Wednesday, July 25, 2018

"I'll try sir!” A Visit to the Lundy’s Lane Battlefield, Niagara Falls, Canada


   If Chippawa is a battlefield preserved, Lundy's Lane is a battlefield lost—or at least obscured.  The urban sprawl of the modern day town of Niagara Falls has almost obliterated the battlefield.  Still, there are hidden nuggets to be found to reward a visitor searching for a link to the past.  After all, the history of one of the largest, deadliest and most confusing battles of the War of 1812, can still compel one to visit the site.


  Lundy's Lane Battlefield was a tourist tradition from about 1820 until 1865, in part because both Americans and Canadians claimed victory, contributing to its popularity.  Large observation towers were constructed and veterans from the battle served as guides.  After the American Civil War the appeal of visiting Lundy's Lane was eclipsed by more recent and vast battles in places like Gettysburg and Antietam.  The Lundy’s Lane observation towers were eventually torn down, which helped make room for attractions more familiar to us now.


   Today, it's almost like the town has become one giant theme park!  Because the battlefield is so built up, with a major roadway cutting across it, carrying buses and cars with people from all over the world to see the natural wonder of Niagara Falls. And all the tourist trappings such as wax museums, fast food places, parking lots, and souvenir shops, it takes some imagination to walk the land and picture how it was back in the summer of July 25, 1814. Thanks to the personal efforts of Miss Ruth Redmond, a schoolteacher, who bought up parcels to keep from development, at least some of the battlefield was saved.


Thank you Miss Ruth Redmond

  To help in your time travel,  I recommend you start with a visit at The Niagara History Museum, about two blocks down the road.  The very friendly Canadians there gave me an excellent walking tour map which is a must-have to visit the area.  In addition, the Museum has a succinct exhibit about the Battle of Lundy’s Lane and the War of 1812. There are uniforms, artifacts and stories about soldiers from each side.  A short audio visual presentation features reenactors in period uniforms.  Best of all there’s a hands-on opportunity to try on reproduction uniform coats and shakos from the 8th Regiment of Foot, and heft a reproduction musket.  It was great fun watching children (as well as a few adults!) enjoying these items.


   From the Museum you can walk up the road to Lundy’s Lane Battlefield as parking can be difficult.  Or, you can follow our lead and stop at the nearby Starbucks.  I got a head start, marching off, books and maps in hand to explore, while Janine parked and got us an iced coffee.  (Hey, if they had it, they would’ve used it!)

The Red painted meeting house on Drummond hill in 1814.

   After successfully navigating the onslaught of traffic, across the busy street I found the site of the Red Meeting House (which is still a church) and the cemetery (which has greatly expanded).  These landmarks allow one to mark out positions of the British line and American attacks with some accuracy.  


Looking from the British lines towards where Scott's brigade stood.

British artillery line was along the hill top.

Colonel Miller advanced under cover and fading light to overrun the gun line in this area.

Modern view of Miller over running and capturing the British artillery.

   My march across the paths to the southeast corner of the cemetery led me to find the area where American Colonel James Miller and his 21st US Infantry regiment surprised and captured the British artillery line.  His iconic answer when asked if he could capture the guns, "I'll try sir!" is the motto of the present day 5th Infantry Division. Examining the folds of the ground and imagining the fading light, I could better understand how he managed this.


Graves of Captain Hull and American soldiers.

  In the cemetery there are a number of markers and monuments.  As a resident of Massachusetts, I looked for and found the marker to Captain Abraham Hull of the 9th US Infantry regiment who was killed during the battle and buried on the field.  He was the son of General William Hull who surrendered Detroit and nephew of Commodore Isaac Hull of the USS Constitution.  With him are buried nineteen other American soldiers who were discovered in 1900 and reburied here.  There is always something moving and mysterious about the graves of unknown soldiers.


The battleground Hotel was not open the day we visited.

Area Drummond rallied his troops and launched assault to recapture the guns.  The American line was Montenegro of the hill.  Between these two groups Scott marched his brigade with ddisastrous results.


Modern rendition of fighting in this area.  British charging up hill to recapture the guns.  The Americans holdings hill top.   By this stage of the battle it was pitch black darkness.

   On the Starbucks side is a park with waysides, markers and displays (along with the small Battle Ground Hotel Museum which was closed).  Walking down the slope I found where General Drummond rallied the British and Canadian forces to try and retake the captured cannon atop the hill.  It was near here, between the Americans on the top of the hill and the British on the lower slope where General Winfield Scott stumbled in the dark with the remnants of his brigade.  This was after dark and the fighting had been raging at point blank range.  Marching his brigade between the two antagonists in the pitch darkness his men were decimated by musket fire of friend and foe and he himself badly wounded.  Fighting in this area continued until just after midnight.  Exhausted, both sides withdrew ending the fighting.


   I enjoyed my visit very much and came away with a better impression of what happened during the battle.  I’d like to emphasize the value of a good map, as it will reward a visitor with a better understanding of this complicated and confusing battle, as well as sort through the modern day landscape for clues to what it once looked like.  I walked the field with A Crucible of Fire, by Robert Feltoe, which greatly assisted me.

   Thanks again to my dear wife, Janine, who accompanied me to Lundy’s Lane in 1985 when I scrambled up the side of the hill by a Seven Eleven because the cemetery gates were locked!  And returned again with me in 2018.  Thanks especially for enjoying the history with me, and editing this story! 

Thank you!


Saturday, July 21, 2018

Battle of Street's Creek (Chippawa) July 1814 (part 2)


  At game night there were four of us who played this battle.  Dave and Art played the British/Canadians while Mike and I commanded the Americans. Rules used were the Fife and Drum miniatures rules which I have adapted for War of 1812 and called "Fife and Drum met Mr Madison's war."  All agreed they were easy to follow and provided a most excellent game.  After the first turn everyone had picked up the rules and were playing the game rather then playing The rules.

  The British regulars entered the board by the road on the north side.  The 19th Light Dragoons provided cover while the Royal Artillery led the column followed by the 100th, 8th and 1st Regiments of Foot.  Their Native warriors were deployed into the woods, but the Canadian Militia and British Light Infantry companies advanced in the open order along the fence line.

British deploying.

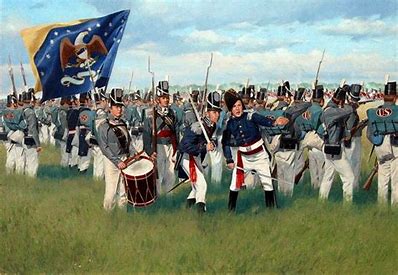
19th Light Dragoons covering British advance.

  The Americans had a company of the 21st Infantry regiment on picket duty by the Ussher farm house protecting Captain Towson's artillery battery.  Scott's First Brigade (9th/11th, 22nd and 25th US Infantry) entered on the road on the south side of the table.  They quickly headed towards the fence line to establish a defensive line.  The Canadian Volunteers (Canadians who supported the Americans)  and Pennsylvania Volunteers slowly advanced in the woods with the Native Americans racing ahead of them.

Mind the sheep!

Pennsylvania Volunteers and Canadian Volunteers.


   The American Dragoons, seeing the British Light Companies unsupported charged them.  It did not go well and they were forced back with 50% casualties and shaken.  During the charge the American Dragoons scattered a flock of geese in front of them to the amusement of all players.  As they retreated one British player placed a geese running after the retreating cavalry!

Out of our way!

Run away!  Killer geese!


  While the 9th/11th and 22nd US Infantry took position along the fence line Captain Towson's battery took aim at the Light Dragoons and  Royal Artillery.  In a couple turns they decimated the crews and forced  the dragoons to retire.  The British deployed their regulars into line and advanced against the Americans with cold steel.


    The Americans continued to pepper the advancing British with artillery fire while Scott prepared to defend the fence line.  In the woods the Pennsylvania and Canadian Volunteers stopped floundering about marched to support their comrades in the open plain.  Left alone in the woods both groups of  Native warriors held an impromptu truce and promised to not fight at each other.

 Native warriors wondering about in woods.
Thirsty work boys?

never mind those noisy boys.

  Once within musket range both sides opened fire.  The British 100th Regiment  was decimated by accurate artillery canister and musket fire (eight hits in one turn!).  Still they passed their morale and charged in.

Charge!

Friendly American goose gives British commander advice.


  In the fight along the fence line the British 100th Regiment was defeated and routed off the table.  But the combined 1st and 8th Regiments defeated the 9th/11th US Infantry who retired in disorder.  The British infantry climbed over the fence but now found themselves in great difficulty.  The 8th had  taken numerous hits and just barely passed morale.  A fresh American Regiment, 25th US Infantry was in front of them.  The Pennsylvania and Canadian Volunteers were advancing on their open  flank.  American reinforcements (two fresh infantry regiments) were advancing towards the  fight and were within musket range .  British reinforcements were too far away to get in to the fight, but within range of Towson's deadly guns.

Dice Mark casualties and red marker is shaken status.

Killer geese not so brave flees the fight.

Charge!  Shaken hand of photographer due to excitment!

High water mark of the British advance.

With advancing Americans on all sides the British commanders decided to conclude the game.


   At this  point the British commanders conceded the game. They felt that the two British regiments were about to be overwhelmed with no help possible.  All agreed it had been a fast and fun game.  Everyone also agreed the various items I placed about the field like animals (cats chasing mice, sheep and foxes) and civilians (woman bringing water to the troops, milking a cow and the farmer and his dog) were great fun and added visually to the game.

Thank you to Dave, Art and Mike for a fun and most enjoyable game.  Next month at game night we go  to the Crimean War 1854.  Stay tuned!


Thursday, July 19, 2018

Battle of Street's Creek (Chippawa) July 1814 (part 1)


I had agreed to put on  a War of 1812 game for our club game night on July 20.  Which battle to do?   July was the anniversary of the Battle of Chippawa which would be a obvious choice.  But I had already done Chippawa which was great fun.  Rather then repeat it I chose to create a fictional action in the same ground with the troops available to both commanders.  It would follow the historical battle, but additional reinforcements would be available to join the battle. This would make the table top battle a little different and also add an additional command for another player for the night. The more the merrier.


   Set up for the battle included the following troops.  The British/Canadian Militia, Light Infantry and Native Americans sets up in the woods on the north side of the table.  The British regulars, artillery and light Dragoons enter on the road on the north side of the table.  Commander must write order of march and formation.    British/Canadian victory conditions are for the Light Brigade to hold the woods and cause trouble.  The 1st Brigade needs to drive the American regulars off the table.


   The American Third Brigade sets up in the woods on the south side of the table.  The First Brigade enters on the road on the south side of the tabke.  Again write out the order of march. The Divisional troops enter with the First Brigade except one battery and the company of the Twenty First  who set up on Street's Creek by the Ussher farm house.  American victory conditions are for the Third Brigade to clear the woods and the First Brigade to drive off the British regulars.


  Rule additions for the game. Fences provide soft cover for all Troops behind  them.  To get road movement troops must be in march column formation and start and end move on road.   Troops in woods maintain formation and move at reduced rates (2" for every 1" ).  Formed troops (volunteers) do not get soft cover advantageous;  troops in skirmish formation (Light Infantry and Indians) do.  Indians  move at full rate in woods, change  direction at no cost and get soft cover advantage in woods.  American militia or volunteers check morale first  time they encounter Indians, and each turn after they suffer a casualty caused by them. Indians that get a shaken morale result must retreat one full move;  can return after it iscremoved.  If Indians get a routed result remove from game.  At start of game Indians may operate at full 12 figure strength or break down into two 6 figure groups for entire game.  Melee lasts one turn. If no winner attacker retreats as shaken.

Reinforcements are available.  Both sides roll a 10 sided die At end of the second turn. Number rolled is how many turns after second turn they enter.  This if you roll a five they enter turn seven. British regulars enter in main road.  Americans roll a second die.  On evan number they enter woods,  odd number enter road.


British Division: Gen. P. Riall
1st Brigade: Gen. Riall
1st Regiment of Foot
8th Regiment of Foot
100th Regiment of Foot

2nd (Light) Brigade: Lt.Col. Pearson
Light Infantry companies
Militia Flank  companies
Native Indians

Division Troops: Gen. P. Riall
19th Light  Dragoons
Royal Artillery

Reinforcement: Lt. Col. Morrison
89th regiment of foot
49th regiment of foot

American Army:
1st Brigade: Gen.W Scott
9/22nd Regiment
11th Regiment
25th Regiment
Towsend's battery

3rd Brigade: Gen Porter
Pennsylvania Volunteers
Canadian volunteers
Six Nations Indians

Division Troops:
Rope' s company 21st Regiment
US Dragoons
Biddle's battery

Reinforcement:
21st US infantry
23rd US infantry