Friday, February 26, 2021

Painting 18th Century New England Houses


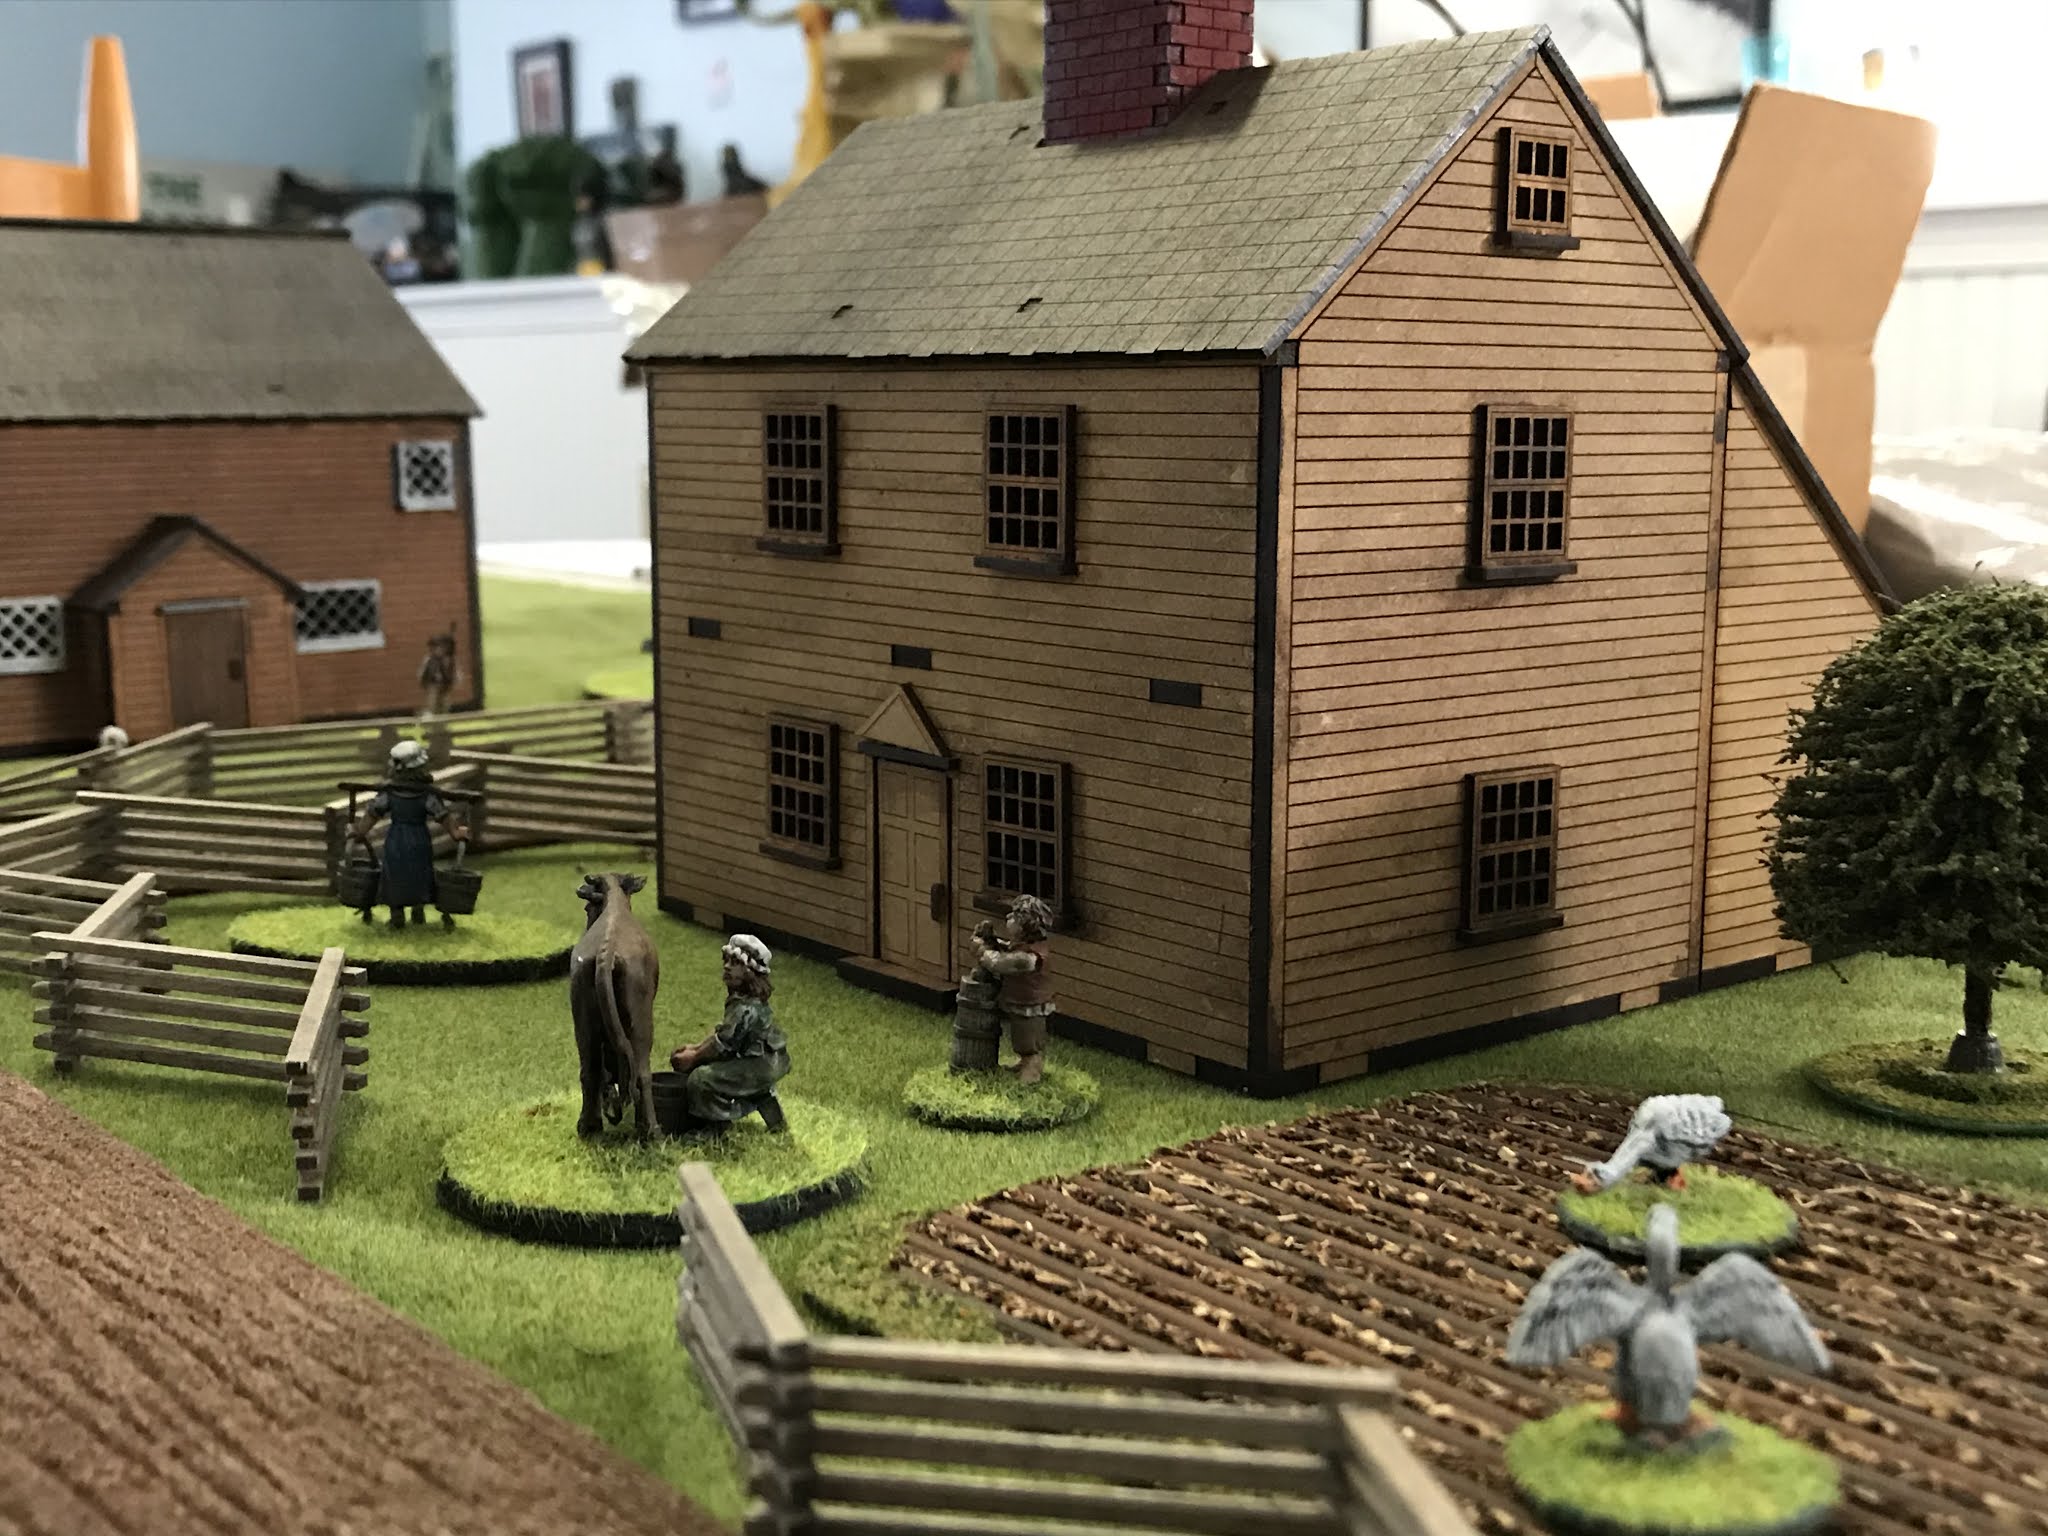
For those of you that may buy the historical New England  buildings from "Things from the Basement" and are curious how to paint  them here is some historical information I found.  The following information was from the Ipswich Historical Society web page.   The original article can be found here:   https://historicipswich.org/colors/)


This is a great guide they created to help home owners paint their older homes to stay within the colonial period.  Please consider that this guide is for New England.  Other regions of the colonies and Canada were different both in architecture and style.  Also that this is just a guide and not a definitive end all authority.  I have followed it in my painting for houses for my American Rev War and War of 1812 houses.  I post it here to explain why I did what I did and to help out others.  If you have different or other information please feel free to drop me a line.  I am always interested in learning more.


 COLONIAL AND FEDERAL period from 1640-1840. Paint was used on the three main parts of Colonial and Federal houses exteriors.  These were:

Body: the walls – usually clapboarded or shingled, sometimes boarded.

Trim: the decorative woodwork that framed the large wall surfaces and often the smaller elements such as windows and doors.

Sash: The movable elements – doors, windows, shutters.

Period houses rarely painted trim and sash in different colors and so were generally of two colors only; later styles often had three.


Colonial Period (1640-1780)

Architecture: asymmetry, verticality. 17th-century colors were derived from earth, stone or other natural pigments.

Body: clapboards, originally not painted or stained but weathered to dark brown. 

Trim: Unpainted or painted red/ brown to contrast with unpainted body.


Second Period or Georgian (1725-1780)

These houses favored stronger colors from naturally derived pigments. Colors imitating stone construction were popular exteriors, interiors were bolder and brighter than once thought.

Modest and rural houses often not painted. Strongly contrasted color schemes favored.

Body: dark stone colors, chocolates, orange, ochers, greys and reds.

Trim: Almost always white, but a softer, yellower white than today’s white. Cornices, window and door casings, cornerboards and molded details often simulated stone – pale grey, yellowish-white, very pale blue, sometimes with sand blown into the wet paint.

Doors: always dark color – chocolate, red, green or blue.

Roofs: occasionally red, chocolate or yellow


Federal Period (1780-1830)

Fashionable taste moved away from the more robust Georgian toward lighter colors: white, off-white, pale shades of stony gray, and ochre. Bright, clear tones in interiors, often in contrast with pale trim – creams, pumpkins, sage green, muted blues etc. The 1812 painting guide by Hezekiah Reynolds of CT advised a palette of “white, cream, straw, orange, pea-green, parrot green, grass green, red, slate and black.” Lighter colors were fashionable, but darker ones were still used for more traditional tastes. Contrasts were less marked than on Georgian houses.

Body: White, cream, straw were fashionable, but orange, pea-green, red, slate met more conservative, traditional tastes.

Trim: White, or sometimes the same color as the body. Shutters and doors were dark green or black.

House fronts were sometimes painted in fashionable, lighter (and more expensive) colors, while the back and/or the sides were in the more traditional, and cheaper, reds.

Rural houses were often unpainted until the middle of the 19th century


Tuesday, February 23, 2021

New England houses from "Things from the Basement"


   In addition to the Salem Meeting House Things from the Basement has also released two New England style houses.  These can be built as is, or you can add the extension kits to make them into the traditional salt box style homes.  I have chosen to add the extension as I really like that style and worked inside that type of house during my career with the park service.  Both houses are alike so I will just describe building one of them to give you an idea of how they go together.  A second post will go into how to paint these period houses and how I painted them.

  First off I lay out the parts sheet to familiarize myself with them.  After downloading the assembly plans from the site I am ready to start putting these together.  I use superglue to assembly the building.  I then usually add a beading of white glue along the inside edges for added strength.  


  One of the nice details is the windows of these buildings.  There are two parts and you snap out the windows and ledge you want.  I tend to do these all at one, assembly line fashion.  Glue the window to the ledge and then push it through into the opening.  These give a nice effect and each has great details.  


Also note there are two doors for each building.  One fancy, which I will use for the front and the others plain which I will use for the back.  


Next step is glue the four walks to the floor.  Again take A moment to fit the pieces together before you glue them.  You may want to secure them with a rubber band as they dry.  There is a second floor to the building which you can just drop in.  This is for skirmish type gaming.  I glue the floor for added strength as I do not bother putting figures into the buildings.  I also glue down the roof but you do not have to.


Lay out the chimney assembly.  I suggest carefully fitting it together before gluing.  Its a little fidgety so take your time.  Same with adjusting the roof around it.  Make sure the glue is dry on the chimney and take your time fitting it together.  When done fit to the house.  You can glue it to the house or not to fit your games.


  Lastly, once together I assembled the extension.  No need to go into the details.  It fits to the main house easily.  once done you have a great little house put together to grace your table top terrain.  Well, actually two houses with this kit!  


Next time I will go into a little about historical home colors in New England in the 17th and 18th century as well as how I have painted these homes.  See you then! 


Hey!  Get your chickens off my lawn!


Update:


The second one house you get in the package us slightly different then the one I built here.  So you get two of the same house types but both are slightly different. More value for the money. Well done!


Saturday, February 20, 2021

Building the Salem Meeting House kit


  Most meeting houses in New England in the 17th and 18th century were plain, box like structures.   They were practical and not for show.  Some, like the one on Lexington Green were almost barn like.  Too many wargame churches look like late 19th century structures and are very wrong for the time period I game.  So I was most excited to get this model for my American Rev War and War of 1812 battles.  Plus I really like the models from "Things from the Basement" and knew this would be a good addition to my collection of buildings. The gentleman who runs Things from the Basement does a outstanding job and make truly outstanding models.  Highly recommend!

  The Salem Meeting House is based on the replica that was built for the movie "Three Sovereigns for Sarah" about the Salem Witch trials.  You can visit it at the Rebecca Nurse house in Danvers Massachusetts.  The site is run by the Danvers Alarm company, a reenactment group portraying a American militia company on April 19, 1775.  They are a excellent group, extremely authentic and very knowledgeable about the period.  They have maintained and managed the Nurse house and its property.  It's worth your time to visit them.

Now,onto the MDF building!


Before starting I lay out all the parts and review the down loadable instructions.  Once familiar with them I start construction.  I use a superglue to put the building together.


I start by putting together the windows and doors.  


Simple but clever.  I think that these add period charm to the building and give it personality.  They go together very easily.


Next, after fitting the walls together to get a good fit I glue them together and put a rubber band around them to hold them tight while the glue dried.  


I finish the entry way and glue the windows and doors into placce.


Next the roof is put together.  The rafters requires careful fitting and patience.  But once dine tit fits very nicely in place.  If you ate going to use it with figures inside in skirmish games do not glue the roof onto the building.


Once put together the meeting house looks great and I am sure will fit on my table rather nicely.  To give a scale of the building I have put a Fife and Drum miniature in front.  Next up I will be painting the building using the actual structure as a guide.

 Most 17th and 18th century buildings in New England were not painted.  Instead they were stained.  Windows and trim may have been painted and they usually show up in period illustrations as a light color.  This is a rule of thumb and of course there are exceptions.  For my buildings I was looking for a stained look much like I did with the William Smith house.  I included the two photos if the actual house at the top of the post to show how the stain looks at different times of the year and in different light.


I started out with the citidal stain.  I put a couple of light stains over the building.  for the roof I mixed in a little black paint to give it a darker shade.  Later I lightly sanded a few spots on the walls to show weathering.   Next I highlighted the roof shingles with a little gray.  I mixed a darker shade to give some contrast to the shingles.  Then the windows and trip also with gray.  Not too much.  


  And there you have it.  A New England type meeting house that goes together nicely, is fun to build and will look great on your table top.  Fir thise of you tgat woykd like more details "Things from the Basement" sells shingles for the roofs that will give great details and improve the model.  They also make furniture to fill your house if so desired.  but for me I am very happy with how the house turned out.  I am sure it will look great on my table.

Highly recommend!


Friday, February 19, 2021

Review of US Soldier vs British Soldier War of 1812


I received the Kindle edition of this Osprey series book.  There is not much out there on the North American War of 1812 in wargame circles. So when something comes out it is met with great rejoicing.  I saw this originally on the Osprey publishing website and pre ordered it right away.  I then spent the morning reading, and rereading it.  As someone who has limited dollars to spend on his hobby I have to say I was most happy with the book and think it well worth adding it to your library.


First off, what the book is not.  It is not a uniform guide.  It is not a history of the war.  There are other better books for those subjects.  Nor is it about the various Militia, Volunteer or Fencibels regiments.   

What it is is a comparison if the United States Regular soldier and his British counterpart.  It details their training, organization and background.  It goes into the drill manuals and how regiments formed up for battle.  There is some information about uniforms but just basics.  And there are three workman like accounts comparing the two armies at three major actions:  Queenstown Heights 1812, Chrysler's Farm 1813 and Chippewa 1814.  


The heart of the book is how the US regular army grew and developed during the war.  At the start the regular army was often the poor step child compared to the state militia.  Officers were often political appointed and ignorant of their duties.  There was no solid non commissioned ranks to train and maintain discipline and to be an example like in the British army.  Drill manuals?  Take your pick! Because there was no standard it was each regiment on its own.  As the war progress the incompetents are weeded out and a solid officer and non commissioned officer corp evolves.  A group of talented and dedicated officers rose to command positions.  The difference between the army at Queenstown and Chippewa was as light is to darkness.  


The book is not biased or one sided.  The British regular was a professional who maintained that reputation throughout the war.  The US regular evolved and developed throughout the war.  So yes, there is much more about him in the text and how this development came about.  Again the book is a comparison of the two regular soldiers from the start of the war to the end.  I think it is important to understand this before you buy the book.    I enjoyed it very much and found lots of good food for thought and lessons for my wargames armies.  


Wednesday, February 10, 2021

Things From the Basement MDF buildings


Captain William Smith House by Things from the Basement.

There are three really nice buildings just released by "Things From the Basement."  These were from a kickstarter program for a King Philip's War card game called "Devil in the Wilderness.". The kickstarter must have been successful since the buildings are now available to the public.  These are perfect for American Rev War and I am sure will see service with my War of 1812.  Please note that all pictures of these buildings are from the website of Things from the Basement.  

Salem meeting House

First off there is a very nice Salem Meeting House.  most models of churches out there are very 19th century.  Thus INE is much better and captures the box like meeting house I was familiar with in New England during  the 17th and 18th century.  An example of this is the Meeting house on Lexington green in the Amos Doolittle engraving of the battle on April 19, 1775.  Thus one would not be out of place in my Lundy's Lane battle either.

Two very nice houses

Side view of houses

Then there are two New England type buildings with extra extensions for the back.  You can building them with the extension so they are traditional salt box type homes or without.  So with very little effort you can get four different looking homes for your table top.  


Extensions to buildings

Extensions added to houses to create salt box 


I have bought the Captain William Smith house and it has graced A number of games here on my blog. They are very easy to build and are very economical.  You can also buy things roof shingles to improve the appearance if you wish.  And much more is out there if you are inclined.


Here is the link to the website for the buildings:

https://www.thingsfromthebasement.com/store/c45/Historic_American_Buildings.html


 I am ordering these houses as a early birthday present for my self so please stay tuned in March for once I have them built.  Thank you Earl for bringing these to my attention!