Friday, January 29, 2021

Battle of West Ford village 1776


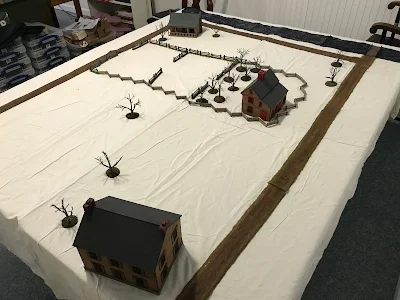
 Set up for game:

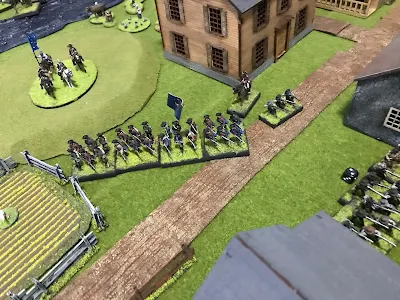
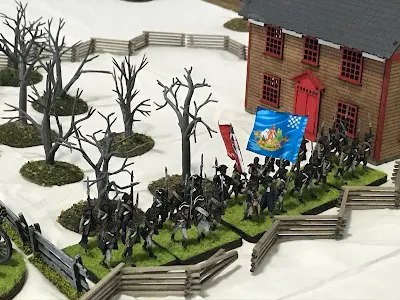
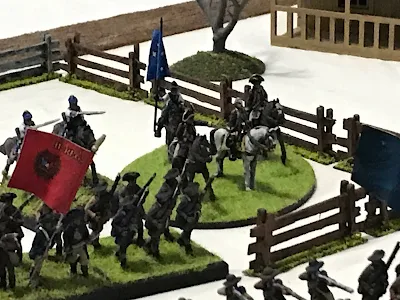
In setting up for the battle the American commander placed his rifle unit in the woods to flank the British.  They were then ordered to fall back across the north ford where the 26th Continentals and a artillery battery would hold the line.  They were to cause casualties and delay the advance if the enemy on that side.  On the road from the southern edge of the table a militia battalion was placed in the farm with a artillery battery to hold any out flanking attempt.  In the center a militia battalion hid in the woods while two Continentals (13th and 3rd) under General Glover took defensive potion in front of the town.  In reserve was a small troop of the 3rd Continental Light Dragoons.


The British entered the field by way of the eastern edge of the table.  General Rall with his three battalions and a battery (Rall, Knyphausen and Lossberg) would cross the southern ford while General Webster's Brigade (23rd, 33rd and 63rd) and two batteries crossed at the bridge.  The Jagers would attempt to clear the woods.  General Cornwallis held the 17th light Dragoons in reserve.  Not on the table, the 1st and 2nd Grenadier battalions were marching to out flank the American position and would enter on the fourth turn.


Turns 1&2:

In the woods the American rifles slowly fell back towards the ford pursued by the Hessian Jager company.  Both units caused casualties.  The Jager commander then charged his enemy and in a fierce melee drive the Rifles back across the ford with heavy casualties.  


General Rall had his Regiment across the ford under heavy fire from the militia in the woods and the American battery.  Once across they formed  line to return fire.  Although they suffered heavy casualties they passed their morale check with the presence of their commander.  The rest if the Brigade hurried to cross.  The militia, under fire from two batteries at close range hung in for two turns before failing their morale check and retired.  


In the center the 23rd crossed the bridge and firmed line to protect the 33rd as they crossed.  They were very lucky to not suffer any casualties due to very poor American dice rolling!  

Along the line the Continentals of Glover's Brigade prepared to engage the British.


Turns 3 & 4:

The Jager and 63rd crossed the ford through the woods driving the Rifles before them.  Once across the 26th Continentals charged them, destroying the jagers and driving the 63rd back across the river.


In the center the 13th Continentals and Hamilton's battery drove the 23rd back into the woods when they failed a morale check. The 33rd took their place and the British commander quickly called his cavalry and artillery up.  The Hessian commander continued to  pressure the American line and on the fourth turn the Grenadier battalions made their appearance.


Turn 5 & 6:

The 1st Grenadier battalion formed column to march up the road and out flank the Americans.  Waiting for them was the 3rd Continental Light Dragoons who charged and drove the 1st back.  The 2nd Grenadier routed the militia behind the fence and captured the artillery.  Quickly facing to their left they fired a devastating volley which destroyed the poor dragoons.  


As the British poured over the bridge in the center Glover ordered his Brigade to fall back. The militia, rallied by their commander and Washington himself formed line in the village of West Ford.  Washington begged them to hold and give the Continentals time to withdraw.


Turn 7 & 8:

The Grenadier battalions advanced into the village from the south.  Rall, determined to not lose any more men brought two batteries up and their combined fire routed the militia in front of them.  Glover pulled his men and gun back towards the bridge with the 13th Continentals and the rifles as rear guard.  The British launched their light dragoons at the rifles who managed to shoot down some before they were sudden down.  


In the foot race to the bridge the Americans managed to get the Continentals and the gun across the river.  The militia, what was left of them broke and ran off the north edge of the table.  The British succeed in capturing the town. Lord Cornwallis could write home about a glorious victory.  But the Americans had saved the Continentals and one of their guns to fight another day.  Although the militia were decimated  more militia were available to be called up to take their place.  


Conclusion:

It was a very hard fought battle which I greatly enjoyed.  It's an interesting game with both sides able to win.  The defenders are not going to stop the attackers but just need to cause casualties and withdraw their troops.  In the end the casualties were nearly equal (70 British and 85 American).  Because of this I think the game accurately reflected the war and how both sides fought.  Both could claim victory but in the long run I feel the result favored the Americans.


Monday, January 25, 2021

Afternoons with Bernie


A brief pause from the wargame and miniatures world for a little fun.  After President Biden's Inauguration Senator Bernie Sanders in his overcoat and oversized mittens has become an internet meme.  A number of sites have come up with cut and paste images to let you place Bernie anywhere in the world.  The one place he has not visited was the wargame table world so I placed him in the midst of some if my miniature battles.  


These are great fun and I hope you can get a little laughter with me over these.


We now resume our regularly scheduled programming.


If you too want to have Bernie sit anywhere I recommend this site.  Its fast and its free.

https://outsnapped.com/content/sit-with-bernie-sanders-meme-generator/?fbclid=IwAR0owseUHb6XC6AbAi6-HX_RxV7BVtulnhclWTYPjKeNiQFzH7imjorbXHI


Tuesday, January 12, 2021

Rev War Battle Problem.


This game comes from a back issue of The Courier.  The battle problem creates a challenge for both commanders and sets up a situation familiar to players of this period.  A larger British force must capture its objective in a limited number if moves.  The American commander must hold the enemy off for a number of moves and withdraw his forces to safety.  Both sides need to avoid high casulties. 


 I plan in the next weeks to play this out twice;  once in the Rev War and again with my War of 1812 figures.


The American commander must try and prevent the British from capturing the village (hold 3 of the 4 buildings) for 7 turns.  They may set up their command anywhere to the left of the small stream.  The Rifle regiment may set up, in ambush in the woods marked "C".  It is not placed on the table until seen or it fires.  The American forces must withdraw off the board by way of the bridge over the larger stream by turn seven.  Militia regiments may retreat off the table by road " D".

The British main force enters on road "B" and must capture the village by turn 7.  The British commander may send up to 1/4  of his force to enter on road "A",  but will roll a d6 to determine which turn they arrive.  

If either army suffers over 50% casualties (included routed figures as well as casualties) they must withdraw at once.

Order of Battle:

American Forces:

3 Continental line battalions

2 Militia battalions

1 Rifle battalion

1 Dragoon regiment

2 Artillery battery


British Forces:

6 Regular line battalions

2 Elite battalions

1 Light or Jager battalion

1 Dragoon regiment

3 Artillery batteries


Thursday, January 7, 2021

“It is a fine fox chase my boys!”


The set up:


Mawhood's Brigade (17th Regiment of Foot, Converged battalion of drafts and recruit and light Dragoons (mounted and dismounted)) are in march formation on the road to Trenton.  Having spotted Mercer's brigade they have reversed course and marched back to the Thomas Oldan House.  They deploy into line in front of the house facing the orchard.  The 17th with artillery in the center, Dragoons to left and  Converged battalion to the right protecting the flanks.  The 55th could enter the field on turn 4.


Mercer's Brigade ( battalion and medium gun)  enter the William Clarke farm yard and deploy along the fence facing the British.  Cadwalader's brigade (3 militia battalions, A light battalion and some riflemen) enter the table in march column on turn 2.  Fermoy's Brigade ( A continental line battalion and some riflemen)  rolls and will enter the game on turn 5.  Hitchcock's Brigade (Rhode Island Continentals) will enter on turn 6 .   (Note: Mercer's brigade was a mixed rifle and muskets.  I am giving them rifle range but they roll on musket chart)


Turn 1:


British advanced  from the Olden house towards the Clarke farm.  Mercer's Brigade fires at them and cause some casualties to the 17th. The British brushed off the hits without a pause and continue their advance.

Turn 2 and 3:


The British use a fire and charge order ( they fire then move into contact with no movement bonus.  Casualties are removed before contact). This disordered the Americans line.  The devastating musket volley not only inflicted heavy losses but killed the American  battalion commander.  (Rule note: a volley which causes 7 or more hits causes a separate roll to see if the battalion commander is killed. If so thus causes morale headaches for that battalion.). The British overrun Mercer's brigade and they rout off the table.  


Mercer is not killed however and he joins Cadwalder in steadying his militia who pass their morale after witnessing the retreating troops.  One American battalion forms along the fence line with the artillery.  A second battalion takes position to their left and Cadwalader holds a third battalion in reserve.  The lights and rifles move out to the right and skirmish with the Dragoons.  


turn 4 and 5:


The 55th marches to get into the fight but have a long  way to come.  Mawhood deploys the 17th along the fence in front it the orchard and fires at the Americans.  He deployed the converged  battalion  to their right and moves against the militia.  The single stand of Dragoons charges the rifles who shoot them down!  The American lights advance against  the dismounted Dragoons who fall back guarding the artillery. 


The American lights and rifles push against the British left flank pushing the Dragoons away and threatening the guns,  and threaten to overwhelming that flank.  

Turn 6:


The 55th Regiment of Foot arrives and moves up to try and save the flank.  Seeing more Americans arriving Mawhood gambles on driving the Militia in front of him away and boldly advances forward.  The 17th Regiment pushes back the militia battalion in front of them as do the British converged battalion. 


American reinforcements have now arrived  on the field in strength.  Fermoy's Brigade moves quickly to attack the Converged battalion and the Hitchcock's Brigade against the 55th.


Washington is now on the field and is ralling the retreating battalions of Cadwalader's Brigade.  A single militia battalion and the artillery hold and poor fire into the advancing 17th who pass morale but are losing men quickly.

Turn 7:


With Fermoy's brigade driving into the drafts and the 17th taking heavy casualties the British in the farm just hold on.  The American lights and rifles silence the Royal Artillery.  Although the 55th is now on the field it is too little too late.  The Americans have overwhelming numbers and fresh troops.


Turn 8:


The Converged battalion and 17th  now collapse due to casualties and retreat towards the bridge. The Royal Artillery is shot up by the lights battalion and silenced.  The 55th is now alone and pulls back towards Princeton.  Washington waves his hat at the retreating enemy and orders a advance all along the front;  “It is a fine fox chase my boys!”


Conclusion:

A bloody, fast moving game. But one sided.  I do not think the British have much of a chance here if fought as a historical battle.  Especially once the American reinforcements arrive.  Interestingly there were more possible American reinforcements if I had wanted to add them.  I feel this is a very good little action to play as there is a small amount of terrain and troops.  I added the 55th Regiment who historically did not march to the sound of the guns.


  If you are a competitive gamers thus us not the game for you.  But if you are the type of gamer who gets in to the time period you will enjoy this one.