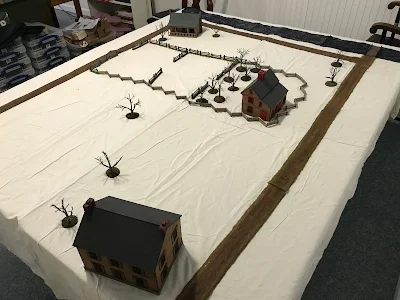
The set up:
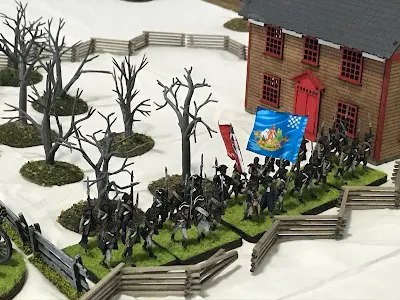
Mawhood's Brigade (17th Regiment of Foot, Converged battalion of drafts and recruit and light Dragoons (mounted and dismounted)) are in march formation on the road to Trenton. Having spotted Mercer's brigade they have reversed course and marched back to the Thomas Oldan House. They deploy into line in front of the house facing the orchard. The 17th with artillery in the center, Dragoons to left and Converged battalion to the right protecting the flanks. The 55th could enter the field on turn 4.
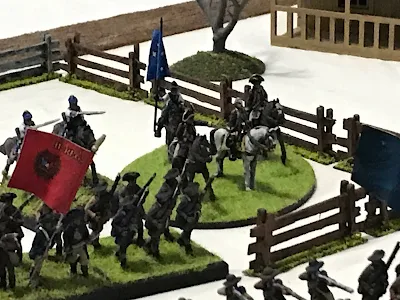
Mercer's Brigade ( battalion and medium gun) enter the William Clarke farm yard and deploy along the fence facing the British. Cadwalader's brigade (3 militia battalions, A light battalion and some riflemen) enter the table in march column on turn 2. Fermoy's Brigade ( A continental line battalion and some riflemen) rolls and will enter the game on turn 5. Hitchcock's Brigade (Rhode Island Continentals) will enter on turn 6 . (Note: Mercer's brigade was a mixed rifle and muskets. I am giving them rifle range but they roll on musket chart)
Turn 1:
British advanced from the Olden house towards the Clarke farm. Mercer's Brigade fires at them and cause some casualties to the 17th. The British brushed off the hits without a pause and continue their advance.
Turn 2 and 3:
The British use a fire and charge order ( they fire then move into contact with no movement bonus. Casualties are removed before contact). This disordered the Americans line. The devastating musket volley not only inflicted heavy losses but killed the American battalion commander. (Rule note: a volley which causes 7 or more hits causes a separate roll to see if the battalion commander is killed. If so thus causes morale headaches for that battalion.). The British overrun Mercer's brigade and they rout off the table.
Mercer is not killed however and he joins Cadwalder in steadying his militia who pass their morale after witnessing the retreating troops. One American battalion forms along the fence line with the artillery. A second battalion takes position to their left and Cadwalader holds a third battalion in reserve. The lights and rifles move out to the right and skirmish with the Dragoons.
turn 4 and 5:
The 55th marches to get into the fight but have a long way to come. Mawhood deploys the 17th along the fence in front it the orchard and fires at the Americans. He deployed the converged battalion to their right and moves against the militia. The single stand of Dragoons charges the rifles who shoot them down! The American lights advance against the dismounted Dragoons who fall back guarding the artillery.
The American lights and rifles push against the British left flank pushing the Dragoons away and threatening the guns, and threaten to overwhelming that flank.
Turn 6:
The 55th Regiment of Foot arrives and moves up to try and save the flank. Seeing more Americans arriving Mawhood gambles on driving the Militia in front of him away and boldly advances forward. The 17th Regiment pushes back the militia battalion in front of them as do the British converged battalion.
American reinforcements have now arrived on the field in strength. Fermoy's Brigade moves quickly to attack the Converged battalion and the Hitchcock's Brigade against the 55th.
Washington is now on the field and is ralling the retreating battalions of Cadwalader's Brigade. A single militia battalion and the artillery hold and poor fire into the advancing 17th who pass morale but are losing men quickly.
Turn 7:
With Fermoy's brigade driving into the drafts and the 17th taking heavy casualties the British in the farm just hold on. The American lights and rifles silence the Royal Artillery. Although the 55th is now on the field it is too little too late. The Americans have overwhelming numbers and fresh troops.
Turn 8:
The Converged battalion and 17th now collapse due to casualties and retreat towards the bridge. The Royal Artillery is shot up by the lights battalion and silenced. The 55th is now alone and pulls back towards Princeton. Washington waves his hat at the retreating enemy and orders a advance all along the front; “It is a fine fox chase my boys!”
Conclusion:
A bloody, fast moving game. But one sided. I do not think the British have much of a chance here if fought as a historical battle. Especially once the American reinforcements arrive. Interestingly there were more possible American reinforcements if I had wanted to add them. I feel this is a very good little action to play as there is a small amount of terrain and troops. I added the 55th Regiment who historically did not march to the sound of the guns.
If you are a competitive gamers thus us not the game for you. But if you are the type of gamer who gets in to the time period you will enjoy this one.


Lovely sized game and action
ReplyDeleteYes it is. And a very fun but one sided game.
DeleteBloody but very nice! Gorgeous miniatures!
ReplyDeleteThank you very much. I appreciate the compliment. Thank you
DeleteI had feeling I would be reading an AAR along these lines Mark! As you say, would not be much fun for the British [player if it was a two sided game, but as a historical recreation it looked very good indeed!
ReplyDeleteYou are correct. The advantage if playing solo was not worrying about making it an interesting game and instead playing it as a historical action.
DeleteStay turned for the next game.
Great start to the year! Princeton is a bit of an odd fish of a battle, but this captured it very well.
ReplyDeleteAn odd battle yes it was. But I enjoyed it.
DeleteCrackin game Mark.
ReplyDeleteMany thanks!
Delete