Friday, April 19, 2024

"Four different views of the BATTLES of LEXINGTON and, CONCORD..."


  Amos Doolittle (1754-1832), a New Haven silversmith and engraver was a member of the Governor's Second Company of Guard.  Receiving word of the fighting on 19 April, 40 volunteers of this company marched to Cambridge, MA, arriving on 29 April. Among the ranks were Doolittle and a portrait painter named Ralph Earl. Although Earl is not recorded as being a member of the company he nevertheless came along.  


 Camp life being dull, the two received permission to journey to Lexington and Concord in order to investigate sites of the recent conflict.  In early May, the two men traveled from Cambridge out to Lexington and then Concord.  Doolittle interviewed numerous participants while Earl sketched the landscape. Amos instructed the painter as to what activities were to be depicted in each scene;   and even posed with musket when needed. Only a solitary person - Levi Harrington from Lexington reported the visit, "...a stranger from Connecticut came here to take a sketch of the village as it appeared on the 19th of April 1775... and he afterwards published a series of copper plate engravings".


By late May, Doolittle and Earl had returned to home where the four paintings were copied onto   copper and  "neatly engraved" plates used to make a set of prints.  These we're sold either "plain ones or coloured". Curiously neither placed their name on the advertisement.  There were claims that Doolittle used the water colors of a 14 year old for his engravings but those paintings were done in 1777-78;  probably from Amos's 1775 prints. In 1831, Doolittle credited Earl as his cohort in conversations with historian J. W. Barber and the friendship of the two was verified in June 1800 when the noted artist Earl displayed his work at the home of Doolittle.


THIS DAY PUBLISHED, and to be SOLD at the STORE of Mr. JAMES LOCKWOOD, near the College, in New-Haven, Four different views of the BATTLES of LEXINGTON, CONCORD, etc. on the 19th of April 1775" "Connecticut Journal" December 13, 1775

Thus was advertised the only pictorial record by a contemporary American of the events of 19 April. While historians have noted minor inaccuracies, the general consensus has been that the four prints are a correct, detailed representation of the fights 


The Concord plates (II and III) depicted "A View of the Town of Concord with the Ministerial Troops destroying the Stores" and "The Battle at the North Bridge in Concord"; Lexington plates, "The Battle of Lexington" (I) and "The South Part of Lexington where the first Detachment were joined by Lord Percy" (IV).


By the late 1800s/early 1900s the plate were being  carefully studied by historians of the battle. Though crude they were rich in detail and depicted the story from the colonists side.  Both Allen French and Harold Murdock used the plates in their ground breaking books and essays.  Criticism of the plates centered on the fact that no British soldiers had been interviewed and thus the prints were biased and propaganda for the colonials. In addition small detail errors were pointed out - uniforms and equipment wrong, formations and troop dispositions incorrect.  To the complaint that too many activities were depicted at once, Doolittle answered that his intent was to condense time at each location and show as many events as possible in each scene.


How many original prints were published, how many complete or partial sets remain and what happened to the original engraved plates and paintings are questions that remain unanswered. Over the years, numerous re-engravings and reprints have been done but searches for the Earl paintings have produced but one possible item;  The "View of the Town of Concord" that  currently is displayed at the Concord Museum.  But this too is shrouded in controversy with some individuals thinking it to be an original (passed Minots to Brooks to Merricks to Buttricks) while others believe it to have been painted by a Concord man, who copied from the Earl version.

Monday, April 15, 2024

The Sudbury Fight, King Philip’s War


  If anyone out there happens to be in the area I will be giving a talk at the Fort Devens Museum on Saturday 29 April.  Please stop by and say hello!

The Sudbury Fight, King Philip’s War

April 20, 1 PM

Fort Devens Museum, 94 Jackson Road, Devens, MA


On April 21, 1676 over five hundred Wampanoag, Nipmuc, and Narragansett warriors attacked the frontier settlements of Sudbury (today Sudbury and Wayland) in the Massachusetts Bay Colony.  Various companies of English militiamen from nearby settlements marched to that town’s defense and were drawn into ambushes and suffered heavy losses. The battle was the largest fight and the last major Native American victory in King Philip’s War before their final defeat in southern New England in August 1676.  All but forgotten today, the sites and stories of this battle are still there to be found by the curious who look for them.


Mark Nichipor is a local historian interested in the Colonial and Revolutionary History of New England.  He was a National Park Service Ranger at Revolutionary War sites until retiring after nearly thirty years. He served as an instructor in the NPS Historic Weapons Safety Program and ran The Staff Ride Programs for military visiting Minute Man and Bunker Hill parks.  He has a number of published articles on Revolutionary War history.


The Fort Devens Museum is located at 94 Jackson Road, Devens, MA, on the third floor and is wheelchair accessible. This event is free and open to the public with donations gratefully accepted. Thanks to the Harvard Cultural Council.

Cigar Box Mats


  I have seen a lot of talk about the Cigar Box Mats over the last couple years.  Almost always positive reviews.  They are printed on a blanket type material which folds nicely over  hills and gives a good appearance.  In addition fields, woods and roads are printed on the mat.  Helps with the set up or you could just put terrain. Pieces over it.

  I was able to pick one up used at a good price.  Unfortunately it was for 15mm and has narrow roads but it should still work for my 25mm figures.  After it arrived I set it up and threw a few miniatures and terrain items on it.  I think it looks good;  but I am going to have to keep my eye out for another on to cover my table.


Friday, April 12, 2024

Imperial Guard at New Orleans


Does every Napoleonic wargamer have painted a battalion or more of the French Imperial Guard?   Probably. And how many games do they really get used or see the table top.  Again probably not many.  But you just have to have them.  So here is a new use for those figures that may be gathering dust.  And once again we turn to that neglected but excellent for wargameing period the War of 1812 in North America and the Battle of New Orleans!


The Battalion d'Orleans or Plauche's Battalion was one of the most colorful units in the American army of the War of 1812. The Battalion participated in the defeat of the British forces at the Battle of New Orleans. The Battalion was a continuation of units which had existed under the French and Spanish regimes and were reorganized by the territorial act of January, 1805. Napoleon had raised and equipped three companies of French Creoles in New Orleans in 1803 after losing Santo Domingo. It is probable that these companies became the core of the Battalion d'Orleans. New Orleans remained very pro-Bonapartist durin this period. They felt a special connection to him because the Empress Josephine was a French Creole. Also, many high ranking Napoleonic exiles fled to New Orleans after the Bourbon regime was restored in France.


After "the Battle" as New Orleanians called it, the Battalion changed it's name to the Louisiana Legion and remained in service until after the Civil War. Throughout its history, the Battalion was known for its resplendent, colorful uniforms of French design. The Battalion was modeled on the Imperial French army of the Emperor Napoleon I. They used the same drill manual and closely approximated the French uniform. Indeed, many members of the Battalion were veteran soldats and officers who had served with Napoleon before moving to New Orleans.


The Battalion consisted of two centre companies (Francs and Blues), two flank companies (Carabiners and Chasseurs) and a company of Dragoons. The flank companies had uniforms based on those of the French Imperial Guard. The centre companies were dressed as the line. The Battalion also had its own flag, adjutant, surgeons, fouriers, and band. A description of the unit's flag in the 1820's describes it as having the words 'Honneur, Patrie, Discipline, Valor' embroidered on it.


Tuesday, April 2, 2024

PORTER'S MILITIA VOLUNTEERS BRIGADE


  During the Niagara campaign of 1814, the US Left Division included a brigade of  volunteers under the command of General Peter Porter.  The including troops from New York and Pennsylvania. They acquitted themselves well in both the battle of Chippewa and Lundy's Lane,  much to the surprise of  skeptical regular army officers!  


  Pennsylvania and New York each had various state militia uniform distinctions. However during the 1814 campaign they were supposed to be equipped by the US government and dressed much like the remainder of the Left Division. The leather shako and short grey roundabout jackets or blue coats were very much in evidence. 


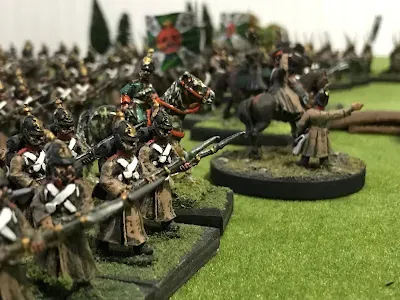
  But the question arose how to portray them on the table top?  I wanted them to look more organized then most militia but less regular then regulars.   I turned to the amazing figures from Knuckleduster miniatures.   These have been sculpted to portray such an unusual outfit.   The bayonets are unfixed and in their scabbards,  Each figure has a variety of irregular equipment and clothing.  Their shakos are not trimmed out to the full extent one would expect of a disciplined regular.  Most have substitute headgear such as straw hats, round hats, and old felt shakos or caps are worn by some of the troops.


Although some have the standard issue regular blue coat, others have civilian coats.  A few wear  work smocks, These were a very common item in camp and are rarely seen on the wargame table. The pattern formed the basis of the rifle frock, which had the addition of fringe and a "cape" (layer of cloth over the shoulders, also with fringes).


Miltia units sometimes painted their unit designations on the shakos rather than wearing a shako plate. They were also quite fond of decorating their knapsacks, canteens, and caps with stars, eagles, and other patriotic designs.


lastly, there is a marvelous militia general.  He is dressed to the nines and has a most self satisfied expression on his face.  A outstanding miniature!

Altogether a nice impression for the period and a unique look for an over looked period.


Friday, March 29, 2024

Native Warriors


  One of the things that make the War of 1812 unique is the use of native warriors.  The Mohawk (properly called the Kanien'kehá:ka), Cayuga, Onondaga, Oneida, Seneca and Tuscarora in the East, and the tribes of Tecumseh's federation in the West, were heavily engaged throughout the War. Native warriors fought on both sides, but primarily for the British. They are essential figures to possess in order to game the , Queenston Heights, the Thames, and numerous smaller conflicts.  By the time of the War of 812,the native people's had adopted a lot of European items for their clothing. Because of this many miniatures from the French and Indian War are not quite right for the period. 


  There are numerous excellent Native figures on the market, mostly of the "naked savage" variety which depict traditional summer dress, which is why I only make one figure in that idiom. The remainder of my figures make an attempt to show what they would have looked like in 1812.


 For summer time dress., linen shirts and Leggings and breechclouts are worn by all, but generally covered by a shirt or coat belted with a sash. Bare heads were plucked, not shaved and a small square patch of hair was left in the back of the crown, which was grown long and braided. A decorative "roach" was attached to the hair, composed of dyed porcupine quills, deer hair, and various feathers, creating a very personalized headdress. Mohaws did not have the "Mohawk" hair style we associate with them, and popularized in the movie, "Drums on the Mowhawk."   Warpaint is very much in evidence, black and red being the most common colors.


  It's difficult to do justice to all their wampum belts and other decorative fabrics. Sashes and belts were finely decorated, some with geometric designs and others with very sophisticated floral patterns woven into the cloth. Even loincloths (breechclouts) sported colorful stripes and geometric designs. Because of this I only paint to give  an impression of these ornate designs.


In cold weather, like at  the Battle of Crysler's Farm heavier shirts , wool coats or capots  are worn. In addition stocking caps or  head scarves cover their traditional hairstyles. 


Monday, March 25, 2024

Embodied and Sedentary Militia 1814


    The  battalions of Canadian militia were active throughout the 1814 campaign.  The 2nd Regiment fought at both Chippewa and Lundy's Lane.  When I started this project I was confused over the terms "embodied" and "sedentary" militia.  These troops who served for longer tours of duty were termed "embodied" militia while those who were called  away from their farms and businesses only during times of dire emergency were the "sedentary" militia.  

The Sedentary militia units seldom had uniforms.  They might have castffs from stores but fir tge most part hey were instructed to report for battle turned out in a civilian coat made of a dark cloth. They were advised to avoid grey coats, which was the color frequently used by the Americans.

   The Embodied militia wore both uniforms and civilian clothes. While  they  wanted to present a uniform appearance, it was very rarley achieved.  Depending on the year or month they were given red coats with yellow facings, green coats with red or yellow facings, castoffs from the 41st Foot (red faced red), regulation gray trousers,  "gunmouth" blue trousers. Head gear were left over stove pipe shakos, round hats or what ever the individual brought with them.  Equipment were regular accoutrements.  The troops who came the closest to military uniformity were the flank companies, who's uniforms included lace and possibly wings.


On the table top they present a interesting and unusual appearance. 


Friday, March 22, 2024

British Infantry Shakos War of 1812


  A major question when creating your British/Canadian army for the War of 1812 is which shako type will your regulars wear?  Opinions, debate and speculation about what equipment might have been in stores, Horse Guard's attitudes toward equipping  units in far-flung quarters, and isolated and obscure eye-witness accounts all flavor the question.  I still have not pinned down sources but here are my thoughts and opinions and I sincerely welcome you to draw your own conclusions. 

Stovepipe

Belgic

A British infantryman's cap (shako) was meant to last him two years. If an infantryman was issued a stovepipe shako in 1812, it would not be replaced until 1814 unless the entire unit was re-equipped. The British army went to war against Napoleon in Spain wearing the Stove Pipe shako.  The Belgic shako (sometimes called the "Waterloo" shako) was adopted by regulation in 1812, but did not find its way into the hands of infantrymen until nearly the end of fighting in Spain. It is usually associated with the Battle of Waterloo in 1815.

1812/1813


What about the written orders in Canadian or British archives that determine which caps were in service. As it turns out, the orders provide very little guidance as the headgear is simply referred-to as "caps", or "felt caps."What the neck is a "Felt Regulation Cap."   Is it a stovepipe or Belgic shako? Both were made of felt.  Other documents mention 600 "bucket caps" returned to storage at Kingston in 1813. Were these stovepipe shakos returned because they had been replaced by Belgic shakos, or were they the shorter bucket shakos worn by Caldwell Rangers?  One would think these clerks could be more helpful!!!!


1814

The solution I  have reached for my armies  (and it is only an opinion) is that the Stove Pipe shall was worn in 1812/1813 and the Belgic shako by the time the 1814 Niagara campaign. There remains much debate about the Incorporated Militia regiment. The remainder of the militia, especially the Sedentary Militia, are presumed to be wearing primarily castoffs and items brought from home.  This could let you field them in stovepipe shako, round hats or any civilian hat or cap you like.


Saturday, March 16, 2024

Come on my brave Fusiliers!’ 15 March 1781


Guilford Courthouse 15 March 1781
Along the first line:

  " As at Camden, the British went forward as soon as they were in line. Captain Peter led the 23rd on as acting commanding officer, with the regiment effectively in two wings under captains Saumarez and Champagne. As they went forward, one of them noticed the ‘field lately ploughed, which was wet and muddy from the rains which had recently fallen’.


On they trudged towards the fence that marked the end of Hoskins’ cornfield and the beginning of the woods to the fore, observing as they grew closer that the rails were lined with men. MacLeod’s cannon opened fire, sending their ball whooshing into the American lines. Colonel Webster, on horseback, trotted to the front of his brigade and called out so that all could hear, ‘Charge!’ The men began jogging forward, bayonets fixed and muskets levelled towards the enemy. A crackling fire from their left, Kirkwood’s riflemen, began knocking down a redcoat here or there, but did nothing to check their impetus.


When the British line was little more than 50 yards from the North Carolina militia everything seemed to stop for Serjeant Lamb: … it was perceived the whole of their force had their arms presented, and resting on a rail fence … they were taking aim with the nicest precision. At this awful period a general pause took place; both parties surveyed each other for the moment with the most anxious suspense … Colonel Webster spurred his horse to the head of the 23rd and bellowed out, ‘Come on my brave Fusiliers!’ Some of the Americans started to run, but most held on for a moment; there was a rippling crash of American musketry when the redcoats were at optimum range, 40 to 50 yards away. Dozens of Webster’s men went down as the musket balls cut legs from under them or smashed into their chests. Lieutenant Calvert worried for an instant how his men might react to such a heavy fire: ‘They instantly returned it and did not give the enemy time to repeat their fire but rushed on them with bayonets.’ Captain Saumarez noted with pride, ‘No troops could behave better than the regiment … they never returned the enemy’s fire but by word of command and marched on with the most undaunted courage.’..."


Quote from;
Fusiliers:  The saga of a British Redcoat Regiment in the American Revolution  by Mark Urban


Monday, March 11, 2024

A new Project


I am adding a few new American Regular regiments to my War of 1812 armies.  I will be using the wonderful Knuckleduster miniatures.  Instead of the usual 1814 uniform I am going with the hybrid 1813 uniform.  Its colorful and different.

  The uniforms of the American Army during the War of 1812 is a very complex subject.   Uniforms changed considerably throughout the war,not once but at least three times.   The uniforms worn early in the war were very different then those worn at the end of the war.  More importantly units didn't always receive new items immediately when they became available. 


  Throughout the 1813 campaign season the American regular infantry wore a hybrid uniform. On paper, the US Army had an entirely new uniform in 1813. This was a plain coatee without the lace adorning earlier versions of the garment, and a ,new leather shako. But as any student of military history can tell you, the dictates from on high do not always translate into changes in the field; at least not right away;  sometimes if ever.  The American army throughout the 1813 campaign season (a third of the war), wore a hybrid of the 1812 and 1814 uniform.


  On paper the United States Army  had an entirely new uniform.  This was to be a plain coatee without the lace the earlier coatee had  plus a new leather shako.

  The leather shako was delivered very quickly to the front lines, and most units had them in hand for the 1813 campaign season.

  The regimental coats were another story. The old laced 1812 coatee continued to be worn by a substantial number of units, and because of shortages of blue dye, it was delivered to units in various shades of grey, "drab", brown, and black. According to Rene Chartrand, the Army specified that, "the mixed color coatees and garments were to be cut as prescribed in the February 1812 regulations, with red collars and cuffs, and white lace binding."

US Regulars in the hybrid 1813 uniform from the Knuckleduster miniatures website.


  The units wearing this old coat/new cap configuration, were as follows (coat color follows listing):

12th US: Drab, red facings

14th: Brown for some, Drab faced with Red for others.

21st: Blue, red facings

16th: Black, red  facings


  Yet another exception to the rule., which the War of 1812 is filled.   The 25th US Infantry had the old felt shako and a blue coat faced with red (and with minimal lace). 


Friday, March 8, 2024

Charge of the Light Brigade Rules


I have been ask a number of times what rules I use for the Crimean War. They are "Charge of the Light Brigade." A home brewed self published rules from the author David Raybin so possibly only a few of you have tried them.   I will state right off I am a big fan of these rules. I like simple rules, but with a twist. I like regiments to look like regiments.  And it is important to me that that a group of colorful miniature soldiers represents such and such a regiment.  I want a game I can play in a evening, gives a period "feel" for the time period played, have fun with and come to a conclusion.  "Charge of the Light Brigade" does all of these. Here is a essay on how they play.


The rules are a simple I Go U Go but with a difference.  Each side rolls for initiative with high side getting first go.  If you won the roll last time you add one to your roll.  Each of your regiments or batteries do one action (move, change formation, fire or remove a morale point).  To move roll two dice (or more depending on formation) and that is how far you can move.   After all your units have moved  you may spend a command point (CP) per unit and that unit may do a second thing.


  Here is something that sets this set of rules aside from all others. The author has taken the simple move/counter move system and twisted it. Every unit has a commander (i.e. Colonel). He has so many command points (CP). More if he and the regiment are good, less if mediocare or poor. Russians often get around 8 (sluggish, dull)  while British line get 12 and elite Guards might get as many of 16.  Better units can do more at critical times. But when your CP are gone they are gone.


OK, now it is your turn, and every unit on your side has done one free action. You may then spend a CP and do something else. Fire, remove a Morale marker or what ever. It gives you a chance to take advantage of something or react to what is happeneing on the table. BUT for every action there is a reaction and the enemy now gets to react against that unit and can either return fire at you or change position/facing.   But only against the enemy that spent that CP.   In a past game a Russian battalion removed a Morale pip by paying a CP. The British reacted by firing at the unit and puting 2 morale pips right on back (darn good shooting with the Guards who rolled four 6's). So you spends your money and takes your chaces.  This portion of the rules is what gets a lot of comments and attention from people who  have played this game for the first time. And rightly so. It is simple, inovative and fun. But I would recommend a GM to run the first few games you try to ensure you all stay on tract and not move ahead.  To track CP I put a sticky note under the command figure stand with the number of that units CP.


  Firing is simple. You throw 1D6 per stand for Infantry and 2D6 per artillery stand. Cross refinance with the firing chart for weapon vs. target and this gives you the chances for a hit. Since there is a possible saving roll you might not lose all those figures hit. Yes, the dreaded saving roll.  But here it takes the place of all those calculations you have to do with other rules.  Watch out for double 6's as they can cause a morale marker to drop onto your unit.  Each infantry stand has four figures. Once all four figures are gone you remove the stand.  Until then the stand fights on.


To me, the neat thing about this system is that you forget about calculation, tables and charts. Hits, saves and morale are all tied into each other. The save chart also brings a little of the old "national modifiers" into the mix. With Russians, who get saved on a 5 or 6 no matter how many stands are left you have to beat each one with a stick until they are all dead. You get that steady, dogged feeling you read about. The British start with a high save chance (they dodge bullets like the bat man said the rules auther) but as they loose stands save chances go way down so they wither away. A little fragile. Poor Johnny Turk never gets a save


Morale is a sneaky system that most folks don't think a lot about until it bites them! You get a morale pip for any number of things (crossing an obstacle, being fired at or having friends route past you). Since you subtract 1 pip from every die roll morale effects everything you do. Move, shot or fight it ties into morale.

In a past game a Russia commander with three morale markers on a regiment found out fast that he could not shoot, or save casualties with that unit. With morale markers, once you get into trouble it comes fast and furious. To me this is a superior system then used in many rules. The unit is effected, and everything it can do is effected.


Close Combats takes a bit getting used to since it is very different from most rules. You do not charge like in other rules. You move within 2' of the enemy. THEN, you would have to pay a Command Point or wait till next turn to close and fight. This gives the defender a chance to do something. Like blast the enemy with a close range volley that causes casualties or mabey a morale marker.  It is actually hard to close into close combat due to small arms fire.  But when you do it can be devastating.


  I really love these rules. The game feels like the Crimean to me based on my reading.  Also for a I Go U Go both sides get to do something so no sitting around. In my games Russians tend to form columns (or at least reinforced lines) and try and close with the British quickly.  (One player has nicked named them "Zulu's in overcoats.") Russian artillery is better then the allies and there is a lot of it.  Russian cavalry is, well, sluggish.  The British tend to want to shoot at things. And shoot a lot. Cavalry is small but very aggressive.  By the way small numbers of cavalry will not damage infantry who can usually shoot them down before they close. Many of my games have seen a single British battalion stopping massed charge like at Balaklva.  The French are interesting as their line have muskets while elite troops like Zouaves have rifles and  more CP.  So each army is very different from the other.  You have to work with what you have and get the best out of them.


Wednesday, March 6, 2024

Attack on an outpost 1854


Quite the Affair old boy!


  The Battle of Kowpenski was a recent table top wargame set in the Crimean war period 1854-55.  It saw a Russian attack on a Allied outpost which guarded the flank of the siege lines around Sebastopol.


Russians enter the table.  It's a very long way to The Allies lines!


Russian advance

   Defending on parallel ridges the battlefield is mostly open rolling terrain with woods protecting both flanks.  The Russian forces (Vladimirski infantry Regiment of 4 battalions, 16th  light artillery battery and the  Kievski and Ingermanlandski Hussar Regiments) enter the table.  The Allies are deployed in three lines.  A skirmish line of 1/1st Zouaves  face the Russians.  Behind them are a battalion of 7th Ligne French line infantry.   In the distance, hidden behind a ridge line are British 7th Royal Fusiliers and 23rd Royal Welch Fusiliers.  The British Heavy cavalry brigades deployed in The woods.    The Russian forces must advance across the field quickly (limited number of moves) and capture the far ridge line while destroying the Allied force.  The Allies must stop the Russians.  Rules used are "Charge of the Light Brigade." All figures are 25mm.


Pesky French


Russians suffer casualties from the Zouaves skirmish fire.

   The game started with the Russian infantry and artillery advancing onto the table.  The cavalry hung back protecting the flanks as British cavalry were rumored to be in the area. The Russians used a command point each per battalion and artillery to try and contact the French, but bad die rolls left them short.  The pesky French pounded them with long range rifle fire while they fell back to join their brother battalion on the ridge.


  Although suffering long range casualties the Russian advance pushed the French back into the first ridge line.  Here their cavalry deployed into double lines to advance and take the French line in a double envelopment.


Heavy Brigade destroyed Russian Cavalry Regiment

  But, out of the wood line where they were hidden came the British Heavy cavalry  brigade which crashed into the Russian cavalry.  Caught in flank the Russian cavalry not only lost the melee and retreated but their commander was killed!  (for every three 6's rolled you check for a leader being wounded or killed).


   The Russians infantry  continued their advance but the right hand battalion formed line facing the British cavalry and their artillery deployed into firing line.  Their work done the French double moved back towards their British allies while the Heavy brigade covered their retreat.


 Having cleared the first ridge, the Russian commander sorted his line out and brought up his battery for the final push. But his left flank cavalry commander, seeing the retreating Zouaves in the open could not contain himself and charged headlong towards them.  This brought him into rifle range of not only the Zouaves, but the British on the hill.  The rifle fire decimated the cavalry, which lost over half its strength and retired.


Russian cavalry charging the French

Taking aim at all those horse!

Both sides reformed in their ridge lines.  Although the Russian commander finally unlimbered his battery he did not have the time to batter the Allies.  He knew could get one or two fires into them before he had to advance.  He managed to remove a stand of the Zouaves with his artillery fire.


Advancing across the open fields, the Russian columns were again brought under heavy rifle fire.  The reformed Russian cavalry advanced to support the infantry.


 But this time the allies had double the battalions they had earlier.  Each battalion picked out a advancing column.  Two of the Russian columns were shot up and had to retire.  At this point the Heavy brigade attacked and drove off the remaining Russian cavalry.


 The French charged off the ridge to attack the Russians while the British advanced against the remaining Russian battalion.


French chasing routing Russian line.


Fusiliers brigade move against a isolated Russian battalion.


At this point, with the Russians in disarray and routing the Allied commanders met to congratulate themselves in the victory.  The Russian commanders met to think up how to write this up as a victory.  Or not get thrown out of upper stories windows in tall buildings.  


   One of the most interesting battles of the Rev War  was Cowpens which the reader may have guessed what was really being played here.   A problem with re fighting any historical battle is you know what happened.  I decided to not tell thus to the players.   So here, the players thought they were fighting the battle of  Little Inkerman  (26 October 1854) but we're really fighting the Cowpens battle.   As a game it worked well and surprisingly mimicked the historical battle very well. 

  This was a small, but enjoyable game. It was great fun to get my Crimean collection out again, and great fun to play "Charge of the Light Brigade" rules again.  Couple things about the period are getting to have British and French fight together on the same side and seeing masses of Russians in overcoats.  The rules are great fun and I enjoy them very much.  They create a fun game that moves fast and mirrors the period very well.  Sadly they are not more widely available.  I will post a rules review of them soon, and anyone who is interested in a set please send me a email and I will attach them.