Showing posts with label British Army War of 1812. Show all posts

Monday, June 27, 2022

Spare your reserves


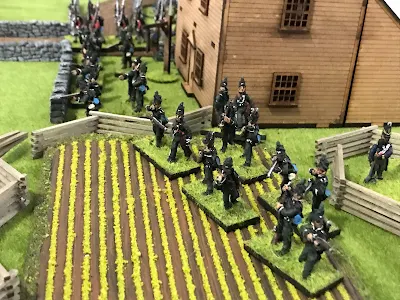
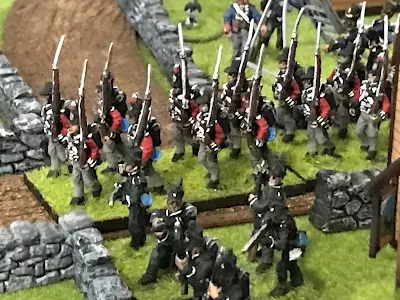
  Recently, on the Fife and Drum miniature forum I complemented fellow member "Dinthedin " on a great and very interesting game he put on.  Each side has the same forces.  They are to capture a walled farmed building in the center of the table.  Both sides have possible reinforcements they can call on.  But, calling on reinforcements will negatively impact your chances of winning.  You have been criticized for calling for help too many times.   And reserves are needed for future battles.  What do you do?   Do you try and win with what you have on the table?  Or bring in extra troops to swing the balance in your favor but negatively effect the campaign?  Its all up to you.  Interesting and frustrating.  

After complimenting Dinthedin, he sent a message to me;  "Thank you!  As it can be played with any rule set and for any Horse and Musket period, I would be extremely glad if you ever gave it a try!  Cheers!"

Ok Dinthedin!  Here is my  take on your game. I am transferring your Seven Years War battle to the Niagara frontier during the War of 1812.  So there will be a slight change in the possible reinforcements.  Hope you like it!


Game Scenario:

Each side has the same troops and possible reinforcements.  Each side enters the table on opposite side of the table on the road.  

Order of Battle:

First Infantry Brigade

3xLine Infantry

1xLight Artillery

Second Infantry Brigade

3xLine Infantry

1xLight Artillery

Independent: 

2 x Light Troops

Possible reinforcements - these reserves may enter only if you call for them:

Foot Brigade:

1xMilitia

1xMedium Artillery

OR

Horse Brigade: 

2xCavalry


Reinforcements can only be call for on turn number 3 or turn number 5.  The player must decide which Brigade (Foot or Horse) to call on.  To bring them onto the table roll D6.  On a 1 or 2 enter on turn +1;  3 or 4 turn +2; 5 or 6 turn +3.  

Example: on turn 3 you call for reinforcements and roll a 4 so that brigade enters the table on turn 3 + 2 = turn 5.

Infantry enter the table, in column on the road your side entered the table from. Easy!  For the cavalry, they are wondering about b the countryside.  To see where they arrive roll a d6 to see where they enter the table.  Note the markers on the map numbered 1 - 6.  That tells you where they arrive on to the table.

Victory! Or how to win:

At the end of each turn count your victory penalties points.  IF a player has 7 victory penalties points then they have lost the game.   If by turn 12  neither side has 7 points, the side that has the least victory penalties points wins a marginal victory.

Points:

Each unit lost lose 1 VP

Each unit reforming (shaken or routed) lose  .5 VP

Holding farm buildings at end of turn 12 win 2 VP

Asking for Foot reinforcement turn 3 lose 1.5 VP

Asking for Horse reinforcement turn 3 lose 2 VP

Asking for Foot reinforcement turn 4 lose .5 VP

Asking for Horse reinforcement turn 4 lose 1 VP


Wednesday, June 22, 2022

Big Fight at Cook's Mill Part 2


With the arrival of British reinforcements the balance of the battle has appeared to swing away from the Americans.  


Turn 6:

  General Scott wanted to try and smash the remaining Canadian units on the table before the British regiments arrived. It would take them a move or two to deploy and be wanted to take advantage of it.


  The 11th US quickly  charged the 2nd militia  who had turned from the ford to guard the Canadian left flank.  The 25th US  charged the rallied IMUC and the 22nd US move forward to deal with the GLI on the American flank.  


In the close fought fighting,  the Militia defeated the 11th US who fell back shaken. But the militia also failed their morale check and also fell back shaken!

The 25th US again defeated the IMUC who fell back shaken and Lt.Col. Parsons was lightly wounded.

Lastly the 22nd US easily defeated the wing of the GLI who retreated into the woods to regroup.

The remnants of the 1st US Rifles passed their morale check and rallied for next turn.  They turn to face the oncoming militia.  Where did they come from?


Ignored by the Americans the 1st Militia deployed into the road in the rear if the American line!


Turn 7:


Both sides rallied the shaken troops and steadied themselves for the fight.


Morrison deployed his Brigade.  Scott sorts out his troops.


Turn 7:


The 9th US Infantry moves forward into the woods to drive the Mohawk away.  Rather then standing and fighting they fall back and continue a harassing fire. In addition the 2nd militia across the river join in with long range fure.  The casualties mount and the 9th US goes shaken.


The 1st militia takes cover by the stone wall and exchanges fire with the 1st US Rifles.  Its too much for the already decimated rifles who break and rout.


  Finally the wing of the GLI and the 89th Regiment gang up on the 22nd US who take big casultues.  To add insult to injury the Rocket battery finally scores a hit and the 22nd US fails its morale check to also go shaken.

  All in all a bad turn for the US!  With no help on the g prison and both his flanks gone General Scott deciedes to beat a hasty retreat across the river and calls the game.


Conclusion:

All in all a fun and enjoyable game.  I played this out over a week and a half .  its nice to be able to set up a game and leave it in place to continue later.  The rules worked well and the game could gave gone to either side although this was a massive win for the British/Canadian side.  Reinforcements arrived in time for them and General had been just too aggressive.  Much like real life!  American reinforcements were not to arrive until turn 12.  If they had cone in earlier could they have turned the tide?  Try the game out yourself and see!


Tuesday, June 21, 2022

Big fight at Cook's Mill 1814 Part 1


  The game starts with both brigades marching onto the table.  The 1st US Rifles are already deployed on the Canadian side of the river.  Both sides roll for possible reinforcements.  The British/Canadian reinforcements arrive in turn 6 while American reinforcements arrive turn 12.  Let the game begin!


Turn 1:

  Brigadier General Windfield Scott entered the field with his 1st Brigade.  


  While most of the Brigade, lead by the 25th US Infantry marches up the road to cross the bridge, the 9th US Infantry is sent to the right to protect his flank and look for a possible ford across the river.  

The 1st US Rifles have already crossed the river and taken position to protect the 1st Brigade as they deploy.


  Lt.Col. Parsons brings the Light Brigade onto the table.  


The Glengarry Light Infantry (GLI) deploy in skirmish line while the Battalion of Incorporated Militia of Upper Canada (IMUC) marches down the road.


 The two militia battalions deployed on either side of the road. 

 John Norton and his Mohawk warriors appear on the other side if the river to annoy and  snipe at the advancing US regulars.

A local sheppard is less then impressed with all this foolishness!


Turn 2:


  Parsons sends his 1st Militia battalion towards the ford while the 2nd Militia battalion advances through the woods to out flank the American rifles.  A wing of the GLI is sent to support them.


  The IMUC deploy while the rockets and artillery in limber to fire.


Scott urging his regulars to hurry, but the bridge is a bottleneck.

The Mohawks take casualties from the 9th US but in turn their fire causes four American casualties.  Both sides easily pass their morale checks.


 While some curious geese wonder what these rockets are all about?


Turn 3:

When is the 1st US Rifles stand firm behind their rail fence Scott deployed his brigade.  They are finaly over the river.


But the 1st Militia and a wing of the GLI are turning their left flank, and the other wing of the GLI on their right now long can they hold?

The 9th US Infantry drives the Mohawks back.  But they take heavy fire from the withdrawing warriors and the 2nd Militia who have advanced up to the ford.

  Run away!  The geese do not like the rockets at all!


Turn 4:


The stand of the 1st US Rifles has been magnificent but it has come to an end.  The IMUC and GLI charge forward and overrun the poor unit.  The remainder of the rifles rout back to the protection of the 1st Brigade lines.

Scott brings up the 25th and 11th US Infantry with the 22nd US Infantry in reserve.  

On the far right flank the 9th US Infantry takes cover by a hedge row and keeps an eye on the Indians and militia.


Turn 5:


Charge!  The 25th and 11th US Infantry sweep forward to engage the Canadians.

The 22nd US Infantry is sent to guard the exposed left flank from the advancing GLI and Militia.


  In the close combat the 11th US Infantry defeats the outnumbered wing of the GLI.  They are sent running back to the Canadian lines.  The 2nd Militia barley notices and resume their watch in the river crossing.


 The 25th US Infantry led by General Scott himself defeats the IMUC who retire back shaken.  Lt.Col. Parsons calls to them to rally and stops their retreat.  The Royal Artillery prepares itself to hold against the on rushing grey tide.


General Scott orders his victorious regiments forward!  The enemy center is broken,  there are inky the rocket battery and artillery to our front.  Don't give the Canadian troops time to recover.  Forward!


Meanwhile, unobserved the 1st Militia has  cleared the woods and finds itself behind enemy lines!


And in the background the fifes and drums beating British Grenadier are heard.  Morrison's brigade has arrived in the nick of time!

To Be Continued....