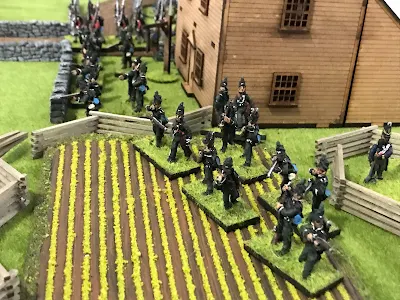
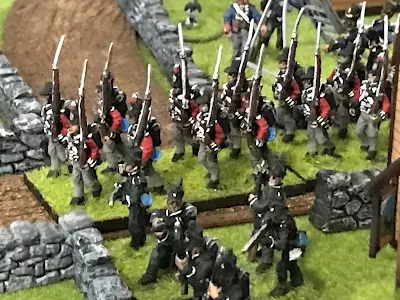
The game starts with both brigades marching onto the table. The 1st US Rifles are already deployed on the Canadian side of the river. Both sides roll for possible reinforcements. The British/Canadian reinforcements arrive in turn 6 while American reinforcements arrive turn 12. Let the game begin!
Turn 1:
Brigadier General Windfield Scott entered the field with his 1st Brigade.
While most of the Brigade, lead by the 25th US Infantry marches up the road to cross the bridge, the 9th US Infantry is sent to the right to protect his flank and look for a possible ford across the river.
The 1st US Rifles have already crossed the river and taken position to protect the 1st Brigade as they deploy.
Lt.Col. Parsons brings the Light Brigade onto the table.
The Glengarry Light Infantry (GLI) deploy in skirmish line while the Battalion of Incorporated Militia of Upper Canada (IMUC) marches down the road.
The two militia battalions deployed on either side of the road.
John Norton and his Mohawk warriors appear on the other side if the river to annoy and snipe at the advancing US regulars.
A local sheppard is less then impressed with all this foolishness!
Turn 2:
Parsons sends his 1st Militia battalion towards the ford while the 2nd Militia battalion advances through the woods to out flank the American rifles. A wing of the GLI is sent to support them.
The IMUC deploy while the rockets and artillery in limber to fire.
Scott urging his regulars to hurry, but the bridge is a bottleneck.
The Mohawks take casualties from the 9th US but in turn their fire causes four American casualties. Both sides easily pass their morale checks.
Turn 3:
When is the 1st US Rifles stand firm behind their rail fence Scott deployed his brigade. They are finaly over the river.
But the 1st Militia and a wing of the GLI are turning their left flank, and the other wing of the GLI on their right now long can they hold?
The 9th US Infantry drives the Mohawks back. But they take heavy fire from the withdrawing warriors and the 2nd Militia who have advanced up to the ford.
Run away! The geese do not like the rockets at all!
Turn 4:
The stand of the 1st US Rifles has been magnificent but it has come to an end. The IMUC and GLI charge forward and overrun the poor unit. The remainder of the rifles rout back to the protection of the 1st Brigade lines.
Scott brings up the 25th and 11th US Infantry with the 22nd US Infantry in reserve.
On the far right flank the 9th US Infantry takes cover by a hedge row and keeps an eye on the Indians and militia.
Turn 5:
Charge! The 25th and 11th US Infantry sweep forward to engage the Canadians.
The 22nd US Infantry is sent to guard the exposed left flank from the advancing GLI and Militia.
In the close combat the 11th US Infantry defeats the outnumbered wing of the GLI. They are sent running back to the Canadian lines. The 2nd Militia barley notices and resume their watch in the river crossing.
The 25th US Infantry led by General Scott himself defeats the IMUC who retire back shaken. Lt.Col. Parsons calls to them to rally and stops their retreat. The Royal Artillery prepares itself to hold against the on rushing grey tide.
General Scott orders his victorious regiments forward! The enemy center is broken, there are inky the rocket battery and artillery to our front. Don't give the Canadian troops time to recover. Forward!
Meanwhile, unobserved the 1st Militia has cleared the woods and finds itself behind enemy lines!
And in the background the fifes and drums beating British Grenadier are heard. Morrison's brigade has arrived in the nick of time!
To Be Continued....


Stirring stuff Mark and I look forward to seeing how things turn out in the next instalment:).
ReplyDeleteGlad you liked it, and more in part 2
DeleteVery nice!
ReplyDeleteThank you
DeleteFab game, significantly enhanced by the shepherd, sheep and geese 😉. I actually did two shepherds for Hovels: that’s the one Dennis Coleman referred to as the ‘wealthy’ one! I also had to do the sheep twice because the first versions were too large. I still have one in my modelling box.
ReplyDeleteLittle things like the geese and the Shepard add a lot to the background. At club game nights people always got a laugh out if finding things I put in the table.
DeleteDennis had a long list of items for me to do (I think he wanted to be the William Britains of 28mm) but then I met the future Mrs Jeffers and had other things to occupy me…😉
DeleteSuperb looking game Mark, always a joy to see your 1812 collection on the table, so much inspiration to be taken from your games.
ReplyDeleteThank you Donnie! Glad you like them and always a pleasure hearing from you.
DeleteThe Brits certainly need those reinforcements Mark, it was looking like the Americans woukd win the battle before they arrived!
ReplyDeleteIt did. In setting it up I wanted a good solid Brigade of regulars arriving during the game to assist the Canadian light Brigade. I am sure American General Scott is wondering where his reinforcements are!
DeleteThe way things have been going, I don't think he needs them!
DeleteWait and see.....
Delete