Showing posts with label Battle. Show all posts

Monday, May 23, 2022

Battle at Dyckman's Mill part 1


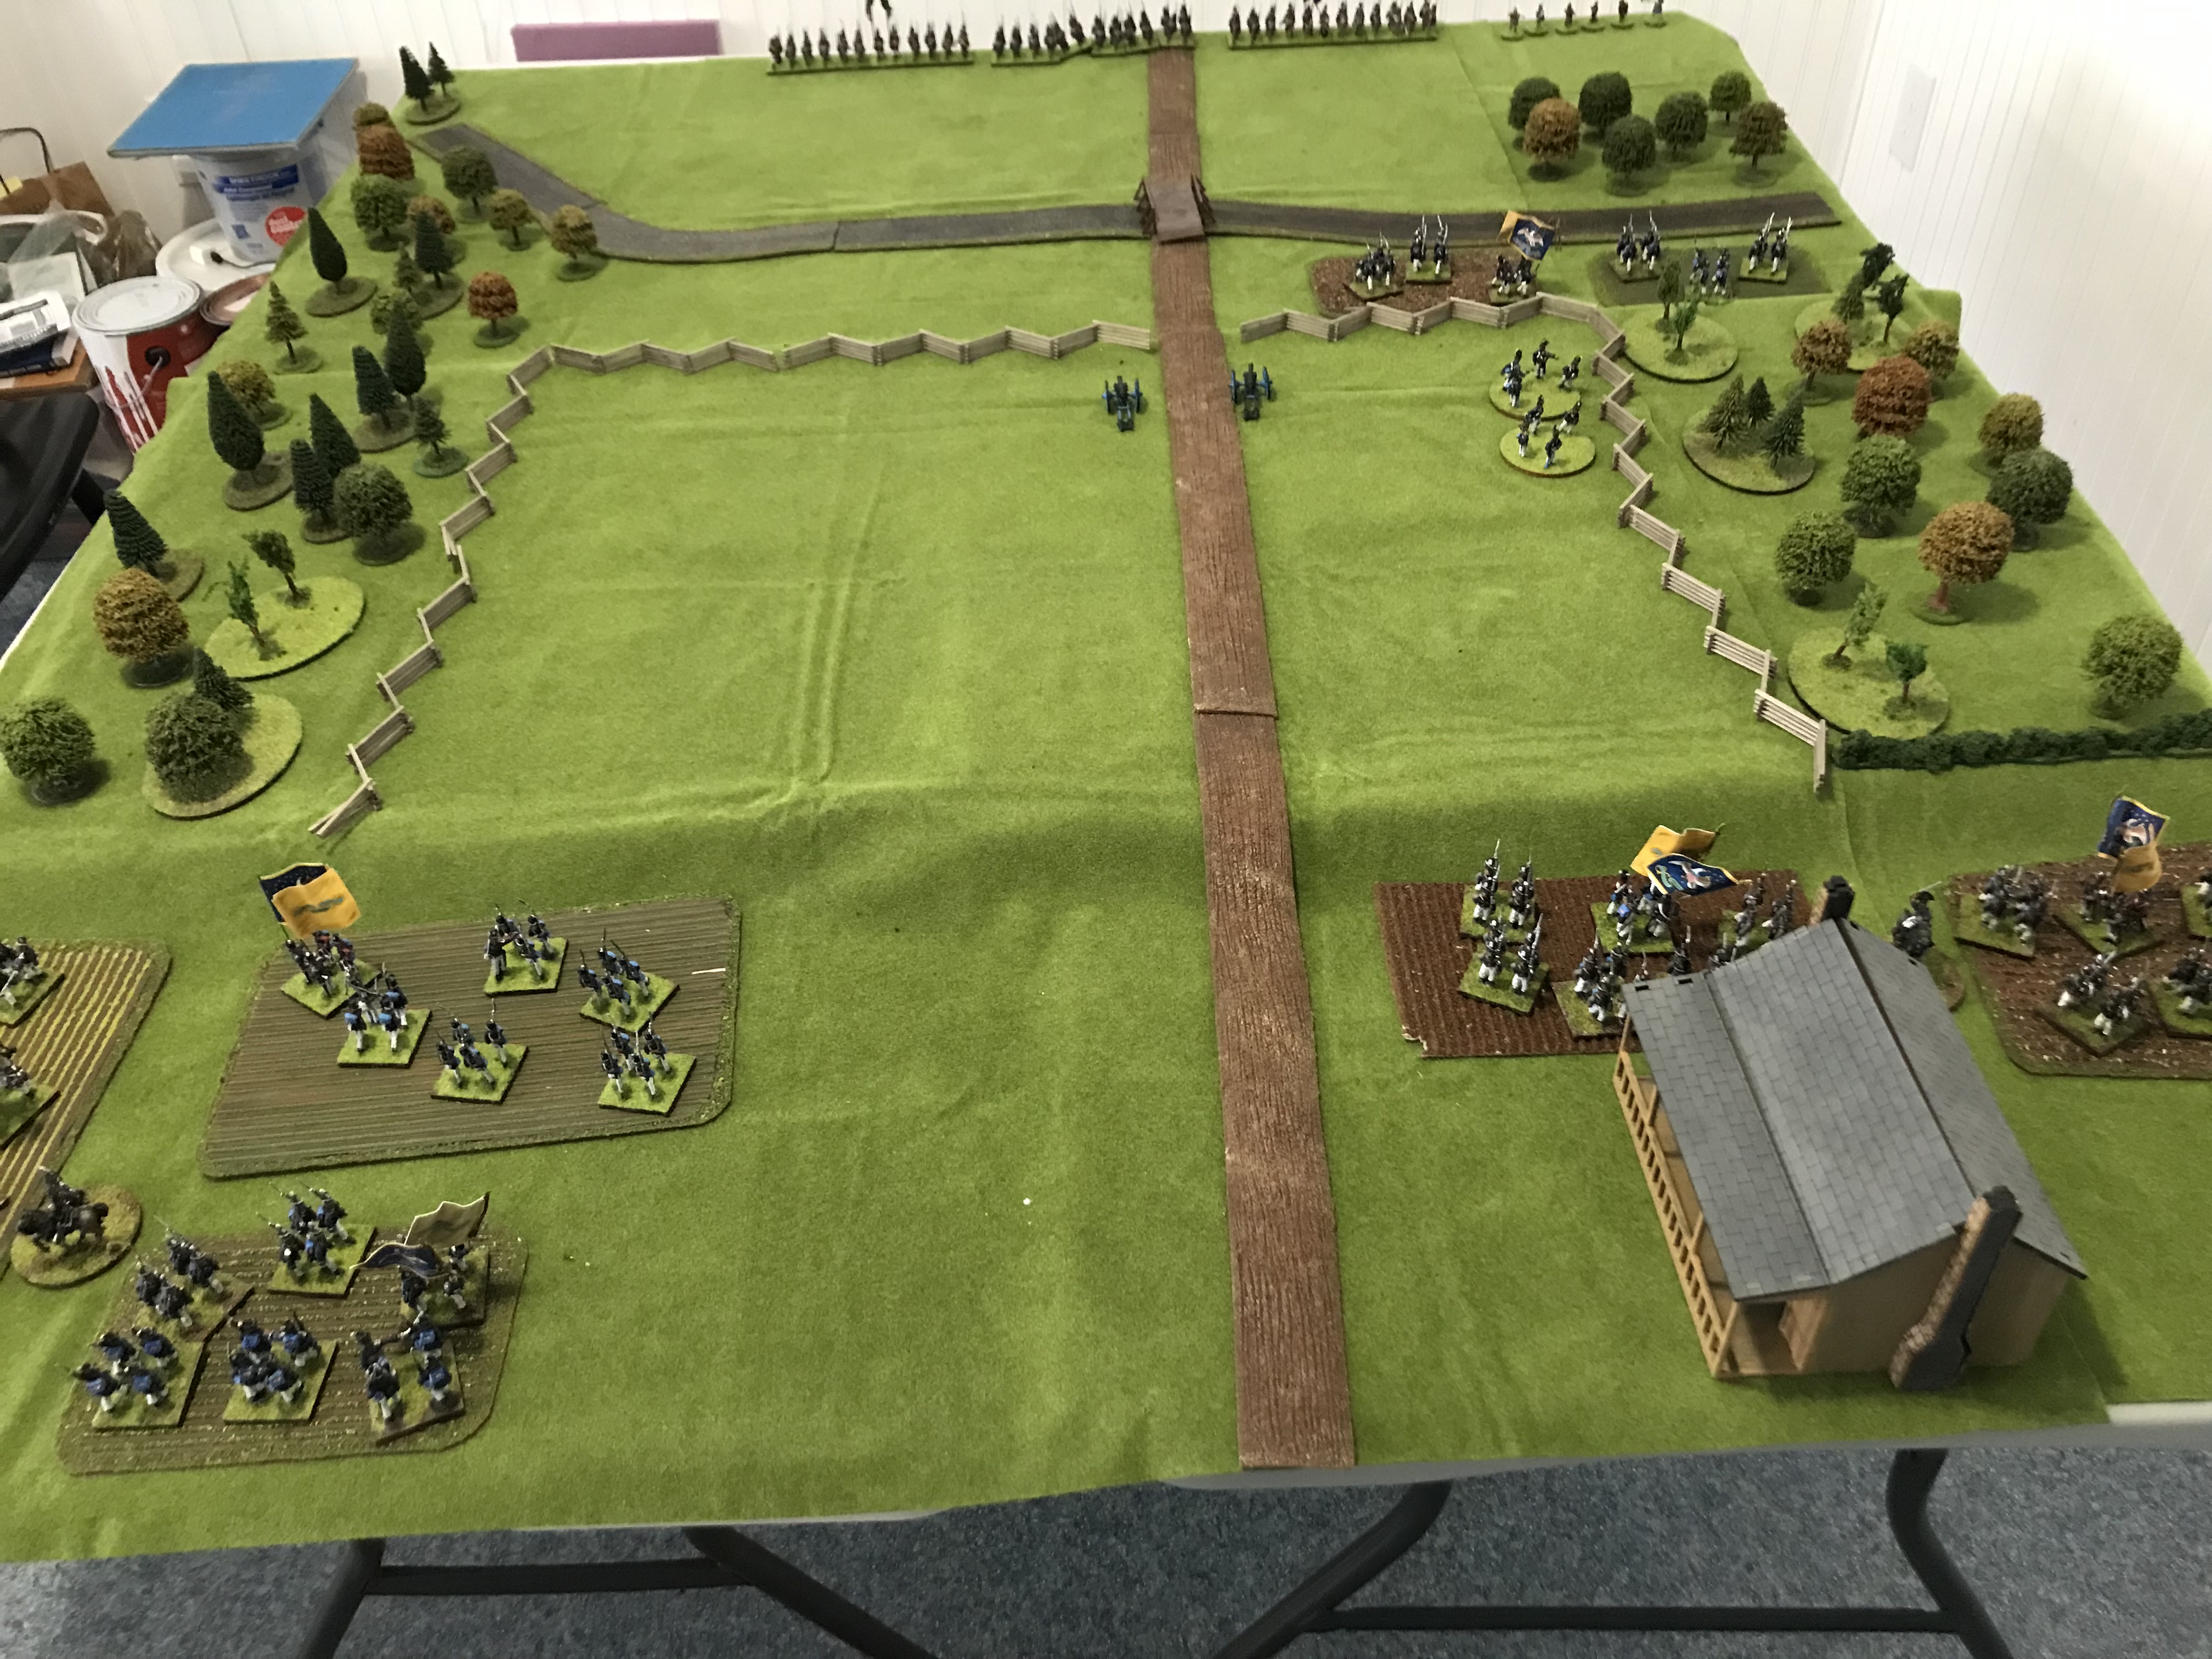
  The game starts with the British entering the table in the southeast corner.  American rifle armed troops are in the fields to their flank.   The main American army is in position on the other side of the stream.  The all important wagon train is slowly moving up the road to make their escape.  It moves at a speed of four inches per turn;  so its slow!  The Americans must buy time for the wagons to escape, and then withdraw off the table.  The British must capture the bridge and the town and the wagons if possible .

Turns 1 & 2:


   The British enter the table from around the road.  The light infantry are pushed toward the stream while the Jagers move to their  right towards the American Rifle men. The Grenadiers boldly push forward to cross the bridge. 

The American rifles fire and fall back.  At long range neither side is scoring any hits.


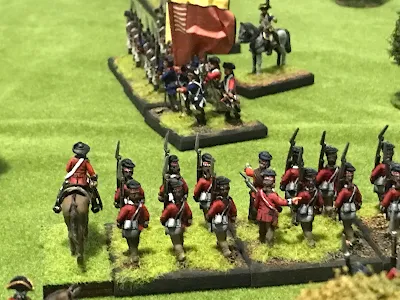
  The Hessian Brigade moves up to support the Jagers and to look for a crossing upstream. Grenadier Regiment Rall in front followed by Fusilier regiment Knyphausen.  In addition the Royal Artillery moves up to support the British advance.  The 7th and 63rd Regiments of foot are just entering the table.


The Americans take positions behind fences and walls. Still at very long range a few militia men fire at the close pack column of British.  The Continental line holds their fire waiting for the enemy to close into close range.


Meanwhile the wagons slowly move up the road.


Turn 3 & 4:

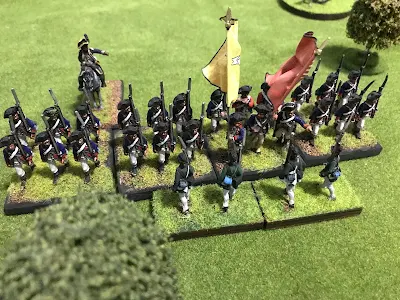
  The Grenadiers charge across the bridge and quickly form into line.  Although the Militia battalion gets a shot at them they pass morale and next turn close into close combat.  The light infantry moves to cover the Grenadier flank and exchanges musket fire with the 9th Continentals.  


  The next turn the Grenadiers charge the militia.  Its an uneven fight and the militia are defeated  and lose their colors.  They rout back and the Grenadier battalion takes the stone wall.  The lights continue to screen their flank and the 7th and 63rd move up to cross the stream. 


 The 9th Continental falls back and the 11th Continental and New York (Hamilton's) Artillery move up in support.


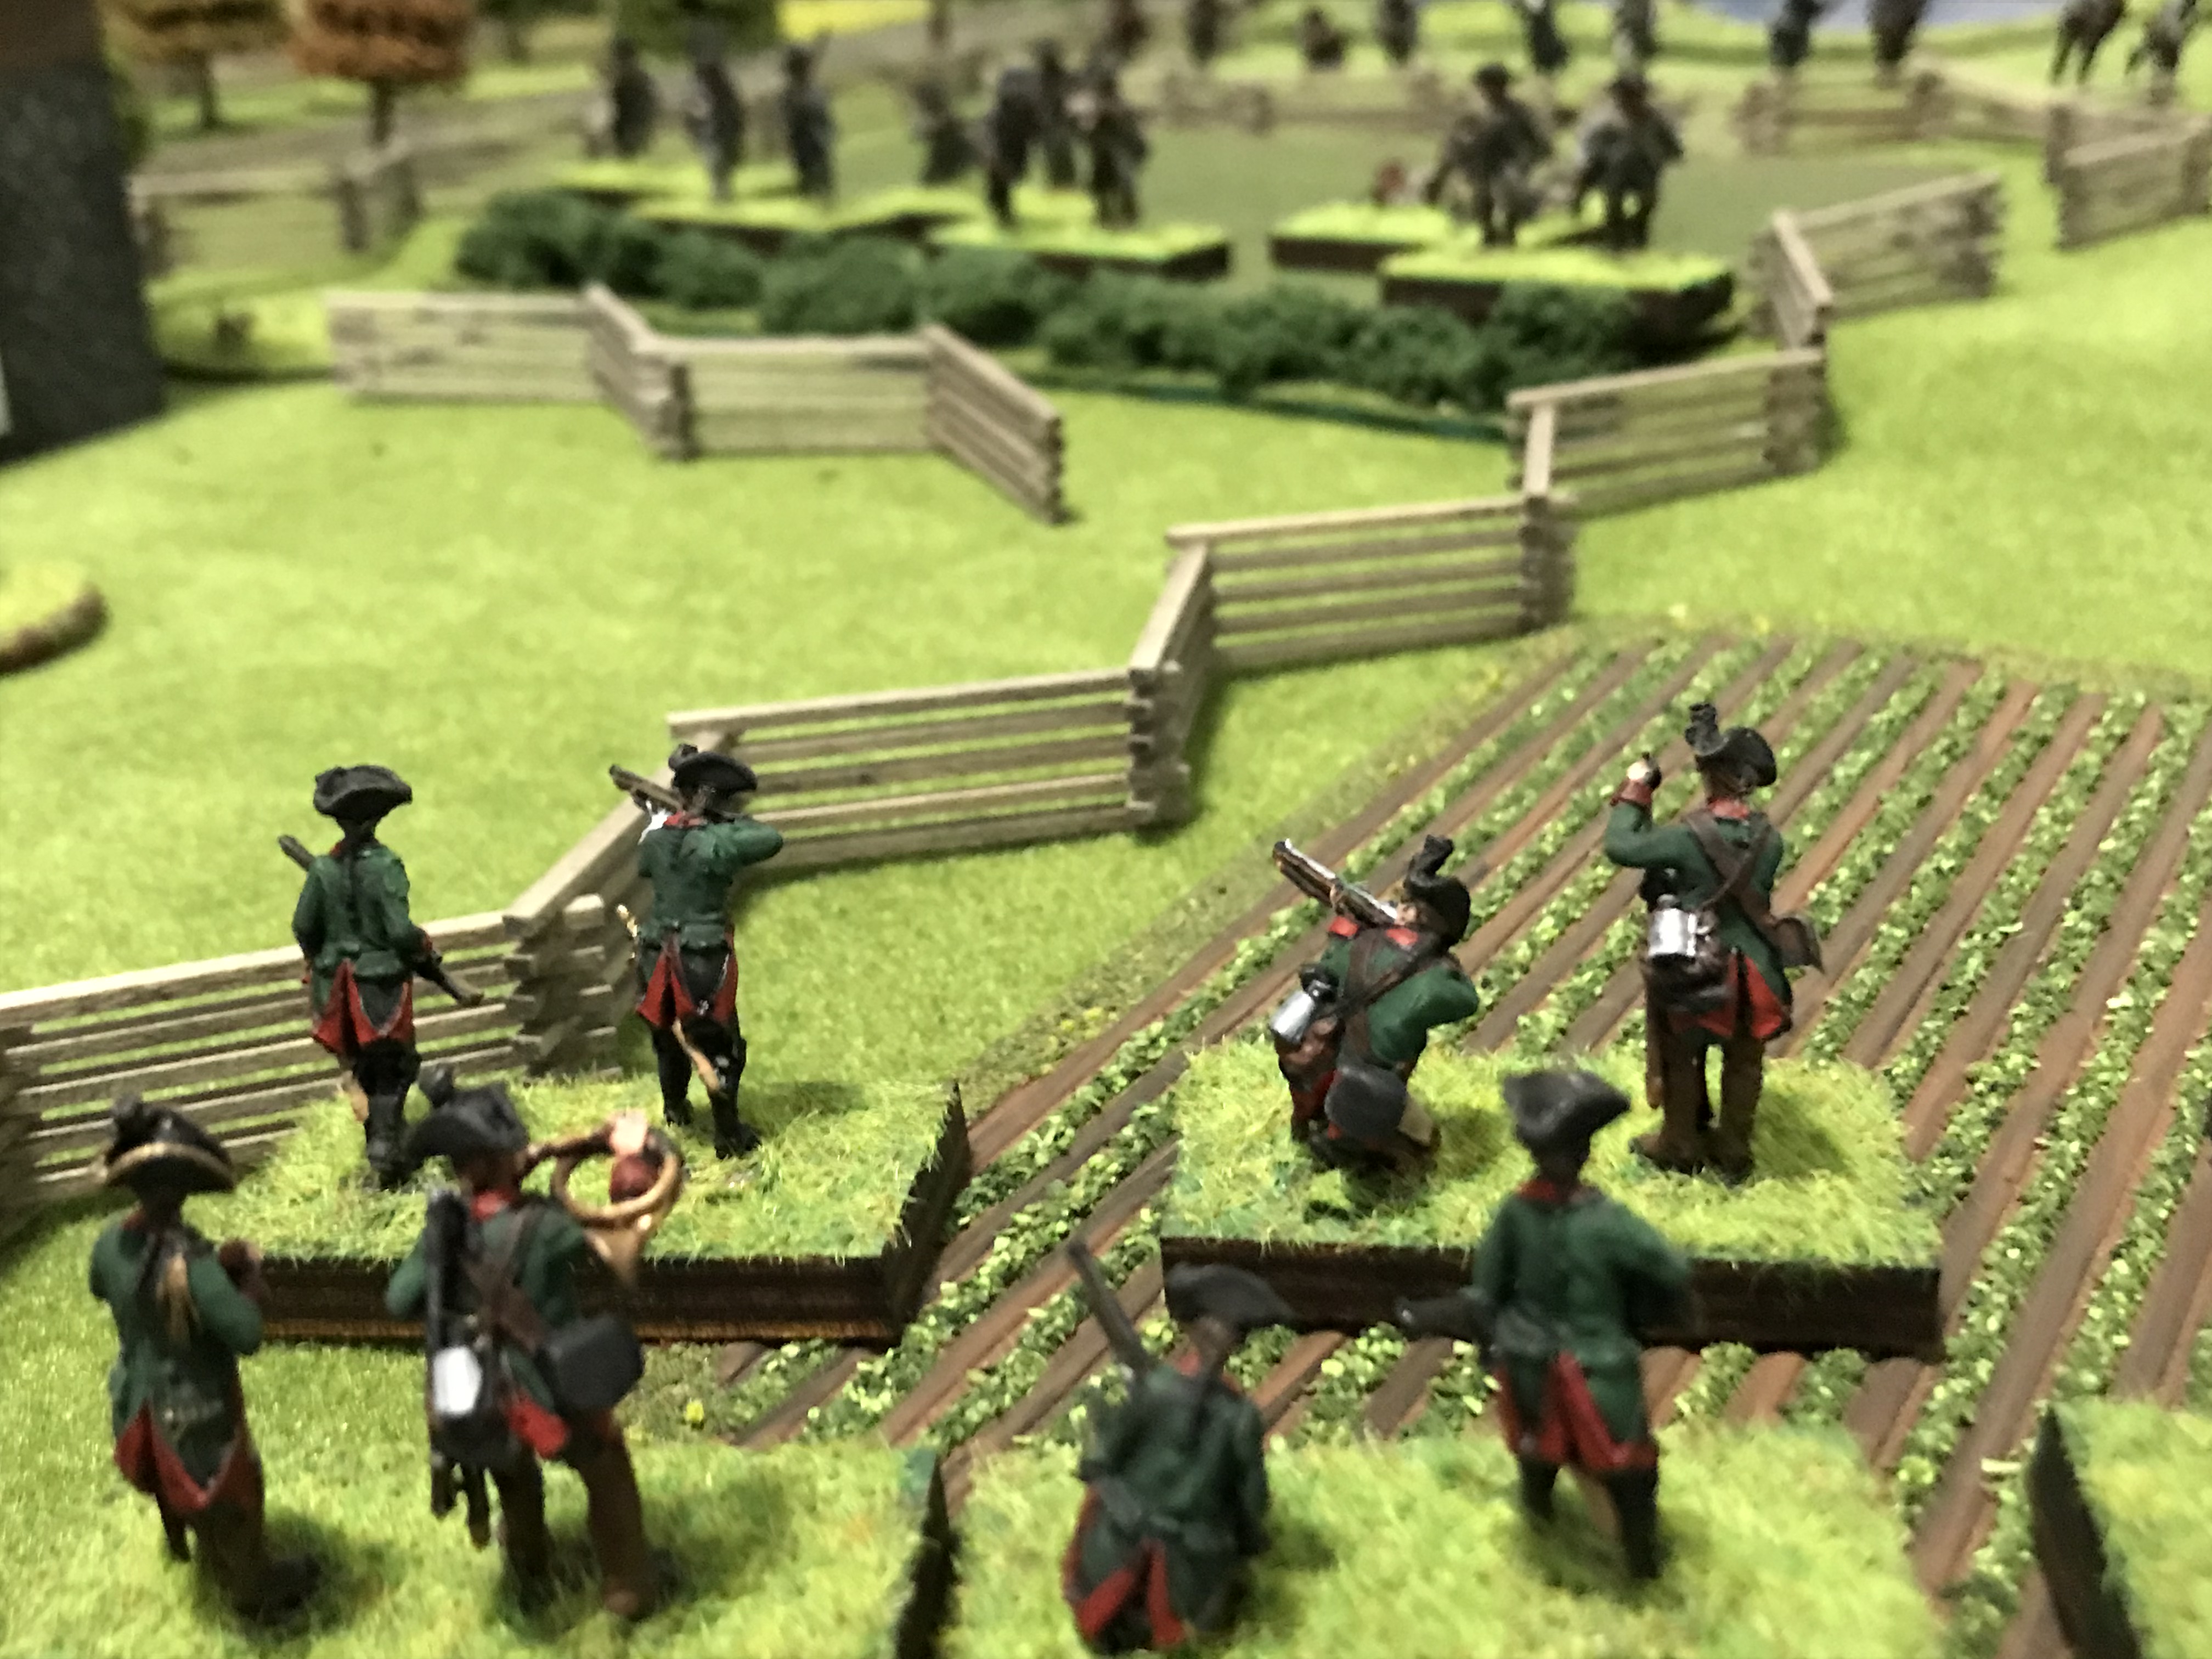
 The American rifles continue to exchange fire with the jagers as they fall back from cover to cover.  They two units leapfrog each other to give a continuous fire.  Remember that rifles have superior range but take longer to reload (they fire every other turn.


  The American rifles are running out of terrain to fall back on.  All the rifle armed units are suffering heavy casualties by this time.  One American unit crossed the stream and took up position to cover their brothers.  The Hessian battalions move forward.  The jagers fall back after suffering over 50% casualties.  

And still the wagons make their way up the road trying to escape!


Turns 5 & 6:


   With the jager company shot up and in retreat, the Grenadier Regiment Rall took up the pursuit of the retreating rifle units.  As the Pennsylvania rifle unit arrived at the ford the regiment Rall fired a tremendous volley which decimated the retreating rifles.


 Both the British, now across the stream and the Americans firmed up to prepare for the next attacks.


End of part 1


Thursday, May 19, 2022

Dyckman's Mill: An American Revolution battle problem.


  Setting up a small American Revolution battle problem.  Each side has very different victory conditions from each other.  I have set the battle in 1776 around the New York city area to give me the opportunity to play with my early war Continental line regiments for a change.  

The battlefield of Dyckman's Mill.  The top of the photo is north, the bottom south, left side is west and right side is east.  


   The Americans have a number of supply wagons (3) which need to get off the table.  They have a small force of two Continental line regiments, a local militia battalion and two large companies of Rifle armed light troops.  They must hold the British off long enough for the supply wagons to escape, and then get his forces off the table on the road to the Northern edge if the table.  The militia may exit on the road to the west if they wish.  


  The Americans Continental line and Militia may set up anywhere west of the river.  The rifle units may set up east of the river in ambush positions if they wish.  There is a ford way the river in the woods that only the Americans know about.  It is after all their country! 


American Command:

9th(Rhode Island) Continental Regiment (30 figures)

11th (Rhode Island) Continental Regiment. (30 figures)

New York Militia battalion (30 figures)

Pennsylvania Rifle battalion (12 figures)

Virginia Rifle battalion (12 figures)

Hamilton's NY Artillery (1 gun and crew)


  The British must capture the small village in the northwest corner of the table as well as the bridge over the river.   They enter on the road on the southeast side of the table.   Local guides have been less then helpful about the local topography and are unaware if the river can be crossed.  


British Command:

1st Grenadier battalion (30)

Light Infantry wing (16)

Jager  company (12)

7th Regiment (30)

63rd Regiment (30)

Grenadier Regiment Rall. (30)

Fusilier Regiment Knyphausen (30)

Royal Artillery (2 guns and crew)


Monday, May 9, 2022

Wake up! FIghting Stoney Creek


Set up:   The American encampment was behind a long ridge line.   In addition a shallow creek was in front of the ridge. A rail fence was along the ridge that gave cover to troops behind it.   One regiment was placed in front of the ridge as an advanced guard.  Unfortunately they were asleep.  The rest if the American army was asleep in their encampment areas (marked by rough ground) behind the ridge or in the case of the artillery off to the side of their guns.  Woods covered both flanks.  Once alarmed the Americans will roll to wake the regiments and respond to the attack.  There are six American regiments and two guns.

  The attacking British and Natives enter the board and advance towards the American lines.  There are two line regiments, a combined flank battalion and a small warband of native warriors.

Turns 1 & 2:  The Americans roll a "5" so they continue to sleep soundly.  The British advance forward.  On turn 2 they roll a "4" so they continue their rest.


Turns 3 & 4:  the Alarm is sounded!  Americans roll to activate.  Indivual stands more forward towards the danger.  One of the American guns is manned, the other not.  Stands in range fire!  No hits (really poor die rolling here!).  Infantry rolls one dice per stand (or one dice per 2 indians)  with a six a hit.  Artillery roll one dice and half the number rolled rounded down are hits.

The British 8th regiment charges the advanced American Regiment.  The Native warband also attacks.  Since all American stands are not activeated they first test morale with a negative 2 per die roll. The American regiment is soundly defeated and retreats.  (note:  In close combat you roll one dice.  A 1,2 the British withdraw, 5,6 American withdraw otherwise continue.  I then fight another round until one side is beaten).


The combined flank battalion races up the road to engage the American guns.  They take three hits on two stands which withdraw due to poor morale ( if a stand takes a hit through fire it tests morale).


Turns 5 & 6:

More American stands activate and head towards the battle.    They attempt to form a line to drive off the attackers.  There is lots of fire back and firth but very few hits.  (Stands when they are withdrawing check morale.  If they pass they return to the fight.  If not they continue withdrawing but subtract from roll.  This is bad and causes them to rout off board).

Flank battalion captures the two guns!

Turn 7:

The 8th regiment is locked in close combat with an equal number of Americans.  It's a back and forth action with stands withdrawing  and finally the American line breaks. In the center the Flank battalion also drives back the stands in front if it.  

And in the woods the Native warriors chase the enemy from the woods.


Turn 8:   American numbers are starting to tell.  Fresh stands are forming into lines.  The 8th regiment is driven back.  More re American stands move up to engage the 49th and Frank battalion.    At this point the British side decided to start a withdrawal taking the captured cannon with them.  They have blooded the invader and captured their artillery and with few casualties.  The American army has seen the attackers off but now must decide if they should continue the advance through the country.

Conclusion:

I have played this now about four times.  It is always a fast game.  If the Americans can get an early warning it speeds up their activation and gives them more time to bring up stands.  Eventually, as in the historical battle numbers tell and the British withdraw.  But until then its a series of individual actions and you see how much damage they can do. There are a lot of Americans and only half as many British.  But the game dies give a goid feeling for the actual battle and the results are also similar.


   All in all it's a fast fun game and can be changed to almost any time period depending on what figures you have.  Give it a go, you may enjoy it!


Monday, January 17, 2022

Camden 1780: Part 2 The Stand of the Continentals


The American general Gates was swept up in the rout of the Virginia and North Carolina militia brigades.  Although some units managed to rally, the advancing British infantry quickly routed them and cleared the field.  The British Legion cavalry rode down the isolated American gunners silencing most of the artillery.


Ignoring the defeat and rout of the Militia, the 2nd Maryland Brigade went on the offensive.  Charging forward the Delaware regiment charged the Legion Infantry while the 2nd/4th Maryland regiment took on the North Carolina Volunteers.  Both regiments won their fights and the loyalists retreated back.  To add insult to injury the Continental artillery fired a load of canister at the Volunteers of Ireland which caused a morale check.    

loyalist militia run by for the hills!


The 23rd and 33rd flank the Continentals.

71st marching to the rescue.

Royal Artillery

Rawdon rallied his line regiments but the loyalist militia panicked and ran. Cornwallis ordered up the 2nd /71st to help hold the flank.  Webster redeployed his brigade to attack the 1st Maryland brigade.

23rd vs Virginia militia

Delaware regiment fighting the Legion infantry.

2nd Maryland Brigade sweeping away the Loyalist line.

With Gates having been swept away in the retreat of his militia, Baron De Kalb remained with his Marylanders and Delaware regiments.  Ordering Smallwood to hold his flank he charged forward to attempt to push the Loyalist brigade out if his way.  Already weakened, and with the loyalist militia not wanting any part of the fight they were watching  the line broke.  The Maryland and Delaware regiments fired and charged causing high casualties and both defeated their opponents in the melee.  The Legion Infantry was destroyed while left the NCV broke and routed.   

On the flank the 5th /6th Maryland regiment fired a devastating volley into the VoI causing high casulties.  In addition the remaining Continental artillery joined them and the combined casualties were too much for the VoI who routed back.  At least on this flank the Americans appeared to have some success.  


But it was not to last.  Webster ordered his brigade forward and fired a devastating volley into the 1st/3rd Maryland regiment and the North Carolina militia regiment to his front.   The North Carolina militia retired.

The 71st moved up onto the flank of the Delaware regiment and fired a volley into their flank.  Their morale held, but just.


After the Royal Artillery added their firepower Tarleton launched his Cavalry into the Maryland regiment.  A long range volley caused some casualties but the dragons crashed into the Continental and defeated them, capturing their colors and killing their colonel.  They also over ran the the artillery.  


At this point, the British had broken through and both groups of Continentals were isolated.  De Kalb ordered a retreat to try and save what he could of his command.  It had been a brave stand but the early rout of the militia had doomed his small command.


Thus ended our game of the Battle of Camden.  The results mirrored the actual results of the historical battle   with the early rout if the militia and the Continental line fighting steadily.  Although one sided it did provide a fun game.  Perhaps if the Militia could have held out a little longer?  I suspect the historical set up doomed the American side.  another time perhaps a different set up or on a different field might result in a different result.  After all the American army here was very similar to what Greene later fought with at Guilford Courthouse.