Sunday, July 16, 2017

Chippewa July 5, 1814


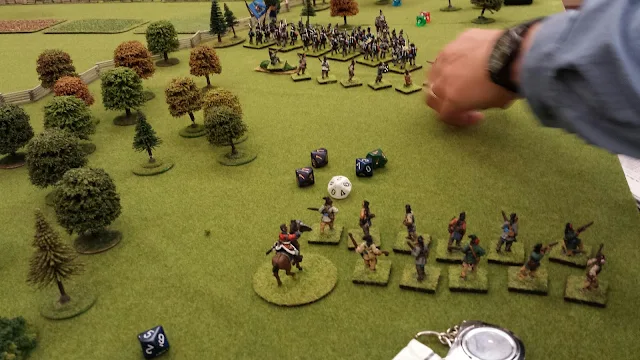
   This was the battle which sparked my interest in the War of 1812.  We visited the battlefield in 1985 and I have wanted to recreate this battle on the table top since.  It has simple terrain, balanced equal forces and colorful uniform.  British regulars, gray jackets Americans, volunteers in mixed dress and native Indians.  You would have a difficult time finding a more perfect battle to fight in miniature.


  For this battle I used the maps out of Richard Feltoe's book, Tides of War.  To fit the battlefield on a six foot by eight foot table I divided the field in half to represent the plain and the woods.  Fences outlined the woods and defined the roads.  This way I could place trees in the wooded area but players could move the trees to not interfere with troop movement.   I did not include either river.  Instead both sides had to enter the table on the road in road column.  Light troops for both sides were already deployed in the woods.  Historically I should have had the players in the woods fight for three or more turns before the regulars entered the table.  But I did not  want players just hanging around doing nothing  ( no fun there).  So for the first couple turns players commanding the regulars entered the table and deployed while the light troops fought it out in the woods.

American Command:
9/21st Regiment (24 figures)
11th  regiment. (24 figures)
25th regiment  (24 figures)
Towson's battery (2guns)
Richie's battery  (2 guns)
American dragoon  (6 figures)
Pennsylvania Volunteers (24 figures)
Native Warriors (12 figures)

British/Canadian forces:
19th Light Dragons. (6 figures)
1st Regiment of Foot. (24 figures)
8th Regiment of Foot. (24 figures)
100th Regiment of Foot. (24 figures)
Light companies  (12 figures)
Royal Artillery. (2 guns)
Lincoln Militia. (24 figures)
Native warriors. (12 figures)

The game:
In the woods both sides marched directly at each other.  Militia volunteers fought militia volunteers while native warriors fought each other.


  During this time the regulars of both sides marched up the road and onto the field.  Although both sides advanced with the cavalry leading, the Americans brought their infantry up fast while the British made sure their artillery was to the front.


Once they spotted each other the cavalry could not help themselves and both sides
charged.  A good war gamer cannot do otherwise.  Although the melee was inconclusive, the American morale broke and they
scampered back.  The victorious 19th Light Dragons held the field and covered the royal artillery.


 Meanwhile both sides deployed along parallel rail fences.


In the woods the great melee was coming to a head.  The American Indians forced their British counterparts to fail morale and retire shaken.  But the Lincoln militia forced the Pennsylvania Volunteers back also.  The American Indians raced behind the Lincoln's to attack them from the rear but the British Indians had recovered their morale and attacked them in their rear  and routed them in turn! The Lincoln Militia marched on chasing the Pennsylvania volunteer off the boards!


On the plain, the British commander massed three gun sections and commenced target practice on the U.S. 9/21st Regiment.  The American commander could only reply with two gun sections, the other guns were masked by his cavalry.


  Seeing the 9/21st being shot to pieces the British commander advanced his light companies in skirmish order against him supported by the 19th Light Dragoons.  This must have been the moment the American Artillery commander waited for.  He unmasked his guns and unloaded a devastating round against the dragoons which decimated them.  The American dragoons charged the skirmishes.  Although the skirmishes were shaken, they in turn caused the dragoons to fail their morale which tumbled them back.


The 9/21st failed their morale in the face of the British advance and retired off the board.


By this time the Lincoln Militia and Indians in the woods were positioning themselves on the flank of the American line.


 The British line advanced against the Americans, who now have a major gap in their line and are facing enemies on three sides.


At this point, with the full weight of the British line on them, and the Lincoln's in position to out flank them we called the game.  It was a British victory and future cadets at West point would wear anything but gray!

Conclusion:

All felt it was a fun and balanced game and would enjoy replaying it.  Perhaps I have found my "go to" scenario for War of 1812?

In the future a couple things to improve the game.  I plan on buying more trees to make the woods look better.  Also I am working on better buildings.  I will add rivers and bridges to both ends to make both sides remember their escape (should things go wrong) is a small bridge.

  Thank you Byron, Dave and Warren for commanding the Americans. And thank you Charlie and Ed for commanding the British/Canadians.  I am most glad you played in my game and more importantly had a good time.


Saturday, July 15, 2017

Club game night


  Last night was club game night and fun evening it was.  Attendance was great, with over 20 people in attendance.  The three games put on were  Fire and Fury American Civil War game in 15mm, a X Wing Star Wars game and War of 1812 in 25mm.
  The X Wing game put on by Mike  saw a large variety of space ships spread across an very nice space mat.  Ships big and small battled it out.  From across the room it looked like great fun.


  Phil put on a 15mm Civil War game based around the historical battle of the Anna River.  It looked good and again people were having fun.


  Finally I put on a battle based around Chippewa  on July 5, 1814.  This time it was a British victory and cadets at West Point will wear anything but grey coats in the future.  This is one of my favorite battles of the war, one I have long wanted to firefight.  So there will be a longer post, and more pictures in a separate posting.  But let me say it was a fun game which may become my go to War of 1812 game scenario.

Monday, July 10, 2017

Lee's Legion 1781


  The 2nd Partisan Corp or as it's better known as Lee's Legion was formed in April 1778 when it was detached from the 1st Continental Light Dragoons.  Through its commander, "Light Horse" Harry Lee and his memoir the Legion's service is one of the better known regiments during the American Revolution.  As to if it was an elite unit, that is up to the reader to decide. But what is not debatable is it could be, at times as ruthless as the British Legion with whom it fought. It was a very active part of Greene's army so I had to include it in my collection.

   Incidentally, Lee's  memoir was written partly to adress the controversy over Lee's action at Eutaw Springs.  His son, Robert E. Lee would continue the defense of his father in later editions of the book.


There are numerous interpretations of how the Legion looked.  This could be because the uniform was changed during the War and also supply problems.  In addition different infantry elements were assigned to the Legion during its history.  I have of course focused on it activities in 1781.


  I understand that suggesting Lee's Legion were not dressed in green might go against current excepted knowledge this is usually suggested that Lee ambushed Pyle's loyalists because they were dressed similar to Targets 's British Legion.  When I painted them up I used the painting of Lee himself in a tan/brown faced green coat. In addition I also used the following quote from private Shaw of the 33rd regiment of foot. He was captured just prior to guilford courthouse and wrote later:
"Scarcely had we gone half way up the lane, when seven of Lee's light horse made their appearance: my companion swore there was Tarleton's light horse coming, and, says he, ‘we shall be taken up on suspicion of plundering, and get 500 lashes a piece.' ‘No;' said I, upon observing their brown coats, and white cockades, ‘no, friend, you are deceived; these must be the rebels.' Having therefore discovered his mistake, he began to cry;--but for my part, I thought it very good fortune.—As they were advancing towards us, we concluded to go and meet them; which we accordingly did, and falling on our knees begged for quarter; which they granted ….


While the evidence, and most authorities agree on the inform of the Legion cavalry the Infantry are much more of an mystery.  I think the evidence suggests the Legion infantry had a different uniform from the mounted element. There was an issue of enough cloth to three officers to make coats of blue faced red and lined white (see p40 Katcher Uniforms of the Continental Army). This was by the clothier general of Maryland in 1782. Coincidentally it was at the same time the portrait of Harry Lee
painted by Charles Wilson Peale. There is also a portrait of an officer of the Legion Infantry,  Laurence Manning who was
shown in a blue coat faced red.

  So I feel confident the Infantry element of the legion in 1781 at least we're in standard blue faced red coats.  There is no evidence helmets were issued so I outfitted my infantry in standard infantry uniform.

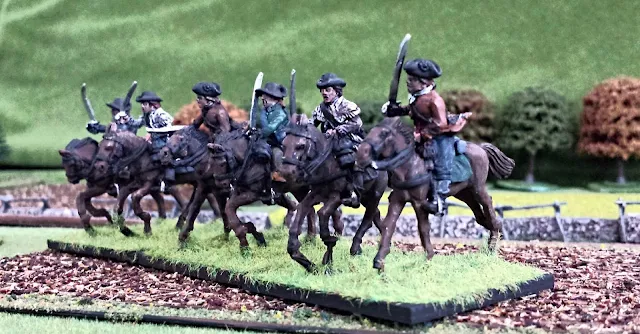
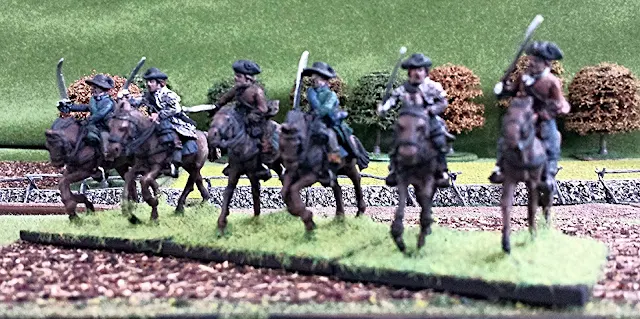
  For my table top Legion I have once again used the most excellent figures from Fife and Drum miniatures.  While they do not make a figures for the Legion figures in their existing range work well.  The cavalry comes from the 16th light dragoons. Minor filing was all the work they needed.  For the Infantry I am using existing painted figures. Half of the Light battalion are used as Kirkwood's Delaware company, so the other half of the battalion are now the Infantry of the legion.  Thus I get double duty out of that group.  No flag for the unit.  Although some sources suggest one I am unsure of the documentation.  If better information comes available later to convince me I will add it then.  And now I look forward to Lee tangling with Tarleton in the battle of the legions on my table top!


Saturday, July 8, 2017

49th Regiment of Foot 1812


  At the time war broke out, the 49th Regiment of foot was one of the only regiments of regulars in Canada.  Having arrived in Canada in 1803 the regiment was stopped returning to Great Britian by the declaration of war.

  Divided up into smaller commands the 49th was stationed around the Niagara area.  The Grenadier and Light infantry companies were at Queenston Hieghts in October 1812 and played a prominent part in the battle.   The regiment's  commanding officer, Lietentant Colonel Isaac Brock (and commander of all British Forces in Canada) was killed at the head of the Grenadier and Light companies leading a charge against the Americans.

In November 11, 1813 at the Battle of Crysler's Farm the 49th and 89th regiments of foot fought and defeated a much larger American Army under General Boyd.  It was a text book example of better trained and disciplined troops against poor quality but more numerous troops.

  I have painted the regiment in its early war dress.  Officers are still wearing bicorns with white breeches and the men stove pipe shakos. I really like the NCO's, keeping men on their toes and dressing the line.  The gallant officer appears to be channeling General Brock inspiring his men.  It is a nice break from the usual and gives the unit a dashing appearance.

  Figures are from Knuckleduster miniatures.  They continue to provide great figures and great value.  The flags from Flags of War.  These are a great item also and I wish they got more press and were better known as they are wonderful.


Wednesday, July 5, 2017

Captain James McCall's mounted militia 1780


  Captain James McCall had been active an an officer in the South Carolina continental and militia forces.  From 1776 to the end of the war he held various command and was almost always in the field leading soldiers.  His service was typical of numerous militia leaders, with long years of service but little public credit.

   His most memorial achievement was leading two troops of mounted militia.  These were typical militia men who provided their own mounted and equipment.  At the Battle of the Cowpens in January 1781 his men served with Ltd. Col. William Washington and played a dramatic part in the victory against Tarleton.  He and his command continued to serve with the Continental cavalry of both Washington and Lee during the fighting in North Carolina.  They left Greene's army just before Guilford Courthouse and returned to South Carolina where they fought under Pickens and Sumter's command.


Miniatures are from the Perry Brothers American Revolution line.