Monday, April 10, 2023

Battle of Camden August 1780


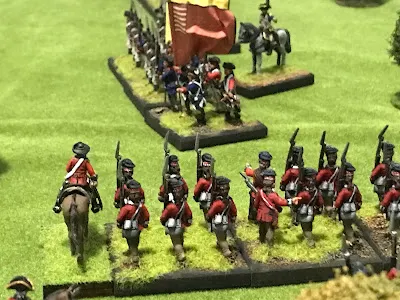
  British advance against the American militia line.  Artillery fire causes one militia regiment to rout. Units to either side check and one regiment in second line is nervous but holds. Brigade commanders are busy holding their men together.

  Webster's brigade advances into musket range. A devastating volley turns the militia line into ruin and regiments break and retreat.

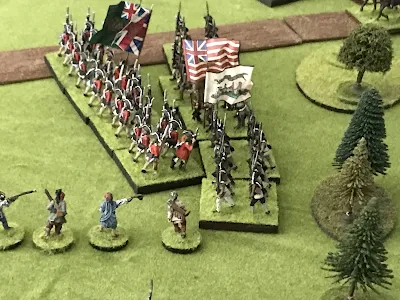
  On the opposite flank the 2nd Maryland brigade advances against the Loyalist line. Both sides exchange volley fire and both sides stand steady.


  Delaware Regiment confronts the Legion infantry and Volunteers of Ireland.

   2nd Maryland Brigade faces Rawdon's Loyalist Brigade whole the 1st Maryland brigade moves to protect the flank.

  At this point following a close range volley from Webster's brigade the militia line collapsed. All American Militia regiments are either all retreating or routed. The British commander now charges forward into this mess and completes the rout of the American left flank.


2nd Maryland brigade closes the gap.

  Seeing this Gates quickly moves the 1st Maryland brigade to cover his exposed flank. One militia regiment holds, but for how long?.

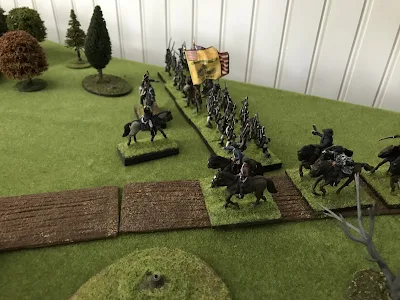
 Tarleton, moves the Legion cavalry forward getting ready for a decisive charge.


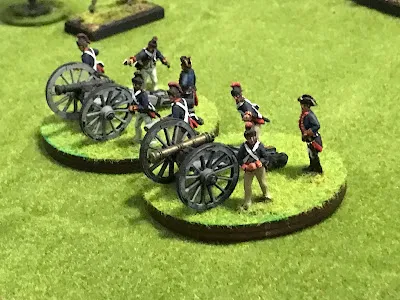
  The American general Gates was swept up in the rout of the Virginia and North Carolina militia brigades. Although some units managed to rally, the advancing British infantry quickly routed them and cleared the field. The British Legion cavalry rode down the isolated American gunners silencing most of the artillery.


Ignoring the defeat and rout of the Militia, the 2nd Maryland Brigade went on the offensive. Charging forward the Delaware regiment charged the Legion Infantry while the 2nd/4th Maryland regiment took on the North Carolina Volunteers. Both regiments won their fights and the loyalists retreated back. To add insult to injury the Continental artillery fired a load of canister at the Volunteers of Ireland which caused a morale check.


 Rawdon rallied his line regiments but the loyalist militia panicked and ran. Cornwallis ordered up the 2nd /71st to help hold the flank. Webster redeployed his brigade to attack the 1st Maryland brigade.


With Gates having been swept away in the retreat of his militia, Baron De Kalb remained with his Marylanders and Delaware regiments. Ordering Smallwood to hold his flank he charged forward to attempt to push the Loyalist brigade out if his way. Already weakened, and with the loyalist militia not wanting any part of the fight they were watching the line broke.

  The Maryland and Delaware regiments fired and charged causing high casualties and both defeated their opponents in the melee. The Legion Infantry was destroyed while left the NCV broke and routed.

On the flank the 5th /6th Maryland regiment fired a devastating volley into the Volunteers of Ireland causing high casulties. In addition the remaining Continental artillery joined them and the combined casualties were too much for the VoI who routed back. At least on this flank the Americans appeared to have some success.


  The 71st moved up onto the flank of the Delaware regiment and fired a volley into their flank. Their morale held, but just.


  After the Royal Artillery added their firepower Tarleton launched his Cavalry into the Maryland regiment. A long range volley caused some casualties but the dragons crashed into the Continental and defeated them, capturing their colors and killing their colonel. They also over ran the the artillery.


  At this point, the British had broken through and both groups of Continentals were isolated. De Kalb ordered a retreat to try and save what he could of his command. It had been a brave stand but the early rout of the militia had doomed his small command.


  Thus ended our game of the Battle of Camden. The results mirrored the actual results of the historical battle with the early rout of the militia and the Continental line fighting steadily.


  Although one sided it did provide a fun game. Perhaps if the Militia could have held out a little longer? I suspect the historical set up doomed the American side. Another time perhaps a different set up or on a different field might result in a different result. After all the American army here was very similar to what Greene later fought with at Guilford Courthouse.


And for someone wishing to start a small American Revolution wargame army Cornwallis' army here would make a ideal force. A Brigade if British Regulars, A Brigade of Loyalists, two battalions of the 71st and the British legion. There is a very nice army for you!


Sunday, April 9, 2023

Camden: Order of Battle


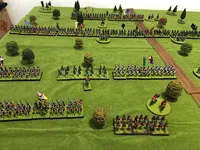
View from behind British right flank.

View behind British left flank.


  Wargames wise this is not one of my favorite battles to fight on the table top.   Possibly because it was so lopsided. Possibly because you need so many militia figures! But really because tactically it's rather boring. Both sides line up and just march forward a very plain table with a few trees and swamps in both flanks.

  Just not that interesting.  But Cornwalli's army is a very nice army to paint up and field.  And Gate's army is rather similar to what Greene fielded at Guilford Courthouse.  But its time to try it out and here is my order of battle. I have rounded up/down numbers to better fit my painted miniatures.  I have also combined some militia battalions. So close but not actual.   Battle report will follow soon.


British Southern Army: (2100)

Lieutenant General Lord Charles Cornwallis


Rawdon's Brigade: Lieutenant Colonel Francis Rawdon

Royal Artillery (light)

Royal North Carolina Regiment (30 figures)

Bryan's North Carolina Loyalist Militia (30 figures)

Volunteers of Ireland (30 figures)

British Legion Infantry (16 figures)

British Legion Artillery (light)


Webster's Brigade: Lieutenant Colonel James Webster

Light Infantry bn.  (16 figures)

23rd Regiment of Foot (30 figures)

33rds Regiment of Foot (30 figures)

Royal Artillery (light)


Reserve Brigade: Lieutenant Colonel Alexander McDonald

71st Highland Regiment (30 figures)

1st Bn/71st Highland Regiment (18 figures)*

2nd Bn/71st Highland Regiment (12 figures)*

Royal Artillery (light)

* can field as two units or as just one.


British Legion:Lieutenant Colonel Banastre Tarleton

British Legion Dragoons (18):

1st Squadron (10 figures)

2nd Squadron (8 figures)


total: 230 figures and 4 guns


American Southern Army: (4000)

Major General Horatio Gates


Continental Artillery:

Captain Anthony Singleton

Meredeth's (Virginia) Co/Continental Arty (light)

Dorseys (Maryland) Co/Continental Arty (light)

Bookers (Maryland) Sec./Continental Arty (light)

Waters (Maryland) Sec./Continental Arty (light)


Advance Brigade: Colonel Charles Armand

Continental & Virginia Cavalry:

Armands Legion Cavalry (6 figures)

Nelson's Virginia State Cavalry Regiment (6 figures)

Pinckneys S.C. Volunteer Mounted Infantry (6 figures)


Continental Light Infantry:

Armands Legion Foot (6 figures)

Porterfields Virginia Light Infantry (8 figures)

Armstrongs Militia Light Infantry (12 figures)


Militia Division : Major General Richard Caswell

1st North Carolina Militia Brigade: Brigadier General John Butler

Left Wing Battalion/1st NC (24 figures)

Right Wing Battalion/1st NC (24 figures)


2nd North Carolina Militia Brigade: Brigadier General Griffith Rutherford

Left Wing Battalion/2nd N (24 figures)

Right Wing Battalion/2nd NC (24 figures)


3rd North Carolina Militia Brigade: Brigadier General Isaac Gregory

Left Wing Battalion/3rd NC (24 figures)

Right Wing Battalion/3rd NC (24 figures)


Virginia Militia Brigade: Brigadier General Edward Stevens

Left Wing Battalion/Virginia (24 figures)

Right Wing/Battalion/Virginia (24 figures)


Continental Division (@1200):


Major General Baron de Kalb

1st Maryland Brigade:Major General William Smallwood

1st & 3rd Maryland Regiments (30 figures)

5th & 7th Maryland Regiments (30 figures)


2nd Maryland Brigade: Brigadier General Mordecai Gist

Delaware & 2nd Maryland Regiments (30 figures)

4th & 6th Maryland Regiments (30 figures)


Total 330 figures and 4 guns


  The set up: 

  The battlefield was open with scattered trees. These did not effect movement or musket/artillery fire historically so they will not in this re fight. Due to the poor visibility that morning (A heavy mist) both sides had set up close to each other. I placed the lines about 20" apart. Due to the swamps on both flanks this is a frontal fight with no manovering. Both sides have set up historically. Both sides have placed their best regiments on their right flank. Unfortunately this means the British elite regiments are against poor quality militia. The Continental line regiments of Maryland and Delaware are opposed by veteran loyalist regiments. Although the Americans outnumber the British heavily the numbers are off set by the superior quality of the British regiments. Now onto the game.


Victory Conditions:

The first side to break and retreat off the table is the loser. The side that remains on the table is the winner

Rules:

The Whites of Their Eyes.


Game Length:

The battle began at dawn, roughly 7 am. The historical battle lasted only one hour but the game should go on until one side breaks and retreats from the field. Sunset was roughly 8 pm, but one side should break far before sunset.


 Editors notes:  as I have said I have combined a number of militia battalions and rounded numbers up or down to better fit my armies of painted figures.  In addition based on my research of troop returns I feel the Maryland and Delaware division of continental was larger then is usually portrayed.  After this battle which all historians agree decimated the two brigades Gates was able to reform them into a two battalion Regiment of 300 men each plus detached light infantry to form the light battalion of about 300 men (although there were Virginia troops included in the light bn.).

Saturday, April 1, 2023

Big Fight At Hanging Rock part 2


  A slight pause in the action as both sides rallied troops and moved to shore up their position.  Major Carden established a line guarding the two remaining camps.  General Sumter rallied his militia and brought them forward.  He also sent his militia horse, Indians and rifles through the woods starting to flank the enemies line.

Reinforcements arrive!  Up the road from Rocky Mount march the New York Volunteers and a troop of the British Legion Dragoons.  Can the momentum of the battle be turning?

But at the opposite end of the field a detachment of Maryland Continental line and a cannon also arrive! 

General Sumter orders his militia battalions forward.  Already his light troops are sniping at the flanks of the loyalist line.  


Davie' rifles score some hits on the BLI  and then his militia horse charge out of the woods and slam into the infantry.   In the melee the infantry break and are chased back.  Colonel Bryan is killed trying to rally the infantry.

  With both flanks threatened Carden orders the Legion dragons to clear the woods to his right while the NYV swing to their left to confront the militia horse. 


  The dragons push back the rifles and continuing the charge also rout the Indians.

  A well trained volley from the NYV sends what is left of the militia horse running.

The Royal Artillery finds the range and hits the advancing SC militia battalion.   They failed morale and retreat back.

  But the Continental line and artillery are now in the fight.  Sumter feels one final push could bring victory.


The SC militia horse charge the Legion dragons;  but are thrown back.  The legion counter charges but they are then thrown back!

The NC militia battalion moves into the 3rd camp.  But this time the sight of loot is too much and they fall to pillaging the camp.  The unit is out of the game.

The continental artillery fires at the RNCR who also take fire from the rifles to the flank.  Its too much and they fail morale and rout back taking the BLI with them!

The PoWAR stand their ground, after taking hits from the SC militia opposed them.  Its too much for the militia who now retire.  Sumter decided now it's time to retire his forces to fight another day.   Both sides having taken heavy casualties take stock of the situation.

At this point, its been ten turns and the game is called.  Points wise the Patriots won by a single point.  I think that was pretty accurate.  While the loyalist still held the field they were pretty mauled and had had three if the camps over run.  The surprise attack that took out the loyalist militia at the start and the wide dispersed camps did not help them.  Historically it was close to the actual battle.


To me its been an excellent game and a fun scenario.  Its definitely one to try again. And it was fun to fight with a numerous militia army.  


Friday, March 31, 2023

Big Fight at Hanging Rock Part 1


  Early morning at the Hanging Rock loyalist encampment.  In each of the four camps the Loyalist regiments were assembling and standing to arms.


 Colonel Bryan's loyalist militia were totally surprised.  The early morning peace of their encampment was broken by rifle and musket fire.  Attacked on all sides the South Carolina loyalist militia broke and ran to safety.  The North Carolina loyalist militia were made of  sterner stuff and stood their ground returning fire and hoping for help.


  Colonel Irwin's command arrived on the board.  After crossing the creek and climbing up the hill they cone in on the north east corner and Eastern side.  (each unit rolled to find where on board they would arrive in)


  Davie's rifle men and the NC militia finish off the loyalist militia who break and run.  The first camp is captured and the militia ignore the loot to continue their pursuit of the enemy. ( rolled a 4,5 or 6 to contunue).


 Colonel Bryan rallied the NC loyalist militia but the SC militia continue their race for home.  The Royal NC Regiment (RNCR) and British Legion infantry (BLI) move forward to engage the enemy.  The RNCR gets a good volley into the militia who fall back to think things over!


Coming out of the woods the rifle armed militia destroyed what was left of the fleeing loyalists.  Sumter and Irwin try and bring more troops into line to take advantage of the situation.


 But before they can the RNCR charges to militia marching down the road and send the running back.  The militia horse and other nearby troops also fall back.  Sumter and Irwin are now trying to rally them.

The BLI charge Davie rifle men and also send them back.

The Prince of Wales  America Regiment (PoWAR) charges and forces back the militia lights. 


The victory by the RNCR is short lived.  Out of the woods the Catawa Indians flank the loyalists and put a devastating fire into them. Then the SC militia charges and send the loyalists back.

Irwin and Sumter rally the forces.....

But in the distance clouds of dust suggest reinforcements are on the move and should be arriving soon!


To be continued....... 


Thursday, March 30, 2023

Setting up The Battle of Hanging Rock


   In corresponding with Steve Haller he mentioned that he had fought Hanging Rock as a miniature Wargame.  About twenty years ago he first put it on at Historicon and he kindly sent me his map, order of battle and scenario rules.  It looked great so I am going to be running my game based on his.  All credit should be directed to Steve Haller.  This will give you a fun game with a wide range of unit types  based on the Battle of Hanging Rock that captured the spirit and confusion of the battle.  


  All regiments are based on a 5:1 ratio of numbers per figures. Some units strengths have been fudged for playability.   Rules used are Steve Haller's "Whites of Their Eyes" with 25mm miniatures.  In the order of battle I list the units, how many figures in it and its morale rating.   My table measures 6 feet x 5 feet.  This just works but a slightly longer table would be much better.  Game lasts 10 turns.  Victory determined by most points at end of game.

Top of table is North.  Bottom is south.  Fields mark camps.


British Command:

Major Carden' s command

Royal Artillery  3pdr.   Elite

Prince of Wales American Regiment  30/regulars

Royal North Carolina Regiment  30/regulars

British Legion Infantry   20/lights


Colonel Bryan's command

Bryan's North Carolina Militia  30/militia

Rugeley’s South Carolina Milita 30/militia


  The Loyalist Forces are set up in four camps widely spaced apart.  From north to south on the table the camps are occupied by:  1st camp North and South Carolina Militia regiments, 2nd camp Royal North Carolina Regiment, 3rd camp British Legion Infantry and 4th camp Prince of Wales American and Royal Artillery.


 To represent the surprise attack on the camps and the time needed to assemble the regiments on the first move of the game only the militia in the first camp can move.  On the second turn of the game the rest of the Crown forces can move

Possible Reinforcements:

British Legion Dragoons   8/Cavalry

New York Volunteers     30/regulars

  Historically a troop of the British Legion Dragons or mounted infantry arrived during the battle.  In addition it was possible that the New York Volunteers from Rocky Mount could have also come out to help.  On turn three of the game roll D6 for each of these units.  They will arrive on the turn determined in road column formation on the road on the south edge of the map.

1 - 2 =  turn 3 

3 - 4 = turn 4

5 - 6 = turn 5

Victory Conditions: by the end of the game on turn 10

A.  Inflict maximum casualties on enemy.  1point for each enemy unit under 50% and 2 points for each enemy unit routed.

B. Hold camp.  Must be held by at least one stand and not in melee. Each camp held is 2 points. 


American Command:

General Thomas Sumter field commander


Col. Irwin's North Carolina Brigade

Col. Davie

Davie's NC Horse. 8/cavalry

Davie's NC Rifles. 18/rifles

Col. Irwin

1st NC Militia. 30/militia

3rd NC Militia 30/militia


Col. Hill's South Carolina Brigade:

Col. Hill

Hill's South Carolina Horse  8/militia horse

Catawha Indians  4/lights

SC State Infantry  18/lights

2nd SC Militia  30/militia

3rd SC Militia  30/militia

Set Up:

The Patriot forces will move first each turn.  On the first turn Davie's horse and rifles set up 6" from the table edge in the north west corner.  Irwin's command set up 6" from the table edge on the northern table in the woods in the center. 

On the second turn each unit of Hill's command rolls a d6 to see where they enter the table.  Section 1  is north east corner, 2  is center Northern edge, 3 - 4 is 12" south of north east corner and 5 - 6 is 24" south of north east corner.

Possible Reinforcements:

Continental Artillery       light gun/regular

Maryland Continentals   18/regulars

  Although there were no historical reinforcements during the battle If you wish you could have a possible group of Continentals from Gate's army.  Historically Gates did detached a small force of Marylanders and a gun.   If you want to add  this command they will enter on the north east road in road column.  Roll D6 on turn four.  On a 1,2 or 3 they arrive on turn 4 otherwise they arrive turn 5.


Victory Conditions: by the end of the game on turn 10

A.  Inflict maximum casualties on enemy.  1point for each enemy unit under 50% and 2 points for each enemy unit routed or artillery stand captured.

B. Capture enemy camp.  Must be held by at least one stand and not in melee. Each camp captured is 2 points.  

 Note: Patriot units that capture a camp must roll D6. If a 4,5 or 6 they carry on and continue fighting as normal.  Otherwise unit is out of the fight being too busy pillaging and getting drunk from captured supplies and taking there ilk gotten goods home!