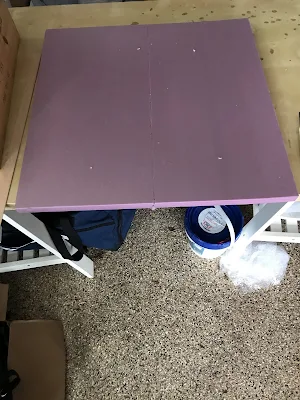
I have always liked the old school style hills. The flat top, wedding cake style of hills. Perhaps I have read and looked through my copy of Charles Grant's "The War Game" too much. Perhaps they remind me of the maps on the old Avalon Hill games or topo maps. They are not what is standard on most game tables today. But then I have never been part of the "in" crowd. My tabletop style is more of a retro Old School. I want simple and functional rather then decorative.
For too long I have wrestled with what type of hill I wanted on my table. What I was looking for was a old school style hill, but with more flexibility. I have limited space so I cannot have too many hills. I also wanted long ridges; perhaps a entire table edges worth. Or a corner of a table. And large hills, not the tiny things that pass for them. And finally the look had to be something out of the book "The War Game."
I recently found an interesting suggestion on a blog called Matakishi's Tea House. The author made a modular series of hills that could be fitted together to create long or short ridges and more. He used cork panels to make these. Search as I did I could not find that material. What I did find at Home Depot were 24" x 24" pink insulation boards about an inch thick. Here was something I could work with! I bought six boards and set off to create my module hills.
First I needed a base for a long ridge or hill. I took three boards and cut them in half. I used two of the 12" x 2 4" boards to make end caps ( the ends of the ridge). With the other four boards I could make one ridge or hill that was 48" long by 2 4" wide. Or break them into hills 12" x 2 4" . Or any combination. The key here is flexibility.
 |
| I cut two boards in half. These will be the basic hills. |
 |
| I cut two extra boards to make the end caps. |
 |
| Here are the end caps. I made a set for both the two boards and single boards. |
I used another board to make smaller versions of the same. I cut the board into three sections; one was 12" wide and two were 6" wide. Again this gave me a lot of flexibility. The remaining board was used for making end caps and a special corner piece. What was important was keeping a straight edge for each piece. This way they could lineup well.
 |
| Here are the smaller hills on top of the larger hill. A nice two story hill. |
 |
| By separating the two sides I can create more variations. Here are two sides of the hill creating a valley between them. |
 |
| A corner piece. |
 |
| Add a base for the big hill to a corner piece and I can create a L shaped ridge. |
In a little over an hour and a half I had the basic pieces cut out.
Next up painting and flocking the boards in part 2.


Nice work Mark. Our group does a compromise between your functionality and something a bit more "decorative"..... We place polystyrene hill modules similar to what you are creating here UNDER our base cloth, so the material of the clothe covers the modules, but they have th flat surfaces we require for bases of troops to occupy. I think it is quite a good method.
ReplyDeleteThank you for the suggestion. While I am waiting for the staid grass to arrive to finish these I am going to try your idea
ReplyDelete