Showing posts with label US War of 1812. Show all posts

Wednesday, February 16, 2022

The Battle of the Four Arms 1814: Introduction


  I have noticed I did not play a lot of War of 1812 last year.  Not sure how it happened.  They are one of my favorite armies, and have an incredible toy soldier look and feel to them.  So its time to correct this in justice and put on a game!

Battle of the Four Arms:

   A small force of (British/Canadian) is sent to guard a major cross road.  A larger force (USA) is sent to capture it.  Although the United States forces outnumber the British/Canadian defenders the terrain is not friendly.   A minor stream hinders their deployment. There are a number of fenced in fields that make good positions to defend.  The flanks are protected by woods to the west and a lake to the east.  It will take A few turns to bring superior numbers on to the field.  So the defenders must dig in a fight a delaying action until reinforcements arrive.  Victory goes to the side who holds the cross roads at the end if the game.  


  British/Canadian Army

On the table:

2nd (Light) Brigade: Lt.Col. Parsons

Glengarry Light Infantry. (24) 

Incorporated Militia Upper Canada (24) 

1st Militia Brigade (24) 

2nd Militia Brigade (24)

Mohawk Warriors (12)

Royal Marine Artillery Rocket Battery (light)

19th Light Dragoons


Reinforcements:

at start of game roll 2d6 for turn they enter the game.

3rd Brigade Lt.Col. Morrison

1st Regiment

89th Regiment

100th Regiment

Flank Companies (Light Infantry and Grenadier)

Royal Artillery (medium)

United States Army: Maj.Gen. Brown

Enter on road on south side of table on first turn.  All units in road column.  This is the order of march.

Advanced Corps:

United States Dragons

New York Volunteer Dragons

1st US Rifles 


2nd Brigade: Brig. Gen. Ripley

1st Regiment

21st Regiment

23rd Regiment

5th Regiment

Artillery (medium)


1st Brigade: Brig.Gen. Scott

9th Regiment 

11th Regiment

22nd Regiment

25th Regiment

Artillery (medium)


Rules used are "Mr. Madison's War"

Scale is 25mmm

Game will last 14 turns.

Terrain:  stream is fordable.  Units move up to it and stop.  Next move cross and full move.  

Woods:  Artillery and cavalry can not enter.  Formed units must be at half speed.  Skirmishes move full speed.

Fences provide soft cover.  Takes one move to cross.


Tuesday, March 16, 2021

The Battle of The River Raisin 23 January 1813


This is the second of the two battles.  Fir the furst please read theborevious post.


The American army camped in and around Frenchtown awake to find the woods filled with Canadian Militia and Native Americans.  In addition British regular infantry and artillery are spotted.  all are within musket range.

The American commander assembled his men.  The Kentucky militia fell in at the works around the town.  The Regulars, caught out in the open started the game in shaken status.  The rifles spread out to maintain contact between the regulars and militia.


In the woods the British commander has his artillery and the 41st Regiment in the center facing the town. He plans to use his artillery to batter the militia while the regulars are held back for the final blow. On either flank a militia regiment and a war band of Natives prepared to out flank the American works and surround the enemy. 


The British artillery started the game by firing on one if the militia regiments to its front.  In either flank the Canadian militia and natives raced to outflank the American works.  The US regular Regiment rallied off its shaken status in time to receive fire from its front and flank.  But a deadly volley cut down some if the over enthusiastic warriors to their front.  While the Americans passed their morale checks, counting heads they wondered how long this could last.


Keeping the Americans pinned down to their front, the Canadian infantry and Native Warriors continued to encircle the town while the artillery and muskets continued to inflict casualties.  The US regulars managed to fight their way back to the town.  But within their ranks many wondered how safe was that.

It was at this point that the most dramatic incident in the game occurred.  As the Native Warriors moved into the town Magua saw his old enemy Colonel John Carroll of the Kentucky militia.  Having vowed to kill his enemy Magua took aim at Carroll and shot him in the back. * The Militia to his right and left never noticed as they were too busy with enemies to all sides now.


At this point everything that could go wrong did go wrong.  Both militia regiments failed their morale checks and routed.  But they were now surrounded and no place to go.  The rifles saw the British 41st regiment advancing with lowered bayonets coming towards them.  And the US regulars were busy fighting enemies to their front and both sides.  There was little to do but throw down their arms and surrender and hope the British could keep the Native Warriors from killing them all.


Conclusion:  another quick and fast game.  Just as one sided as the previous battle.  But fun nevertheless.  Also, how often do you get to fight two different battles with the same terrain?  I think if I do this again I would give the Americans another militia regiment to give them more of a chance.  Having the British/Canadian forces set up and start the game in musket range is very deadly, but also historically accurate.  A little tinkering might make this a more evenly matched encounter.  I enjoyed the research and learning mire about these battles.  Which is after all one reason were enjoy this hobby of ours.


* in the rules I used a single figure needed to roll a 2 or less on a 10 sided dice to score a hit.  Magua rolled a 1.  It was very amusing as the real John Carroll is a friend on the Fife and Drum miniature forum who is always getting shot in the back in his French and Indian War or western gun fight games.  I could not believe that this happened in my game.  Sorry John!


Monday, March 15, 2021

The Capture of Frenchtown 18 January 1813


              The first of two battles for Frenchtown.  


South of the town the River Raisin is frozen over and infantry can cross with a movement penalty. North of the town there is a forrest and wide ditch which provides cover for infantry.  It is within musket range of the town.  

The commander of the Kentucky militia crosses the frozen river and advances towards the town.  He places his two militia regiments together with his rifle armed men to either flank.  If he can take and hold the town he can declare a great victory which if course will help his political career back home.


The British/Canadian commander deployed his Native Allies to either flank with his militia  in the center.  He is outnumbered and plans to delay the advancing Americans while avoiding casualties.  He knows reinforcements  are a couple days march away. 


Taking advantage if their longer range weapons the rifles immediately start picking off their enemies.  Once within range the militia exchange vollies with the Canadians taking the worse of the exchange.  they also fail their morale test and rout towards the woods.  The Native Indians quickly join them.  With the militia in the town the Canadians and their allies withdraw to fight another day.  For the Kentucky men it has been a easy walk in the park which will grown in the retelling as a great victory.


In the next days the Americans are joined by a US regular infantry regiment.  In addition they start building a fortified fence line between the village and the woods.  Its cold and they prepare for an uneventful nights rest.  The Kentucky militia camp in the town while the regulars camp in the open outside the fortified lines.  Next day they hope to continue the works.  A couple soldiers grumble about the woods being awful close to our lines.  Nothing to worry about they are reassured...


Conclusion:

A neat small skirmish.  Not very exciting but it sets the stage for the next battle.


Friday, March 12, 2021

Battles of Frenchtown 18 & 23 January 1813


The Battles of Frenchtown, better known as the Battle of the River Raisin or the River Raisin Massacre, was a series of battles in Michigan Territory that took place from January 18–23, 1813.  These were two separate and different actions fought during the War of 1812.  They were also different from most battles I have fought in that the majority of troops were Militia, Volunteers and Native Americans.  The second battle did include small detachment of regulars for each side.  Both battles were fought in the winter so again these will be very different types of actions.  


Wayside from battle site of the second battle.


Wayside of the first battle.

For a quick history lesson here is a recounting of the actual historical events.  http://en.wikipedia.org/wiki/Battle_of_Frenchtown

The first battle (January 18) saw a American Force of Kentucky Militia and Volunteers capturing the village from a smaller group of Indians and Canadian militia.  The second battle saw the British/Canadians recapturing the town.  Both sides included regulars and the British had two small cannon.  The battles were  better suited to a skirmish action or a Sharp Practice type game.  I am upping the number of figures per each unit but keeping the ratio of figures per side to fit my collection.  So this will not be a full historical recreation.  More of a Hollywood based on type story.

Order of Battle:

18 January:

Defending the village of Frenchtown:

Canadian militia regiment (24 figures)

Native Warriors (12 figures)


American attacking force:

2x American militia regiments (24 each)

1 x Rifle regiment (12 figures) 


January 23;

Americans defending Frenchtown

2 x Militia regiments (24 figures)

1 x Rifle unit (12 figures)

1 x US Regulars (24 figures)


British Canadian attach force:

1 x British Regular (24 figures)

2 x Canadian militia (24 figures each)

2 x Native Warriors (12 each)

Royal Artillery (2 x light guns)


Friday, February 19, 2021

Review of US Soldier vs British Soldier War of 1812


I received the Kindle edition of this Osprey series book.  There is not much out there on the North American War of 1812 in wargame circles. So when something comes out it is met with great rejoicing.  I saw this originally on the Osprey publishing website and pre ordered it right away.  I then spent the morning reading, and rereading it.  As someone who has limited dollars to spend on his hobby I have to say I was most happy with the book and think it well worth adding it to your library.


First off, what the book is not.  It is not a uniform guide.  It is not a history of the war.  There are other better books for those subjects.  Nor is it about the various Militia, Volunteer or Fencibels regiments.   

What it is is a comparison if the United States Regular soldier and his British counterpart.  It details their training, organization and background.  It goes into the drill manuals and how regiments formed up for battle.  There is some information about uniforms but just basics.  And there are three workman like accounts comparing the two armies at three major actions:  Queenstown Heights 1812, Chrysler's Farm 1813 and Chippewa 1814.  


The heart of the book is how the US regular army grew and developed during the war.  At the start the regular army was often the poor step child compared to the state militia.  Officers were often political appointed and ignorant of their duties.  There was no solid non commissioned ranks to train and maintain discipline and to be an example like in the British army.  Drill manuals?  Take your pick! Because there was no standard it was each regiment on its own.  As the war progress the incompetents are weeded out and a solid officer and non commissioned officer corp evolves.  A group of talented and dedicated officers rose to command positions.  The difference between the army at Queenstown and Chippewa was as light is to darkness.  


The book is not biased or one sided.  The British regular was a professional who maintained that reputation throughout the war.  The US regular evolved and developed throughout the war.  So yes, there is much more about him in the text and how this development came about.  Again the book is a comparison of the two regular soldiers from the start of the war to the end.  I think it is important to understand this before you buy the book.    I enjoyed it very much and found lots of good food for thought and lessons for my wargames armies.  


Wednesday, February 3, 2021

West Ford village 1814


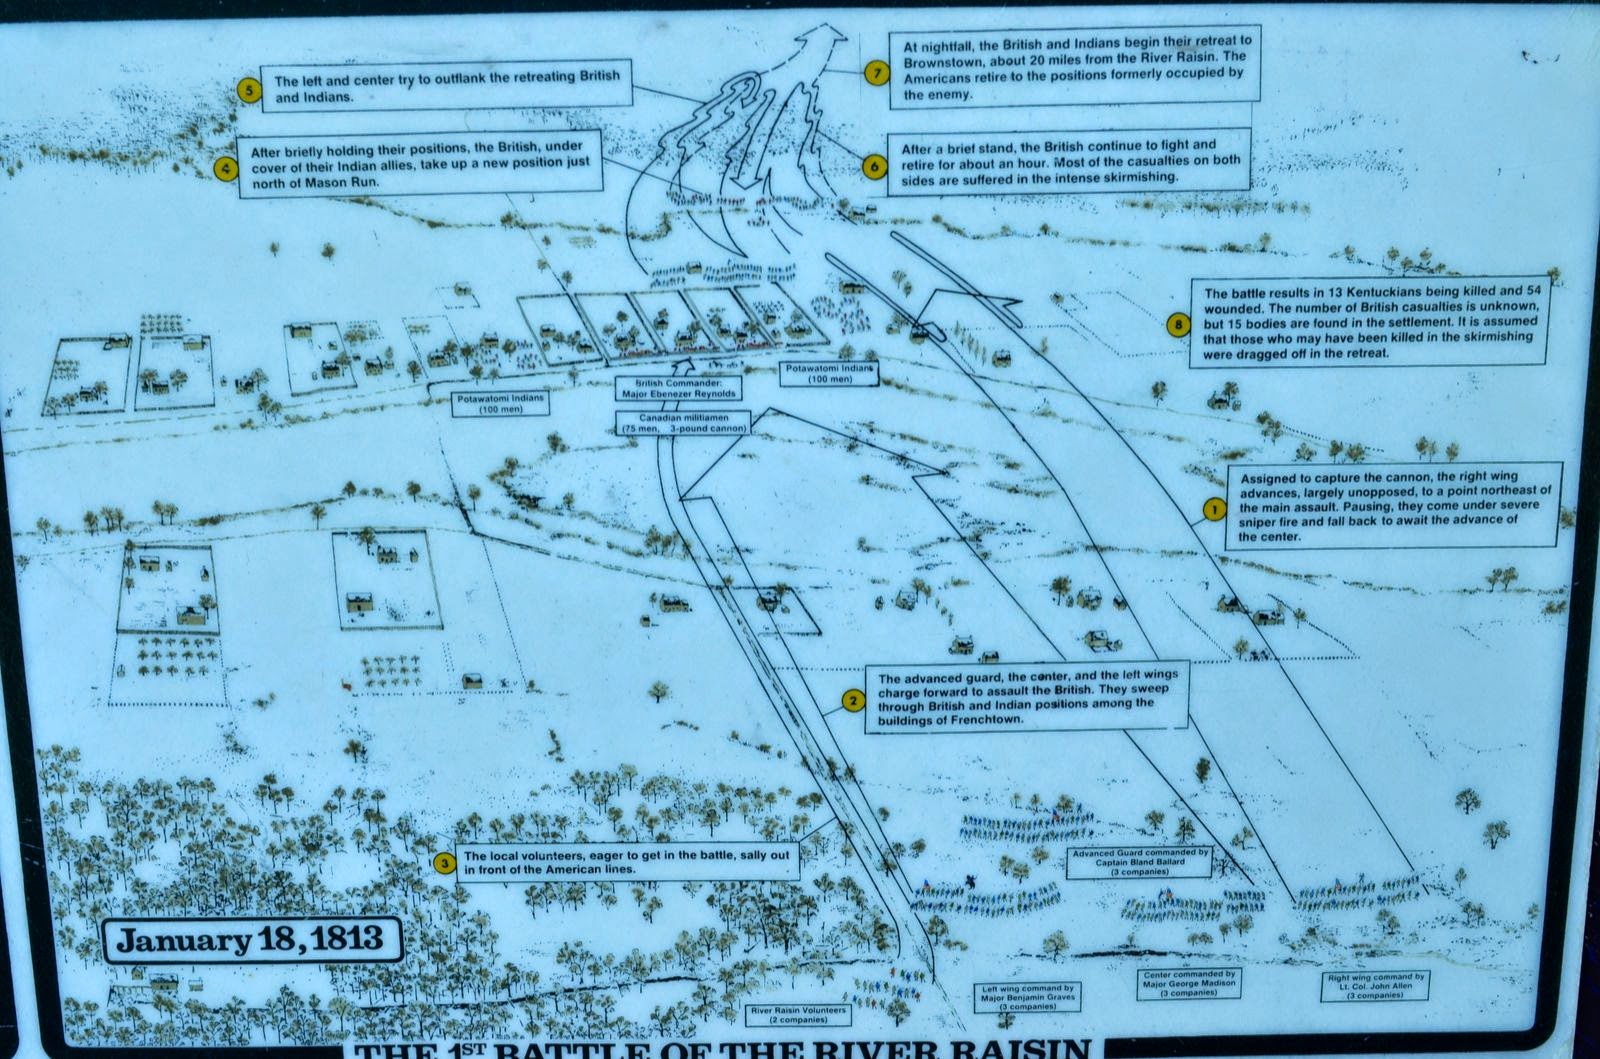
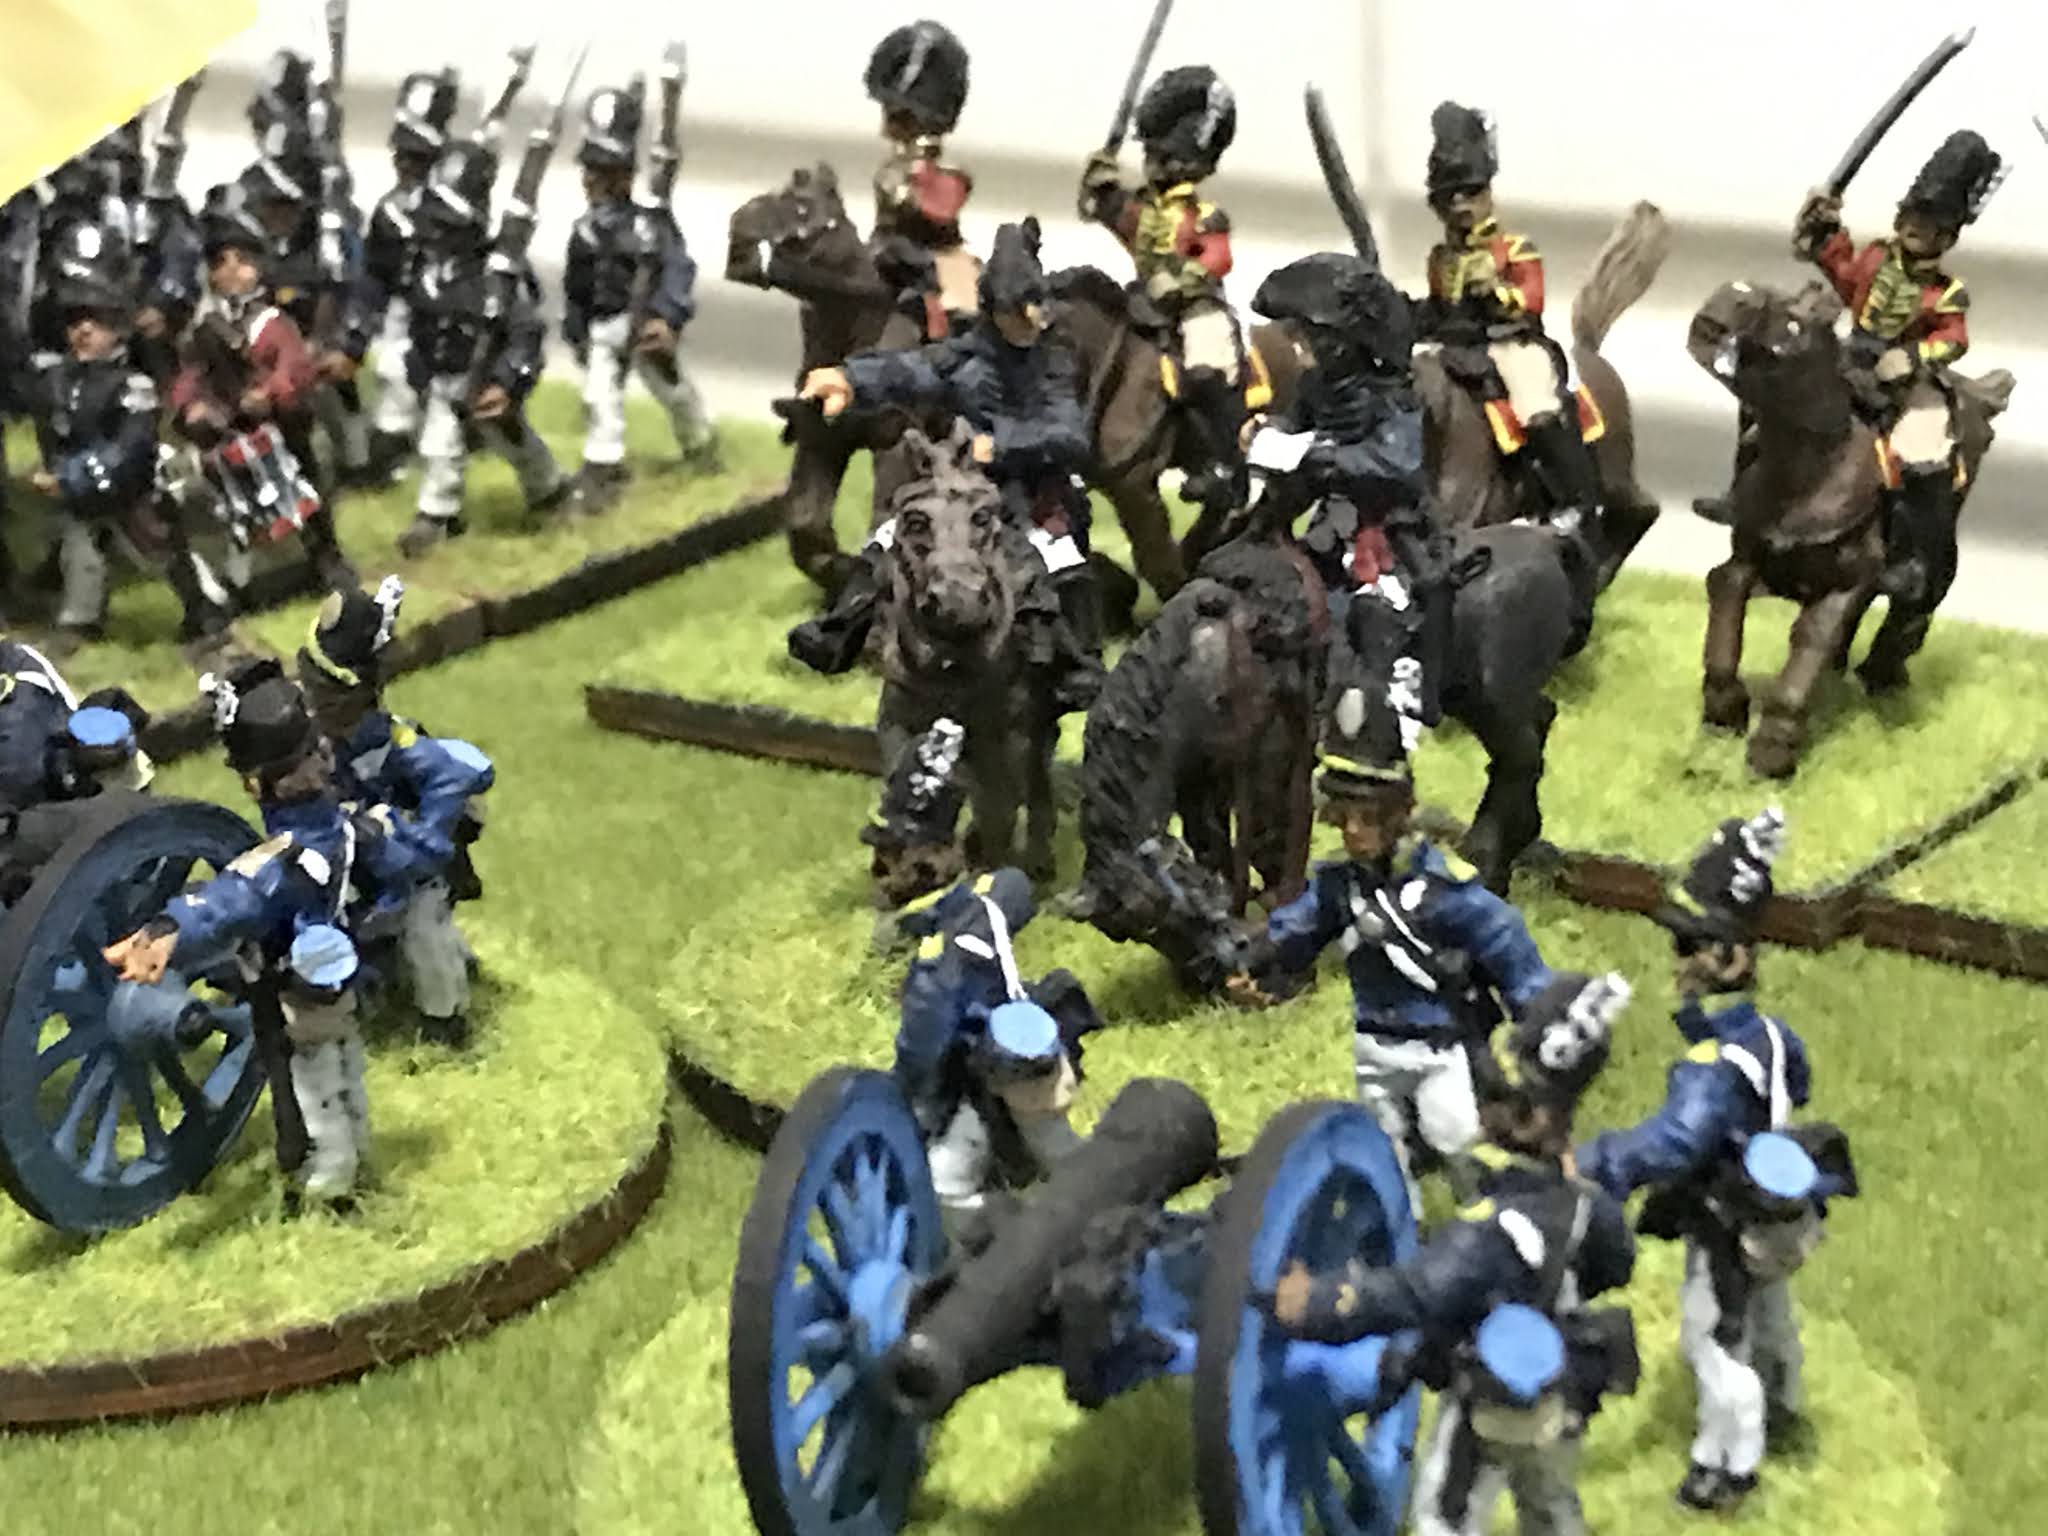
I enjoyed the American Revolution battle problem so much,  I cleared the table off of troops and brought my War of 1812 collection out.  This should illustrate that the game can be fought out in any horse and musket period battle.  This time the Americans are on the attack and the British/Canadian forces defending.


General Rial needed to hold the enemy for seven turns and withdraw his army to fight another day.   Cautiously, he placed his regular infantry (41st, 49th and 100th Regiments and the Lincoln and York militia) back from the front, his guns forward and the native Indians in the woods opposed to the north ford and bridge.  Once the enemy had started to cross he would move his infantry forward.  Two regiments (100th and 49th) were  to defend the south ford while the militia defended the north ford and bridge.  In reserve he placed a troop of militia cavalry and the 41st Regiment.


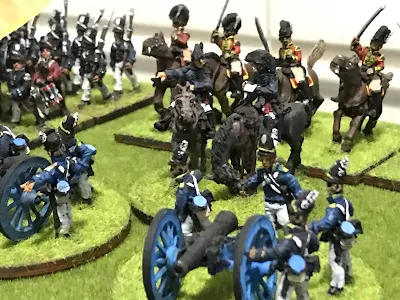
General Brown commanded two Infantry Brigades.  Scott's Brigade of the 9th, 11th US 22nd & 25th US Infantry and  Ripley's Brigade of the 1st, 5th, 21st, 23rd US Infantry. The 1st US Rifle Regiment, three batteries of artillery and a troop of the New York State militia Dragoons rounded out his army.  Rather then attempt an out flanking move he determined to bull through across the bridge and both fords.  Scott would take his Brigade and cross at the lower ford while Ripley's brigade crossed at bridge.  The Rifles, with the 5th US would move through the woods and cross at the northern ford.  With overwhelming numbers and better troops (two of Scott's regiments were rated elite)  they would capture the town and drive off the enemy easily.


Turns 1 & 2:

The Americans were surprised to find the woods covering the north ford undefended.  The Rifles quickly moved through the woods to take position at the ford.  More slowly the 5th US infantry with General Ripley followed. (Note: Skirmishes move full movement rate through woods while troops in formation move at half rate and get a DP each turn moving) Brown himself took the 1st US infantry across the bridge and deployed into line.  The 21st US followed but both battalions found themselves under fire from Artillery and Indians to their flank. 


  Scott marched his Brigade forward and got two battalions (22nd and 25th US) across.  But they too quickly came under musket and artillery fire.  Worse, Scott was lightly wounded while steady his troops. (He lost 2 Command points) An unforseen occurrence was the movement of the infantry massed the artillery fire and the American guns stood useless!


Turns 3 & 4:

With part of there infantry across the southern ford and bridge the American commaners quickly tried to dress ranks and remove the DP's which were rapidly growing. (Notes: you can remove a DP by a commander spending Command points and also by halting for a turn)

 The Rifles crossed the and spread out to protect the 5th as they crossed. At this point the British plan came into action.  In the center cannister  and musket fire disordered the 1st US (5 DP's).  Here and at the north ford the militia charged the disordered troops in front.  Although normally the militia would be handily defeated by the regulars he to the DP's the militia defeated both the 1st US infantry and 1st US Rifles.  Routing backwards the regulars disordered the regiments behind them and the front line came to a halt.


The 100rd and 49th charged Scott's regiments which were in terrible shape. (Note:  5DP' s on one regiment and four on the other)  The 25th US was destroyed in the fight with the 100rd and the 49th continued their fight with the 22nd US next turn.  Scott, already wounded took yet another wound and was escorted off the field.  


At this point, with the entire front falling apart Brown ordered his regiments to pull back.  The surprised British and Canadians cheered and fired a salute.  Their victory was totally unexpected.

Conclusion:

I like the changes to the rules.  They clear up (to my mind) the confusion and provide a fast fun game.  One point to remember is once you start to accumulate Disorder points things get out of hand.  One or two are not bad but after three they seriously effect your Regiment.  You subtract one dice per DP when firing and subtract two per each DP in close combat.  After five DP you start removing stands of figures.  This is what happened to the American side.  Their front line regiments could not remove DP's fast enough and the enemy charged into regiments with four or more DP's.  

I think if I fight this again I need to get another table to give myself a bigger battlefield!  Also,  by attempting to out flank the enemy up the road to the south you spread out the defender and make it harder for him to concentrate his forces against you.  Just compare the last game to this one on who had the better plan.