Showing posts with label War of 1812. Show all posts

Monday, June 13, 2022

Cook's Mill 19 Octiber 1814


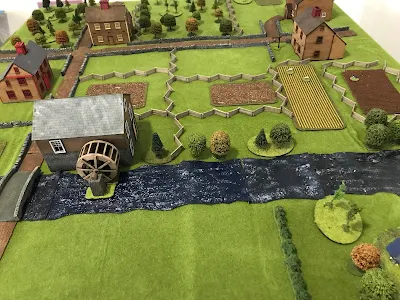
  This game will be based on the historical Battle of Cook's Mill in September 1814.  A reinforced American Brigade was sent to destroy British/Canadian supplies in one of the final actions of the war along the Niagara. In this version the Americans must cross as the river and destroy the enemies supplies located in the town of Cook's Mill.  The Canadian/British force will try and prevent that from happening.   I have altered the historical order of battle slightly to better fit my present collection of figures.  In addition I have added possible reinforcements to create a more interesting game.  

  All figures are 25mm and rules used are my version of the Fife and Drum miniature Rev War rules changed for the War if 1812.  


Order of Battle:

American Order of Battle:

1st Brigade: Brig. Gen. Scott

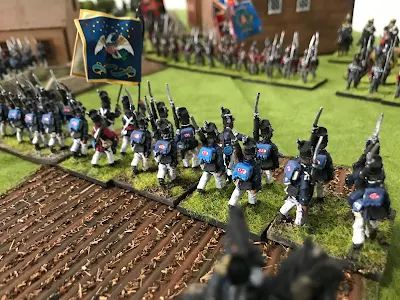
1st Rifle Regiment (24)

9th US Regiment (24)

11th US Regiment (24)

22nd US Regiment (24)

25th US Regiment (24)

(All regiments are rated as regulars.  The Rifle Regiment starts the game deployed by the cross roads West of the bridge.  The remaining regiments enter the game one regiment each move  on the east road. )


Possible reinforcements:

3rd Brigade: Brig.Gen. Porter

9th Pennsylvania Volunteers (24)

1st New York Volunteers (24)

2nd New York Volunteers (24)

Canadian Volunteers (24)

(at start of game roll 2d6 for turn they enter the game.)


  In order to destroy supplies located in a building move a unit next to that building. You must roll a seven or better on 2d6 to destroy the supplies.  The unit attempting it cannot be in close combat or fired at that turn.  

British/Canadian Order of Battle:

2nd (Light Brigade): Lt. Col. Parsons

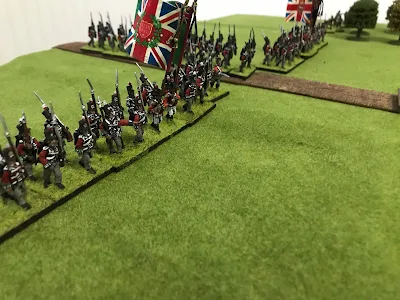
Battalion of Incorporated Militia of Upper Canada (24)

Glengarry Light Infantry (24)

1st Militia Brigade  (24)

2nd Militia Brigade (24)

Mohawk Warriors (12)

Royal Artillery (medium gun)

Royal Marine Artillery (rocket)

(This force deploys on the table top at the North West corner.)

Reinforcements:

3rd Brigade Lt.Col. Morrison

1st Regiment

89th Regiment

100th Regiment

Flank Companies (Light Infantry and Grenadier)

(at start of game roll 2d6 for turn they enter the game.)


Monday, May 9, 2022

Wake up! FIghting Stoney Creek


Set up:   The American encampment was behind a long ridge line.   In addition a shallow creek was in front of the ridge. A rail fence was along the ridge that gave cover to troops behind it.   One regiment was placed in front of the ridge as an advanced guard.  Unfortunately they were asleep.  The rest if the American army was asleep in their encampment areas (marked by rough ground) behind the ridge or in the case of the artillery off to the side of their guns.  Woods covered both flanks.  Once alarmed the Americans will roll to wake the regiments and respond to the attack.  There are six American regiments and two guns.

  The attacking British and Natives enter the board and advance towards the American lines.  There are two line regiments, a combined flank battalion and a small warband of native warriors.

Turns 1 & 2:  The Americans roll a "5" so they continue to sleep soundly.  The British advance forward.  On turn 2 they roll a "4" so they continue their rest.


Turns 3 & 4:  the Alarm is sounded!  Americans roll to activate.  Indivual stands more forward towards the danger.  One of the American guns is manned, the other not.  Stands in range fire!  No hits (really poor die rolling here!).  Infantry rolls one dice per stand (or one dice per 2 indians)  with a six a hit.  Artillery roll one dice and half the number rolled rounded down are hits.

The British 8th regiment charges the advanced American Regiment.  The Native warband also attacks.  Since all American stands are not activeated they first test morale with a negative 2 per die roll. The American regiment is soundly defeated and retreats.  (note:  In close combat you roll one dice.  A 1,2 the British withdraw, 5,6 American withdraw otherwise continue.  I then fight another round until one side is beaten).


The combined flank battalion races up the road to engage the American guns.  They take three hits on two stands which withdraw due to poor morale ( if a stand takes a hit through fire it tests morale).


Turns 5 & 6:

More American stands activate and head towards the battle.    They attempt to form a line to drive off the attackers.  There is lots of fire back and firth but very few hits.  (Stands when they are withdrawing check morale.  If they pass they return to the fight.  If not they continue withdrawing but subtract from roll.  This is bad and causes them to rout off board).

Flank battalion captures the two guns!

Turn 7:

The 8th regiment is locked in close combat with an equal number of Americans.  It's a back and forth action with stands withdrawing  and finally the American line breaks. In the center the Flank battalion also drives back the stands in front if it.  

And in the woods the Native warriors chase the enemy from the woods.


Turn 8:   American numbers are starting to tell.  Fresh stands are forming into lines.  The 8th regiment is driven back.  More re American stands move up to engage the 49th and Frank battalion.    At this point the British side decided to start a withdrawal taking the captured cannon with them.  They have blooded the invader and captured their artillery and with few casualties.  The American army has seen the attackers off but now must decide if they should continue the advance through the country.

Conclusion:

I have played this now about four times.  It is always a fast game.  If the Americans can get an early warning it speeds up their activation and gives them more time to bring up stands.  Eventually, as in the historical battle numbers tell and the British withdraw.  But until then its a series of individual actions and you see how much damage they can do. There are a lot of Americans and only half as many British.  But the game dies give a goid feeling for the actual battle and the results are also similar.


   All in all it's a fast fun game and can be changed to almost any time period depending on what figures you have.  Give it a go, you may enjoy it!


Tuesday, February 22, 2022

Battle of the Four Arms: Conclusion


The battle continues......


  Both sides attempted to rally shaken and routed units.  The 1st US Rifles had had enough and in spite of General Brown yelling encouragement ran for the hills.  On the other hand the Canadian militia and GLI both rallied and joined the fight. 


  In the woods the 11th US Infantry charged after the Mohawks.  Although the Canadian militia came to their help the Mohawks had enough for the day and left the field.  


  All along the line both sides threw in their final troops and blasted away at each other.  Over head the rockets continued to burst spectacularly but without causing g any damage to either side!


    Morrison felt the time had come for desperate measures.  Ordering the GLI to step aside, the tiny 19th Light Dragoons charged forward against the 1st US regiment.  Off to the side the combined Flank Companies joined in against the 21st US.  In the fight the 1st US easily defeated the 19th who then routed off the table.  But the Flank companies beat the 21st US who then failed their morale and routed!  The 1st US seeing this also tested morale and were shaken.


In the center the 100th Regiment charged the 9th US, who failed their morale test and retreated!  


Could the tide be changing?  


   Alas! A little too little and too late.  At the cross road General Scott threw in his battalions to break the center.  The 9th US charged the 89th Regiment while the 11th US and 25th US charged the 100rd Regiment.  In the woods the 22nd US advanced steadily and traded cookies with the Canadian Militia.  Although the 89th stood firm and defeated the 9th US the 100rd gave way and routed opening that side.


On the other side Ripley threw the 1st US against the GLI who were worn down from their long fighting earlier.  They we're defeated and retreated back.  At the sane time the 23rd US and 5th US overwhelmed the 1st Regiment.  To contain the Flank companies Ripley moved up the Light Dragoons and the 21st US.


With everything collapsing arround them the British commander ordered a retreat.  It had been a gallant defense but it was now time to try and save something.


Conclusion:

  As you have guessed the battle was a scaled down version of the Battle of Quatre  Bras.  As a game I think it worked out pretty good.  But I would give the British/Canadian side an extra battalion for the set-up and increase the Mohawks to 24 figures rather then twelve figures.  I think this might evan it out better and give them a better chance for winning. 

  The rules, an adaptation of Jim Purky's Rev War rules worked well.  They provided a fun and fast game and I would highly recommend them.

  One thing I noticed over the pictures was how bad the dice I used to mark casualties looked.  These were replaced by smaller markers with stones and grass which blended in better but still did the job.


Sunday, February 20, 2022

Battle of the Four Arms: part 2


  Lt.Col. Morrison at the cross roads of Four Arms quickly deployed his brigade.  


  The 100th Regiment and 89th Regiment marched to the British/Canadian right flank and took position along a rail fence line.   The combined Flank companies and 1st Regiment are sent to the left to protect that open side.  Meanwhile the 1st Militia, GLI and IM hold on.

 General Brown ordered Ripley to take his 2nd Brigade and go around the village. He ordered his artillery and cavalry to support them.


  Ripley pulled the 5th US Infantry back to rally and sent the 23rd US Infantry to settle up with the Incorporated Militia.  They quickly charged and routed what was left of the militia then moved up to support the rest of the Brigade.  The 1st US and 21St US took position out flanking the village.


The 1st Regiment and Flank battalion having formed line moved into musket range.  For the next couple turns the two lines blasted away at each other.  Neither giving way all taking casulties.


  General Scott continued to bull forward determined to take the cross roads.  He pulled the 25 US Infantry out of line to regroup and pushed the 9th US Infantry and 11th US Infantry forward.  The fresh troops were too much for them and the Canadian Militia and GLI both gave way and retreated.  


  In the woods the 1st US Rifles continued to skirmish with John Norton's Mohawks.  Moving back and forth casualties mounted until the Rifles broke and routed.  fleeing the woods General Brown tailored up to rally them.  

  With their enemy gone Norton moved his warriors against Scott's Brigade.  From the cover of the woods they skirmishes against them.  This forced Scott to pull one battalion back to deal with them.  


  At this point a final push from either side could win the battle.  The initial battalions holding the crime roads for the British/Canadian had been forced back.  But now fresh regiments had taken position.  The United States forces had taken heavy casualties but continued to advance.