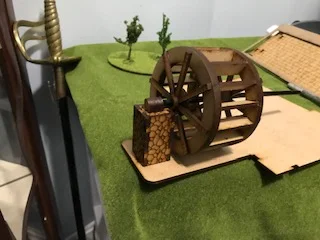
The battle of St. David is a fictional encounter in the Niagara during the War of 1812 . It is the summer of 1814 and the American General Brown is marching his army towards Queenstown to rendezvous with the American fleet. Their goal is to sail to Kingston, join the American division under General Izard there and capture the enemy naval yard and destroy all ships there. This blow may cripple the British Navy in the great lakes. British General Drummond, determined to stop him moves his army into a position by the village of St. David. Here he will attempt to stop the American advance.
The armies for this battle will be based on those who fought at Lundy's Lane. Being the largest battle fought during this campaign it provides a wide variety of regiments and three good sized historical commands per side. As with many things in the miniature war game world I have substituted some regiments who were in the area for those who were there. This is because I have a number of favorite regiments who I wish to see on the table. In addition I have increased the size of some regiments to provide a better table top game.
 |
| View of the Battlefield from the British/Canadian position. |
 |
| View of the Battlefield from the American position. |
The battle ground will be based on the typical countryside of the Niagara. Farmers fields, woods, a small stream on part of the village. There is a slight ridge on the edge of the table the Americans must capture to continue their advance. Numerous fences should provide the British/Canadian forces good defensive positions to try and hold the Americans.
 |
| The village of St. David. |
Victory conditions are the American army must capture the ridge so they can exit off the table towards Queenstown. They have untill the end of game night (7:00 to 11:00 pm). The British/Canadian army will try to prevent this. If either side is reduced to less then 60% of strength they will withdraw off the table towards their base.
Order of Battle
American Army
General Brown Commanding
Unattached:
US Artillery battery
New York Militia Dragoons (6)
1st Brigade: General Scott
9th US Infantry regiment (24)
11th US Infantry regiment (24)
22nd US Infantry regiment (24)
25th US Infantry regiment (24)
Towsend's battery US Artillery
2nd Brigade: General Ripley
1st US Infantry regiment (24)
21st US Infantry regiment (24)
23rd US Infantry regiment (24)
Ritchie's battery US Artillery (24)
3rd Brigade: General Porter
Pennsylvania Volunteers (24)
New York Volunteers (24)
Canadian Volunteers (24)
British/Canadian Army
General Drummond commanding
1st Brigade: Lt.Col. Scott
1st Regiment of Foot (24)
8th Regiment of Foot (24)
Flank Companies (12)
Royal Artillery
2nd (Light) Brigade: Lt.Cil. Pearson
Glengary light Infantry (GLI) (24)
Incorporated Militia Upper Canada (IMUC) (24)
1st Militia Brigade (24)
Norton's Indian detachment (6)
Royal Artillery
3rd Brigade: Lt.Col. Morrison
41st Regiment of Foot (24)
49th Regiment of Foot (24)
Flank Companies (12)
Unattached:
19th Light Dragoons (6)
Royal Marine Rocket battery


