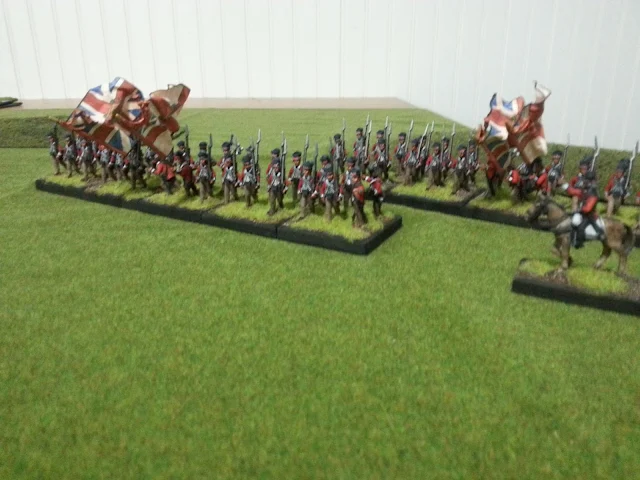
Friday, August 12, 2016

Webster's Brigade

  The name of my blog is taken from an incident during the Battle of Guilford Courthouse. As the 23rd advanced towards the American line they paused when faced by a long row of leveled muskets. Colonel Webster rode up and yelled "Come on ! My brave Fusiliers!"
My RevWar armies are based around the Camden- Guilford Courthouse campaign.  During that time Webster commanded the 23rd and 33rd regiments.  Both veteran units and hard campaigners, they are dressed in shortened coats,  round hats and gathered trousers.  The 23rd has blue facings while the 33rd has red.  These made up the solid core of this hard fighting command.

Miniatures for Colonel Webster's Brigade are from Fire and Drum miniatures.  These are outstanding miniatures and a must have for fans of the American Revolution period.  No parade ground soldiers here, but well researched campaign uniforms. These are really first class!

Guest appearances in the brigade were made by the 7th Royal Fusiliers and an Light Infantry battalion. Both of these were destroyed at Battle of The Cowpens.

The Lights are made up of companies from the 16th, 71st and Prince of Wales volunteers.  A bit unusual in that it is the only unit which I know of that saw British and Loyalists serving together in the same regiment. They were at Camden and Cowpens and numerous smaller skirmishes between. As there is no documentation on what they actually wore during this period I have dressed them in a light infantry sleeved waistcoat (or roundabout) which were typical of that time and available in supply returns.


The Royal Fusiliers were a hard luck group at least during their time in America.  Most of the command were captured. during the Canadian campaign of 1775.  Rebuilt, the regiment was sent down south and met a similar fate at The Cowpens. Although many popular historians say the regiment was made up of new recruits at this time returns suggest otherwise.  The 7th would be dressed similar to the 23rd for this time period.  While I have not, as yet painted them I plan on adding them to my collection.  That way I can field my fusilier brigade from the Crimean (7th, 23rd and 33rd) in its 18th century appearance.

Thursday, August 11, 2016

71st (Fraser's) Highlanders


The 71st (Fraser's) Highlanders saw extensive service throughout the American Revolution.  Raised as a multi battalion regiment for service in America they fought under Sir William Howe's army in 1776 and 1777 as their own brigade.  Service in the south started with Colonel Archabald Cambell's expedition to George in 1779.  After that they fought in almost all the major actions.  By the time of Camden the two battalions were severely reduced in numbers and could barely together field a serviceable battalion.  While the first battalion was destroyed at The Cowpens the second served with the Cornwallis field force through to Yorktown.


These outstanding figures are from Kings Mountain Miniatures and are simply the best highlanders for this time period, period.  They really capture the feel of this hard fighting unit.  All are dressed in gaitered overalls rather then kilts. Although some modern reconstruction have them wearing trewes I have yet to find a period source to confirm it. So,  I painted them in tan overalls.  Flags are by The Flag Dude.

I field them as two 30 figure battalions, and they have there own brigade commander in highland dress.  Historically they can field with Cornwallis' field force or going back a bit with Colonel Archibald Campbell's army that invaded Georgia in 1779.

Monday, August 8, 2016

The Courier, Rev War and Steve Haller

I discovered The Courier magazine in the early 1970's at my local hobby store .  It opened my eyes to the wonderful world of miniature war games. Sure, I had been playing board games from Avalon Hill, but  here were real rules for playing toy soldiers.  Great looking figures, on terrained table tops and lots of research to get correct uniforms and tactics.  Most people were playing Napoleonics, especially a game called Column, Line and Square. The author wrote the most entertaining battle reports and gave great insight in to how and why he wrote his rules and how they represented his historical research.  This was great stuff and I eagerly looked forward to each new issue. When I got into reenacting I found a small group of friends who also war games.  We read and studied copies of the Courier and plotted games and figures.

One of my favorite columns was by Steve
Haller.  He was my guru for American Rev War gaming.  Now those of us who were interested in this were a very tiny smallish niche within a small niche.  But what he put out in each article was a treasure trove of information.  Battle reports, unit history and uniform research.  There were suggestions on organizing troops and discussions on realistic objectives for our games.
More importantly he backed what he wrote about with source materials.  After each article I was off to the library or used book store to find these holy grains of knowledge.  It was through these articles that I set out on a degree in history and eventually a thirty year career with the National Park Service at Rev War sites.

Two articles by Steve Haller always have stood out.  The first was a two part article on Greene's and Cornwallis armies 1780 - 81.
Here were listing of units, troop strengths and uniform information.  The second was a campaign formatted to firefight the Cowpens - Guilford courthouse campaign.  This was outstanding. One did not worry about logistics and map movement. Instead there were a series of interconnected battles who results carried over to the next fight.

 Each side started with a historical order of battles.  Each month of the campaign players were given a series of options.  So January 1781 as Morgan you started with his light Corp.  On a die roll either Picken's or Sumner's or both militia may join you.  You then had the option of either attacking Augusta, Ninety Six or fighting Cowpens.  The British rolled and might reinforce the outposts you were attacking.  While you had the historical order of battle you might get or lose reinforcements.  Once battles happened casualties were removed and you moved to next month.  Replacements and reinforcements were figured in. You had a wonderful system to set up possible battles and firefight the campaign.  Simple but neat and very playable.

When I restarted my rev war armies recently I knew I wanted to do two things.  First do the collection in 25mm.  Second was to build the Greene-Cornwallis armies and re fight the campaign that Steve Haller wrote about too many years ago.  In my next posts I will document building the armies and how the campaign worked out.

But first a word of thanks.  To Dick Bryant for his wonderful publication which started me in this hobby, and Steve Haller who started a life long fascination with (and thirty year career working in) the time period.

Saturday, August 6, 2016

Russian Army of the Crimean


  The Russians were the start of my Crimean collection and have a long and curious history.  The original group were an ebay purchase.  It was a  large collection, painted in the old Peter Gilder style of very glossy varnish.  Most different from my painting style! To pay for them I sold two small 15mm napoleonic armies.

 Once I had the Russians I was able to sell
about half of them, which paid for the entire army!  So a free army (well, sort of, kinda).

 I have very seldom bought painted figures over the years.  To me one of the joys of the hobby is painting and creating your own armies.   Because of this I have never had the attachment to these figures I do to those I have painted myself.  So over the years slowly I have been replacing those figures with my own. As this is long and some what tedious effort it has taken a long time. Often I have sold or traded painted for unpainted castings. By now half the infantry, one
battery and all the column (brigade) commanders have been replaced.  Eventually I will replace the cavalry and remaining infantry.  The remaining artillery is fine and I love the army command stand which I will keep.


My Russians are based around the historical 16th Division at the Battle of the Alma.  I have 16 infantry battalions (4 regiments), 2 Heavy and 2 Light batteries, an Cossack, Lancer and Hussar regiment.  Not a bad little army that I obtained for free (sort of).

Tuesday, August 2, 2016

Charge of the Light Brigade rules review


I have been playing "Charge of the Light Brigade" since 2003.  These are home brewed self published rules from the author David Raybin so possibly only a few of you have tried them.   I thought I would share some of my impressions about the rules and how they play.  I will also post a battle report of a game we played with pictures to show how they work in a latter post.  They provide a fun game which captures the spirit of the period and deserve a wider audience.

  I will state right off I am a big fan of these rules. I like simple rules, but with a twist. I like regiments to look like regiments.  And it is important to me that that a group of colorful miniature soldiers represents such and such a regiment.  I want a game I can play in a evening, gives a period "feel" for the time period played, have fun with and come to a conclusion.  "Charge of the Light Brigade" does all of these.

The rules are a simple I Go U Go but with a difference.  Each side rolls for initiative with high side getting first go.  If you won the roll last time you add one to your roll.  Each of your regiments or batteries do one action (move, change formation, fire or remove a morale point).  To move roll two dice (or more depending on formation) and that is how far you can move.   After all your units have moved  you may spend a command point (CP) per unit and that unit may do a second thing.

  Here is something that sets this set of rules aside from all others. The author has taken the simple move/counter move system and twisted it. Every unit has a commander (i.e. Colonel). He has so many command points (CP). More if he and the regiment are good, less if mediocare or poor. Russians often get around 8 (sluggish, dull)  while British line get 12 and elite Guards might get as many of 16.  Better units can do more at critical times. But when your CP are gone they are gone.

OK, now it is your turn, and every unit on your side has done one free action. You may then spend a CP and do something else. Fire, remove a Morale marker or what ever. It gives you a chance to take advantage of something or react to what is happeneing on the table. BUT for every action there is a reaction and the enemy now gets to react against that unit and can either return fire at you or change position/facing.   But only against the enemy that spent that CP.   In a past game a Russian battalion removed a Morale pip by paying a CP. The British reacted by firing at the unit and puting 2 morale pips right on back (darn good shooting with the Guards who rolled four 6's). So you spends your money and takes your chaces.  This portion of the rules is what gets a lot of comments and attention from people who  have played this game for the first time. And rightly so. It is simple, inovative and fun. But I would recommend a GM to run the first few games you try to ensure you all stay on tract and not move ahead.  To track CP I put a sticky note under the command figure stand with the number of that units CP.
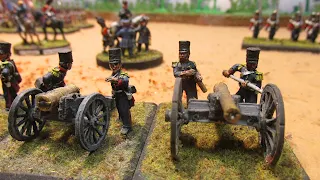
  Firing is simple. You throw 1D6 per stand for Infantry and 2D6 per artillery stand. Cross refinance with the firing chart for weapon vs. target and this gives you the chances for a hit. Since there is a possible saving roll you might not lose all those figures hit. Yes, the dreaded saving roll.  But here it takes the place of all those calculations you have to do with other rules.  Watch out for double 6's as they can cause a morale marker to drop onto your unit.  Each infantry stand has four figures. Once all four figures are gone you remove the stand.  Until then the stand fights on.

To me, the neat thing about this system is that you forget about calculation, tables and charts. Hits, saves and morale are all tied into each other. The save chart also brings a little of the old "national modifiers" into the mix. With Russians, who get saved on a 5 or 6 no matter how many stands are left you have to beat each one with a stick until they are all dead. You get that steady, dogged feeling you read about. The British start with a high save chance (they dodge bullets like the bat man said the rules auther) but as they loose stands save chances go way down so they wither away. A little fragile. Poor Johnny Turk never gets a save


Morale is a sneaky system that most folks don't think a lot about until it bites them! You get a morale pip for any number of things (crossing an obstacle, being fired at or having friends route past you). Since you subtract 1 pip from every die roll morale effects everything you do. Move, shot or fight it ties into morale.
In a past game a Russia commander with three morale markers on a regiment found out fast that he could not shoot, or save casualties with that unit. With morale markers, once you get into trouble it comes fast and furious. To me this is a superior system then used in many rules. The unit is effected, and everything it can do is effected.

Close Combats takes a bit getting used to since it is very different from most rules. You do not charge like in other rules. You move within 2' of the enemy. THEN, you would have to pay a Command Point or wait till next turn to close and fight. This gives the defender a chance to do something. Like blast the enemy with a close range volley that causes casualties or mabey a morale marker.  It is actually hard to close into close combat due to small arms fire.  But when you do it can be devastating.

  I really love these rules. The game feels like the Crimean to me based on my reading.  Also for a I Go U Go both sides get to do something so no sitting around. In my games Russians tend to form columns (or at least reinforced lines) and try and close with the British quickly.  (One player has nicked named them "Zulu's in overcoats.") Russian artillery is better then the allies and there is a lot of it.  Russian cavalry is, well, sluggish.  The British tend to want to shoot at things. And shoot a lot. Cavalry is small but very aggressive.  By the way small numbers of cavalry will not damage infantry who can usually shoot them down before they close. Many of my games have seen a single British battalion stopping massed charge like at Balaklva.  The French are interesting as their line have muskets while elite troops like Zouaves have rifles and  more CP.  So each army is very different from the other.  You have to work with what you have and get the best out of them.