Showing posts with label Rules. Show all posts

Tuesday, May 12, 2020

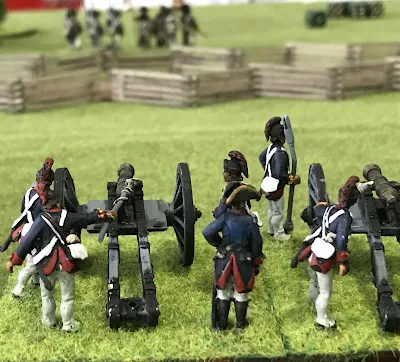
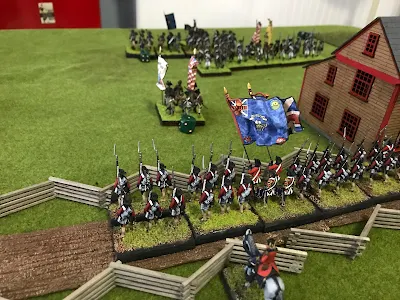
Test game of "Whites Of Their Eyes"


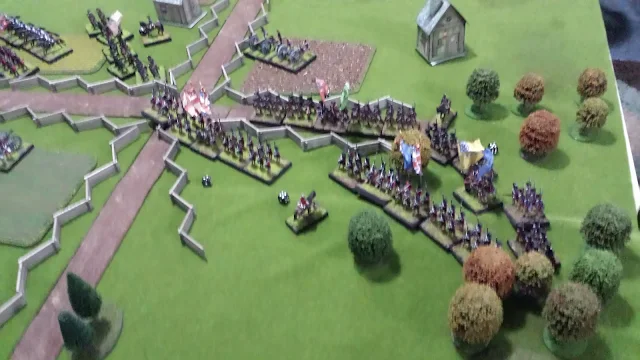
The best way to learn a set of rules is to play those rules.  So my son Nathaniel agreed to try a game.  We set up a small scenario and started playing.  The table was 6' x 5' with a cross road in the center.  The two houses blocked fire but you could not put troops inside them.  


The order of battle for both side were:
American Order of Battle:
General John Glover
3rd  Continental Regiment (30 figures)
13th Continental Regiment (30 figures)
26th Continental Regiment (30 figures)
Militia battalion (30 figures)
Rifle battalion (12 figures)
Hamilton's Artillery battery (2 x 6pdrs)
3rd Continental Light Dragoons (6 figures)

British Order of Battle:
General Lord Rawdon
23rd Regiment (30 figures)
33rd Regiment (30 figures)
49th Regiment (30 figures)
Legion Light Infantry
17th Light Dragoons
Royal Artillery (2 x 6pdrs)


The British set up in the center and marched forward.  The 23rd, Royal Artillery and 49th with the 33rd in reserve.  The Lights and cavalry advanced up the right side of the table  to try and turn the American flank.

The Americans sent the 3rd Continental and Rifles down their right flank to out flank the British.  The Artillery took position in a hill by the British right flank opposed the lights and cavalry. In the center the 13th, 26th and militia hoped to hold on while the rest of the army enveloped the British .

We rolled to see who moved first and Nathan won.  Turn sequence is  check morale, move, fire and after fire movement for first player then second player .  Nathan moved his artillery into two great positions.  One on top of a hill and the other looking down the road.  Both have great views of the British and clear fields of fire.   At this point In the game we both made a error.  Artillery can move and fire in a turn.  Light guns can move 6" or move and fire 3" and can fire out to 36" .  Heavy guns move 3" or 1" and fire and range out to 4 8"  .  Unfortunately we decided they were heavy guns but moved them as Light guns and fired as heavy.  Part way through the game we discovered this.  Artillery was very devastating, possibly because of this.  We will do better next time.

The battle started with American artillery targeting the British lights at close range.  When you fire artillery  you first roll to see if you hit the target.  Roll one dice and point out where you are aiming.  Close range is either a misfire if you roll a one otherwise hit.  You then place a block 4" x 2" centered on where you hit and you roll for the figures within it up to six figures.    Each figure hit gets a saving roll.  Regular infantry save on a 5 or 6 but at close range you lose one pip so save on a 6 only.  Poor rolling saw the light take four hits and then failed the morale check .  


The British guns stayed together and concentrated their fire on the 26th Continental.  We found it important at medium or long range to aim at a point where is you hit it causes the most damage as the  aiming roll could send the shot slightly the right or left of aiming point.  This possibly missing the target or only hitting a small amount of figures.


After a couple turns most  regiments got within small arms range.  The American rifles had superior range but we're slower to reload so fired every other turn.  Light troops could also split move (move - fire - move) but Nathan did not try that.  by this time my Lights had routed off the board due to casualties from artillery fire.  To fire small arms you count up the figures,  check the range and in the small arms chart see how many possible hits.  The target gets to roll a saving roll for each possible hit.  Note that if you are behind cover (walls etc) you add one to the saving roll.  So if you save on a 5 or 6 if under cover you save on a 4, 5, or 6.  Regiments can move and fire.  

In the center the two British line regiments and two guns decimated the 26th Continental which routed.  The American guns continued to cause long range hits in the British 49th regiment.

The American cavalry moved around the British flank and charged the British cavalry.  In a melee both sides throw a dice, add or subtract modifiers and multiple by number of figures.  High side wins.  Loser take a 20% casualties and retired.  Winer take a 10% casualties from front rank.  The Americans easily drove off the British dragoons and then turned against the British center.  


By this time the British were in trouble.  Their lights and cavalry were gone.  American cavalry were moving against their right.  On the left the American 3rd Continental and Rifles were turning that flank. The 49th were taking heavy casualties due to Artillery fire.  But marching steadily onward the British 23rd and artillery took on the 26th (which had rallied and returned) and broke them.  They then routed the Militia battalion. Soon only the 13th Continental stood in their way.  The 49th and 33rd turned to protect their left flank.  In the small arms exchange the 49th was down to less then 50% and failed their morale check.  As they retreated the 33rd charged the 3rd in a attempt to turn the battle.  But it was not to be.  They rolled very poorly ( a 1) and the Americans rolled  very well (6) so they lost lost the melee.  Athough the British 23rd were advancing victorious the rest of their forces were in retreat.  With over 50% losses the game was called and declared a American victory. Well done Nathaniel!


It was a fun game and were learned a lot. For next time I think a cheat sheet for both players will be very useful.   We will be trying another game soon.


Wednesday, May 6, 2020

Rules Review "The Whites of Their Eyes"


  It should be of no surprise to readers of this blog that I am a big fan of self published War game rules.  Nothing against the professional published glossy rules.  I buy them and read them and often play them at club game nights.  But for my own games I really like something different.  So I am always on the hunt for new rules.  Once I find a set I tend to stay with them.  This way I actually learn the rules.  "The Charge of the Light Brigade" rules I use for my Crimean games I have been using for over twenty years.  I just discovered Jim Purkey 's rules and very happily use them for War of 1812.  But my American Revolution gaming has of late been lacking something.  While I enjoy "Loose Files And American Scramble" no one I game with shares my interpretation of the rules.  This means games tend to get into long discussions of what the rule really meant with too many interpretations causing a disruptive gaming night.  So I am on a quest for a better set of rules and I believe now I have found them.


   "The Whites of Their Eyes" by Stephen E. Haller are a set of wargame rules for fighting battles of the American Revolution.  These were originally published by The Courier in 1977 and revised and updated in 1985, 2000 and 2018.  At present the rules are available from the author who still plays them.  They could be considered a throw back or "old school" rule set.  They include saving throws, alternate turns , and use six sided dice.  To me that can be a good thing.  After play testing them I found they give me a fun game which stays within the spirit of the time period.  There are also a number of unusual twists within the rules to make things very intetesting. 

A couple aspects of the rules I really like. 

 Light troops in open order or as skirmishers  (rifle men, jagers, Indians, legion infantry and light infantry) can actually act like light troops skirmishing.  They have a split move.  You can move a portion of your movement, fire then move the rest of your movement.  In play this gives them a obnoxious quality.  You can move up to get a better shot then move away.  But be careful you do not get caught by line troops in a melee as they will eat you up.  Shooting by these troops while in a open order is also different.  Line troops volley by counting up the total number figures and checking the chart for number of possible hits.  Defender then throws a saving roll to see how many casualties they get.  Skirmishers fire one dice per figure. Regular Light Infantry, because they were better disciplined can close ranks and fight as elite infantry.    Once a unit has taken casualties skirmishers can aim at the command stand to possibly hit the unit commander.  If they do it effects the unit when they take a morale test.  Another nice rule is troops behind a wall or fence get a little additional range (3 inches)  to their fire because they are resting the weapons.  Saving rolls for hits are interesting.  Instead of multiple additions and subtraction for results it's a simple modifier for hits.  Personally I like it.  

Artillery is also a little different then most games.  When they fire you point to target and where you are aiming.  Roll a dive and this gives you a deviation.  You might hit right where you aimed, or slightly to the right of left depending on range.  Close range is always where you aimed and there are no saving throws for figures but at close range.  

Morale is interesting.  You have a basic morale factor, and can add and subtract  modifiers to it.  Roll two dice and you have to get a seven or better to pass.  Militia in the open or near British regulars get a deduction.  But in woods or under cover they get a addition.  Lots of little things like this give flavor and cause troops to act as their historical counterparts.  

I like these rules a lot.  It gives you a simple fun game which stays to the spirit of the period.  To give a better idea of how they work my next post with give a small game.  Stay turned for more.

Update 7 May 2020:  Steve Haller, the author of these rules has given me permission to send out a PDF version of the rules.  The total page has the authors email if you wish to contact him.  Please use the contact form at the bottom of the blog page here to send me a email and I will forward the rule to you. 

Evidently some emails to me have not gone through. I can be reached at dinosaurfifty5@yahoo.com

Thursday, November 21, 2019

Rules I use for Wargaming: War of 1812


Mr Maddison's War:
War of 1812 rules

These rules for gaming the War of 1812 originally started out as a set of rules for The American Revolution by Jim Purkey at Fife and Drum miniatures.  These are offered free on his miniature site.  I liked them, and made a few changes to better reflect the new time period.  In addition I have posted a few clarifications and additions here to how we play the game.  They provide a really fun and fast game. Since playing these rules I have had lots of wonderful games and great fun.  My title for these rules, "Mr Maddison's War meets Fife and Drum" reflects the negative image the war had among many Americans.  In addition I often use these rules for American Revolution games with my friends who do not care for Loose Files.

Please do not be fooled by the simple mechanics of these rules.  They are simple but create lots of deep thinking here.  The "I Go You Go" fire and move system has a major twist.  Casualties are removed when they happen. So it's important who fires first.  But if you move first you may pin your opponent in a unfavorable position or run down exposed units.  As I said a lot of thinking goes I to these rules.

In addition, if you like them here is a beautiful example of how to play by the author.  I really wish more rules writers would do this.  Brilliant!  As the two men from Guinness would say.

http://altefritz.blogspot.com/2017/08/fife-drum-awi-rules-tutorial.html

Now, on to my interpretation.

Here are the rules. A nice one page set ready to go!


Move first, fire second, move second, fire first:  when it is your turn to fire remove all casualties from hits.  No, casualties removed do not get to return fire that was the advantage of firing first.

Retire facing or not facing enemy:  deduct 2" from move to retire with back towards enemy.  Half move to retire facing enemy or move sideways.

Charges or moving into melee:  during your move declare charge and point out target.  Defender tests morale;  if they pass they stand and fire at charger. If not retire a column distance back shaken.  There is no charge move bonus.  Fight one round of melee then side who has lost more figures tests morale.  If they fail they retire one column move back facing the enemy.  If they pass then other side tests morale.  If both sides pass then attacker is considered to have failed to push back defender from their position.  The attacker retire one column move back facing the enemy. 

Routing units effect on other units:  ignore friendly units routing past if router is lower morale.  Take morale test if equal or better morale.

Multiple units in melee:  If two units vs one distribute casualties evenly to both units.

Wheeling regiments:   Wheels are made from the left, right, or center of the unit only.

Fences, small streams:  Units move up to them and stop move.  Next move you cross obstacles and continue your move. If both units are touching the same fence line and facing each other across it neither gets the benefit of the fence.

Artillery:  one operation costs 1/2 move, this included fire.  So you can limber and move half movement;  move full move if limbered; unlimber and fire Artillery cannot enter woods, need infantry to knock hole in fences to cross.  Any friendly unit within a friendly artillery arc of fire, if the arc of fire goes through two opposite sides of that friendly unit the artillery can not fire.  Arch of fire is measured  from cannon barrell, with of stand forward like a bowling alley


Difficult terrain (fields, Rocky ground): cost 2" for every 1" of movement in it

Woods; units stop movement at edge of woods.  They enter next turn (similar to fences).  Once in woods skirmishers troops (skirmishes or Indians)  move their full movement, while formed troops move half their movement.  Small arm range is half.  Only skirmishes get cover modifiers. Yes, it sucks for regulars in the woods (please ask General Braddock).

Indians:  always unformed, in mass formation (I.e. in a bunch).  No penalty to change direction.  In woods move full movement.  Units fired at by Indians for first time check morale.  In open clear terrain go one step down chart for firing and morale (if on line "C" use line "D").  Indians are not shock troops. They race about being obnoxious and scaring volunteers and militia who are not used to them.


Rockets:  roll  d10.
   10 = hit, one casualty and test morale.
6 - 9 = test morale
3 - 5 = miss
     2 =  hit nearest friendly unit test morale


Monday, November 18, 2019

Rules I use for Wargaming: The American Revolution


  An older set of rules which were available in the first issue of Wargames Illustrative.  Written by Andy Callan these rules capture the feel and tactics of the war. I was instantly taken with them and have been playing them since they first came out. Not to everyone's taste but a great favorite of mine.  They have brought a lot of fun games and enjoyment to me over the years.

 The Disorganization Points (DP) are a clever way to tract the temporary wavering, disruption and casulties of a regiment.  This can be caused by movement, terrain, small arms, artillery or close combat.  Better trained regiments can dress the line and reform while poorer regiments tend to fall to pieces.   This is done by removing DP's.  A unit stops, does nothing for a turn and can remove a DP based on training and quality.  In addition a mounted officer can assist by helping to remove additional DP's.   Quality in this game is vastly  superior to quantity.

Here is a link to the rules as they first appeared in WI #1
https://www.wfgamers.org.uk/andy-callans-articles/loose-files-and-american-scramble

  A personal observation of mine.   When I have played these rules with players for the first time long time wargamers get confused or bogged down.  The rules are unlike most wargamer rules out there.  But reenactors or individuals who have been in reenactment regiments pick them up just fine.  I find this most curious.  But then I do tend to think of table top miniature  games more as battle reenactments then simulations.

  Here is a quick cheat sheet for playing these rules.  They started as a quick cheat sheet put out by the Corlears Hook Fencibels.  I have made a handful of changes within these.  I have made a couple minor changes to better reflex how I interpret the game. These have been based on reading Matthew Spring's With Zeal And Bayonets.   By the way I play with 25mm figures instead of 15mm but have not changed the measurements.  Please feel free to adapt as you like.  Also, if you currently play these rules I would love to hear from you about how you play them.  Any house rules or such.


Loose Files & American Scramble Quick   Reference Sheet

Order of Play in a Turn (all movement is simultaneous)
1.Compulsory Retreats/Routs following combat in previous turns.
2.Calculate Morale effects provoked by 1 above.
3.Firing (units can fire or move not both)*
4.Allocate Command Points.
5.Move units. Announce attempted advances to contact/charges before moving.
6.Combat.
7.Re-dress ranks (according to training) of units that did not move this turn.
*skirmishers may fire then move

Command Points CP
Move own commander up to 1 die (choice of average or D6) inches = 1CP
Inspire troops in combat (give +1) = 3 CPs *
Rally (remove) one DP = 2 CPs *      * must be in contact with unit

Disorder/demoralization points DP
1st class (elite, veteran) may remove up to 2 DPs per turn if stationary and not in combat
2nd class (line) may remove 1 DP per turn as above
3rd class (green,  partisans) may remove 1 DP per turn if stationary, not in combat/shot at
4th class (militia, Indians) may only remove DPs with aid of an officer
5th class (unmotivated Indians) may only remove DPs with the aid of the Army CO
Casualties
Once a unit has taken the maximum number of DP's (5) each DP after is a casualty.  Remove a stand of infantry  (3 figures), troop cavalry (2 figures) or artillery stand.

Artillery and Small Arms Fire
Artillery Fire range under 10 inches close, 10-30 long (light) 10-36 long (medium)
Roll one D6 for each stand firing modified by below:
+1 heavy gun, target column or limbered artillery, same target/range as last turn
- 1 new target, each DP of firing stand, light gun
- 2 target in fieldwork or stone building or target in skirmish order/unlimbered
Long range inflict 1 DP for 4 or higher.
Short range inflict 1 DP for 2 or 3, 2 DPs for 4 or 5, 1 DP and 1 casualty for 6 or higher.

Infantry fire (Only skirmishing infantry can fire and move in the same turn)
Musket range 8 inches, rifles 10 inches. Roll 1 D6 for each stand firing, minus DPs of firing unit. Halve result shooting at skirmishers/unlimbered artillery, halve if target in fieldwork or building. Round up.
1 DP for each 6 rolled. Skirmishers roll again on 5, with subsequent 4,5,6 = 1 DP.

Movement
Movement is the number of dice score X inches
1st/2nd/3rd class units may move one or two average dice
4th/5th class units may move one average dice or one average plus one D6
Skirmishers may move an extra D6, Cavalry may move one or two extra D6
Formed troops get 1 DP for each 1 or 2 rolled, 1, 2 or 3 in woods.
Hessian infantry (except Jaegers and von Bose regiment in South) move one average die or one average die + 2 inches.
Cavalry who charge must roll at least 3 dice. Can change speed 1 dice up or down per turn.
Moving in woods or uphill -1 inch from each die rolled.
Wheeling, change formation or facing : pivot either right or left stand and line up figures,   1 DP (2 if under fire).
Cross fence/wall,; stop at obstacle, continue nice next turn, 1 DP (2 if under fire).
Retire facing enemy: ½ move get 1 DP if cavalry or under fire.
Heavy artillery takes two moves to limber/unlimited take 1DP
Medium artillery one turn limber/unlimited take 1DP
Light Artillery can do two operations each turn. ( move and unlimber, etc) 1DP

Morale: seeing friends retreat/rout within 6 inches
Troops ignore retreat of lower grade friends but get 1 DP if such rout within 6 inches.
If equal/higher grade friend retreats within 6 inches get 2 DPs.
If equal grade friend routs within 6 inches get 2 DPs and one stand deserts.
If higher grade friend routs within 6 inches get 3 DPs and one stand deserts.


 Combat occurs when a unit closes with enemy.   To close must declare charge to contact before movement otherwise just stop 4 inches from enemy.  Each side throws an average die modified by below:

+3 each training grade better than enemy
      defending fort or stone building
+2 defending fieldwork or wood building
      making bayonet attack*
+1 terrain advantage
      officer spends 3 CPs inspiring troops
- 3 in skirmish order
     attacked in flank/rear
- 2 each DP, each casualty
- 1 outnumbered
- 2 outnumbered 3-2
- 3 outnumbered 2-1
- 5 outnumbered 3-1 or worse   1 cavalry figure = three infantry, one gun = six infantry

Result is difference in scores:
+4 or more: Easy victory get 1 DP. 1st/2nd/3rd class obey orders. 4th/5th class pursue.

+2/3: Successful get 1 DP and (vs. infantry or artillery, not in fort, building or fieldwork) one casualty. Halt one turn.

+1/even/-1: Stand off both sides halt fight continues next turn. Each get 1 DP and (unless infantry facing cavalry or bayonet attack, or in a fort, building or fieldwork) one casualty

-2/-3/-4: Driven back get 2 DPs and one casualty. Retreat one move at maximum speed.

-5/-6/-7/-8: Defeated get 2 DPs and 2 casualties. Retreat at maximum speed behind next line of friendly troops, or next terrain obstacle if no support.

-9 or worse: Routed run away at maximum speed to beyond enemy artillery range or next terrain obstacle, whichever is further. Get 4 DPs and 2 casualties.

* Option only for British to represent aggressive tactics during war.

House rules:
Must move full distance rolled unless point out stopping point (i.e. stop at fence line or top of hill, etc).

Can roll movement for entire brigade if moving together.

Corlears Hook Fencibles House rules: after 2nd stand off in a row both sides retreat 1 average die unless defending an obstacle, fieldwork, building or fort.

Militia units with 50% losses or more flee the field  remove from table. Other units with 75% or more losses flee. No further DP losses by friends who see this


Friday, November 15, 2019

Rules I use for Wargaming: Crimean War


   I have been playing "Charge of the Light Brigade" since 2003.  These are home brewed self published rules from the author David Raybin so possibly only a few of you have tried them.   I thought I would share some of my impressions about the rules and how they play.  They provide a fun game which captures the spirit of the period and deserve a wider audience.

You can download a set of the rules here:
https://miniaturewargaming.com/blog/charge-of-the-light-brigade-rules/


  I will state right off I am a big fan of these rules. I like simple rules, but with a twist. I like regiments to look like regiments.  And it is important to me that that a group of colorful miniature soldiers represents such and such a regiment.  I want a game I can play in a evening, gives a period "feel" for the time period played, have fun with and come to a conclusion.  "Charge of the Light Brigade" does all of these.

   The rules are a simple I Go U Go but with a difference.  Each side rolls for initiative with high side getting first go.  If you won the roll last time you add one to your roll.  Each of your regiments or batteries do one action (move, change formation, fire or remove a morale point).  To move roll two dice (or more depending on formation) and that is how far you can move.   After all your units have moved  you may spend a command point (CP) per unit and that unit may do a second thing.

  Here is something that sets this set of rules aside from all others. The author has taken the simple move/counter move system and twisted it. Every unit has a commander (i.e. Colonel). He has so many command points (CP). More if he and the regiment are good, less if mediocare or poor. Russians often get around 8 (sluggish, dull)  while British line get 12 and elite Guards might get as many of 16.  Better units can do more at critical times. But when your CP are gone they are gone.


   OK, now it is your turn, and every unit on your side has done one free action. You may then spend a CP and do something else. Fire, remove a Morale marker or what ever. It gives you a chance to take advantage of something or react to what is happeneing on the table. BUT for every action there is a reaction and the enemy now gets to react against that unit and can either return fire at you or change position/facing.   But only against the enemy that spent that CP.   In a past game a Russian battalion removed a Morale pip by paying a CP. The British reacted by firing at the unit and puting 2 morale pips right on back (darn good shooting with the Guards who rolled four 6's). So you spends your money and takes your chaces.  This portion of the rules is what gets a lot of comments and attention from people who  have played this game for the first time. And rightly so. It is simple, inovative and fun. But I would recommend a GM to run the first few games you try to ensure you all stay on tract and not move ahead.  To track CP I put a sticky note under the command figure stand with the number of that units CP.


  Firing is simple. You throw 1D6 per stand for Infantry and 2D6 per artillery stand. Cross refinance with the firing chart for weapon vs. target and this gives you the chances for a hit. Since there is a possible saving roll you might not lose all those figures hit. Yes, the dreaded saving roll.  But here it takes the place of all those calculations you have to do with other rules.  Watch out for double 6's as they can cause a morale marker to drop onto your unit.  Each infantry stand has four figures. Once all four figures are gone you remove the stand.  Until then the stand fights on.

  To me, the neat thing about this system is that you forget about calculation, tables and charts. Hits, saves and morale are all tied into each other. The save chart also brings a little of the old "national modifiers" into the mix. With Russians, who get saved on a 5 or 6 no matter how many stands are left you have to beat each one with a stick until they are all dead. You get that steady, dogged feeling you read about. The British start with a high save chance (they dodge bullets like the bat man said the rules author) but as they loose stands save chances go way down so they wither away. A little fragile. Poor Johnny Turk never gets a save

   Morale is a sneaky system that most folks don't think a lot about until it bites them! You get a morale pip for any number of things (crossing an obstacle, being fired at or having friends route past you). Since you subtract 1 pip from every die roll morale effects everything you do. Move, shot or fight it ties into morale.  In a past game a Russia commander with three morale markers on a regiment found out fast that he could not shoot, or save casualties with that unit. With morale markers, once you get into trouble it comes fast and furious. To me this is a superior system then used in many rules. The unit is effected, and everything it can do is effected.

   Close Combats takes a bit getting used to since it is very different from most rules. You do not charge like in other rules. You move within 2' of the enemy. THEN, you would have to pay a Command Point or wait till next turn to close and fight. This gives the defender a chance to do something. Like blast the enemy with a close range volley that causes casualties or mabey a morale marker.  It is actually hard to close into close combat due to small arms fire.  But when you do it can be devastating.

  I really love these rules. The game feels like the Crimean to me based on my reading.  Also for a I Go U Go both sides get to do something so no sitting around. In my games Russians tend to form columns (or at least reinforced lines) and try and close with the British quickly.  (One player has nicked named them "Zulu's in overcoats.") Russian artillery is better then the allies and there is a lot of it.  Russian cavalry is, well, sluggish.  The British tend to want to shoot at things. And shoot a lot. Cavalry is small but very aggressive.  By the way small numbers of cavalry will not damage infantry who can usually shoot them down before they close. Many of my games have seen a single British battalion stopping massed charge like at Balaklva.  The French are interesting as their line have muskets while elite troops like Zouaves have rifles and  more CP.  So each army is very different from the other.  You have to work with what you have and get the best out of them.

Tuesday, November 12, 2019

What rules I use for my games


      War game rules are a very personal thing.  There are numerous sets of rules out there.  Which rules we use with our miniature figures are a deeply personal thing and reflex a lot about us and how we view our games.  It is also something I feel that is great about this hobby of ours.  There is something for everyone.  Find a set of rules that appeal to you and how you would like the game to play.  Stick to them, learn them and enjoy the game. 

      I will state right off I am a big fan of  certain types of rules.  Here is what I look for in a rules set.


       I like simple rules, but with a twist. Mechanisms which create challenges.  You do not need complex rules to do this.  I am thinking of the one brain cells types.  The Disorganization Points (DP) in "Loose Files and American Files" represent a variety of problems to a battalion. They effect fire power and morale much better then complex math formulas.  A simple move first and fire second or fire first and move second also makes for numerous command problems for a player.

       I like regiments to look like regiments.  They should have a good number of figures arrayed in two ranks with regimental colors in the center of the battalion.  A most noble sight!   It is important to me that that a group of colorful miniature soldiers represents such and such a regiment.  The history of that regiment, and what it did in real life means something to me. There is often a reason why I paint the regiments I paint.  After all its why we read and research our chosen periods of time.  Otherwise we could spray paint our figures and he done with it.  And I like to command regiments and brigade.  I enjoy that of game rather then higher command. The rules Volley and Bayonet are a wonderful set and are a fantastic game.  But I cannot relate to the units on the table. It is too abstract for me.  I am happy to play them, but I will not be investing my time and energy bin creating armies for them.  My happy place in miniature wargames is a lower level of command.  Find your level or type of game.

        I want a game I can play in a evening and gives a period "feel" for the time period played. For my Crimean War Rules I want the British to act like British and Russians to be Russians.  I want to have fun, throw lots of dice and occasionally have battalions collapse and run away.  I would like the game to come to a conclusion in a reasonable amount of time.


      In addition, I view my miniature games through the experience of my days in the reenactment community.  My miniatures are dressed alike in as correct uniforms as I can research. But they, like many reenactment regiments are more uniformed and parade ground then in reality.  Regiments advanced across fields and had to stop to dress ranks and restore order.  Men tripped over branches or small holes, got hung up going over fences or fell out when winded. Weapons misfired and needed to be cleared.   Regiments needed to be halted and ranks dressed before advancing again. These are things I think about when moving my battalions.   Do the game mechanics on my table top rules reflex this?  I have read and studied the period manuals and use these.  But the experience of being in a 100 plus man "regiments" also effects my thinking.  Far too often regiments can do things in the table top they could not do in real life.

      I find that individuals who have been in reenactment units view the game and rules in a slightly different vain then pure gamers. They get into what the regiments on the table are doing far more then playing a set of rules.   They get into the spirit of the game if it is historically correct.  Send the Light Brigade down the valley against the Russian guns?  Well if That is my orders, here goes the last of the Brudenells old boy.

      Groups like HMGS talk about recruiting for the hobby of historical wargaming.  my understanding it was created to do so after historical wargamers were marginalized at some conventions.  Many members of this organization feel this should be done by converting fantasy gamers.  Hence the increased number of fantasy games at a historical wargamer convention.  I have always felt there is a bond between reenactors and miniature wargamers.  Something that HMGS has not explored enough to their benefit.  What to I mean? In August 1976 at the 200th anniversary of the Battle of Long Island two wargamers showed up and sold copies of their rule set "1776".  A bunch of us participating at that reenactment bought those rules.  A number of us are still playing miniature wargamers today.  For myself I had long been interested in miniature wargames, I had bought figures But was at a loss how to play.  These were the first serious rules I bought and we played them for a very long time.

        So here are The rules I use for my games. I will described why I liked them and how they play.  If they sound interesting please do try them.  I would enjoy to hear how you found them.  If you already play any of them I would enjoy hearing how you play them and modifications or house rules.


Saturday, May 4, 2019

Fife and Drum Miniature Rules for American Revolution


 As readers of this blog know I very much enjoy the wargame rules from Fife and Drum miniatures.  These are a simple one page set of rules.  A move, counter move set;  but with some interesting twists.  A side may move first and fire second or move second and fire first. Casualties are taken as they happen so there is A advantage to firing first.  But, you can charge into contact if you move first so there are advantages to that too.   A very interesting twist to the old move counter move system.  They are very morale driven which I like.  Casualties are moderate so regiments do not disappear too quickly.  And there are  a number of morale and trading grades so a regiment can be flexable.

   In addition to using these rules for my War of 1812 games I have also started using them for American Revolution.   These were the rules used in my recent Cowpens-Guilford Courthouse Campaign.

   The rules provide a fun and fast game and are easy to learn.  They are great for game nights as players quickly pick up the rules and can concentrate on play rather then looking up how to do things.  This makes for a much better gaming experience.


   As with anything we have made a few house rules and interpretations.  The rules can be here to be downloaded:
http://fifeanddrum-minis.com/rules--articles.html

In addition a rules tutorial with examples of play are here: http://altefritz.blogspot.com/2017/08/fife-drum-awi-rules-tutorial.html

These are my house rules and interpretations:

Move first, fire second, move second, fire first:  when it is your turn to fire remove all casualties from hits.  No, casualties removed do not get to return fire that was the advantage of firing first.

Retire facing or not facing enemy:  deduct 2" from move to retire with back towards enemy.  Half move to retire facing enemy or move sideways.

Charges or moving into melee:  during your move declare charge.  Defender tests morale, if pass they stand and can fire at charger (who tests morale if casulties), if fail retire column distance back shaken.  There is no charge move bonus. When defender turn to move they cannot counter charge or add regiments to melee. r

  Fight one round of melee then side with most casualties tests morale.  If pass then other side tests.  If both sides pass then attacker is considered to have failed to push back defender from their position.  The attacker retired one column move back towards their line facing the enemy. 

Routing or shaken units effect on other units:  ignore friendly shaken units retreat past if they are lower morale.  Otherwise check morale.    If regiment routes past test morale.

Multiple units in melee:  If two units vs one distribute casualties evenly to both units.

Wheeling regiments:   Wheels are made from the left, right, or center of the unit only. measure outside arc.

Fences, small streams:  Units move up to them and stop.  Next move you cross obstacles and continue your move. If both units are touching the same fence line and facing each other across it neither gets the benefit of the fence.

Artillery: Heavy guns one operation per turn.  Medium guns two operation per turn.  Light guns three operations per turn.

Operations are limber, unlimber, prolong and fire. 

Artillery cannot enter woods. They need infantry to knock hole in fences to cross.

Any friendly unit within a friendly artillery arc of fire, if the arc of fire goes through two opposite sides of that friendly unit the artillery can not fire.  Arch of fire is measured  from cannon barrell, with of stand forward like a bowling alley

Difficult Terrain: (fields, woods and  rocky ground or up hill): Cost 2" for each 1" moved.

Woods; units stop movement at edge of woods.  They enter next turn (similar to fences).  Once in woods  open order troops (skirmishes or Indians)  move their full movement, while formed troops move half their movement.  Small arm range is half.  Only skirmishes get cover modifiers. Yes, it sucks for regulars in the woods (please ask General Braddock).

Indians:  always unformed, in mass formation (I.e. in a bunch).  No penalty to change direction.  In woods move full movement.  Units fired at by Indians for first time check morale if second class or Militia.  In open clear terrain go one step down chart for firing and morale (if on line "C" use line "D").  Indians are not shock troops. They race about being obnoxious and scaring volunteers and militia who are not used to them.


Saturday, February 3, 2018

"Battle in America: wargaming the Revolutionary War"


   "Battle in America: Wargaming the Revolutionary War"  is part of the Paper soldier series of books published by Helion and Company.   Soldiers are drawn by Peter Dennis and rules are by Andy Callan. I am especially interested in this set as the American Rev War is my favorite period for gaming.  In addition Andy Callan wrote Loose Files and American Scramble which are my favorite rules for the Rev War. So I was interested in this booklet and very curious about the rules.  Are they a updated version of his rules with improvement?  For those who are interested in picking this booklet up here is my review.


   Introductory material and tactical notes in "Battle in America" take up two pages of the book. a very nice introduction to the period and gaming it.  A guide is presented for choosing armies using cards and dice.  Americans should enjoy a 3:2 advantage in numbers, but dice rolls favor the British in giving them better units. Quality over quantity in theory.

   The rules take up five pages of the book. Infantry regiments have five to eight stands; cavalry, detachments and artillery are represented by fewer figures or stands. Units accumulate disruption points (DP) throughout the game. The turn sequence is firing, movement, close combat, then reaction/rallying and morale checks.  Firing and combat are calculated on a stand basis; movement is determined by the drawing of cards. The cards' colors and types determine what units can or can't do during movement. There are some command and control rules.  There is A two-page playsheet, and three scenarios ("Capture the Heights", "Winter Solders 1776", and "Long, Obstinate and Bloody 1781") To Get You Started. Always nice To have A senerio or two Included.   There are outstanding paper soldiers to start you gaming.  Very nicely done too!  In addtion you get three buildings.  Outstanding value and really useful.

   I'm a big Andy Callan fan and have played Loose Files since it first appeared.  So I was excited to get this booklet as I wanted to see if they had improved Loose Files or clarified them.   I was sadly disappointed.  It appears these are an attempt to change things that deliver unnecessary complication without adding anything to the original set. These include a blunder-type rule and command and control rules. Also, numbers count for more than class, which is a incredibly big change from the original.    When you consider the number of troop classes has dropped from five to three then no longer is quality better then quantity.  One thing I liked in the original rules was better quality regimenrs could take more punishment, regroup remove DP's and come back for more.  I do not expect this to happen here.   Don't expect your outnumbered regulars to last long.

The paper buildings are outstanding and very useful.  I will most definitely be using them in my games. Worth the price of the booklet alone.


Sunday, August 6, 2017

Mr Madison's War rules for War of 1812


These rules for gaming the War of 1812 originally started out as a set of rules for The American Revolution by Jim Purkey at Fife and Drum miniatures.  These are offered free on his miniature site.  I liked them, and made a few changes to better reflect the new time period.  In addition i have posted a few clarifications and additions here to how we play the game.


Move first, fire second, move second, fire first:  when it is your turn to fire remove all casualties from hits.  No, casualties removed do not get to return fire that was the advantage of firing first.

Retire facing or not facing enemy:  deduct 2" from move to retire with back towards enemy.  Half move to retire facing enemy or move sideways.

Charges or moving into melee:  during your move declare charge.  Defender tests morale, if pass they stand and can fire at charger if not retire column distance back shaken.  There is no charge move bonus.  Fight two rounds of melee then loser (most casualties) tests morale.  If pass then winner tests.  If both sides pass then attacked is considered to have failed to push back defender from their position.  The attacker retired one column move back towards their line facing the enemy.   

Routing units effect on other units:  ignore friendly units routing past if router is lower morale.  Take morale test if equal or better morale.  

Multiple units in melee:  If two units vs one distribute casualties evenly to both units.

Wheeling regiments:   Wheels are made from the left, right, or center of the unit only.

Fences, small streams:  Units move up to them and stop move.  Next move you cross obstacles and continue your move. If both units are touching the same fence line and facing each other across it neither gets the benefit of the fence.

Artillery:  one operation costs 1/2 move, this included fire.  So you can limber and move half movement;  move full move if limbered; unlimber and fire Artillery cannot enter woods, need infantry to knock hole in fences to cross.  Any friendly unit within a friendly artillery arc of fire, if the arc of fire goes through two opposite sides of that friendly unit the artillery can not fire.  Arch of fire is measured  from cannon barrell, with of stand forward like a bowling alley

Difficult terrain (fields, Rocky ground): cost 2" for every 1" of movement in it

Woods; units stop movement at edge of woods.  They enter next turn (similar to fences).  Once in woods skirmishers troops (skirmishes or Indians)  move their full movement, while formed troops move half their movement.  Small arm range is half.  Only skirmishes get cover modifiers. Yes, it sucks for regulars in the woods (please ask General Braddock).

Indians:  always unformed, in mass formation (I.e. in a bunch).  No penalty to change direction.  In woods move full movement.  Units fired at by Indians for first time check morale.  In open clear terrain go one step down chart for firing and morale (if on line "C" use line "D").  Indians are not shock troops. They race about being obnoxious and scaring volunteers and militia who are not used to them.


Rockets:  roll  d10.
   10 = hit, one casualty and test morale.
6 - 9 = test morale
3 - 5 = miss
     2 =  hit nearest friendly unit test morale
     1 = rocket doubles back,  destroyed battery

Here is a link to Jim's blog where he explains how to play his rules.  Very well done explanation with clear examples of play.
http://altefritz.blogspot.com/2017/08/fife-drum-awi-rules-tutorial.html

Thursday, August 3, 2017

Loose Files & American Scramble Quick Reference Sheet


I found this quick reference sheet on the internet. My favorite Rev War set of rules which have given me great games for a very long time. As I will be posting a couple of my Rev War battles soon readers may like to try these out. I have added a few house house rules we used over the years.  Hope you enjoy!

 I believe these were done by Vincent Tsao and can be found here:

http://www.wfgamers.org.uk/resources/callan/callan.htm


Order of Play in a Turn (all movement is simultaneous)

  1. Compulsory Retreats/Routs following combat in previous turns.
  2. Calculate Morale effects provoked by 1 above.
  3. Firing
  4. Allocate Command Points. Move commanders and couriers.
  5. Move units. Announce attempted advances to contact/charges before moving.
  6. Combat.
  7. Re-dress ranks (according to training) of units that did not move this turn.

Command Points CP
Move own commander up to 1 die (choice of average or D6) inches = 1CP
Inspire troops in combat (give +1) = 3 CPs *
Rally (remove) one DP = 2 CPs *      * must be in contact with unit

Disorder/demoralization points DP
1st class (elite, veteran) may remove up to 2 DPs per turn if stationary and not in combat
2nd class (line) may remove 1 DP per turn as above
3rd class (green, partisans) may remove 1 DP per turn if stationary, not in combat/shot at
4th class (militia, Indians) may only remove DPs with aid of an officer
5th class (unmotivated Indians) may only remove DPs with the aid of the Army CO

Artillery Fire range under 10 inches close, 10-30 long (light) 10-36 long (medium)
Roll one D6 for each stand firing modified by below:
+1 heavy gun, target column or limbered artillery, same target/range as last turn
- 1 new target, each DP of firing stand, light gun
- 2 target in fieldwork or stone building or target in skirmish order/unlimbered
Long range inflict 1 DP for 4 or higher.
Short range inflict 1 DP for 2 or 3, 2 DPs for 4 or 5, 1 DP and 1 casualty for 6 or higher.

Infantry fire Only skirmishing infantry can fire and move in the same turn.
Musket range 8 inches, rifles 10 inches. Roll 1 D6 for each stand firing, minus DPs of firing unit. Halve result shooting at skirmishers/unlimbered artillery, halve if target in fieldwork or building. Round up.
1 DP for each 6 rolled. Skirmishers roll again on 5, with subsequent 4,5,6 = 1 DP.

Movement is the number of dice score X inches
1st/2nd/3rd class units may move one or two average dice
4th/5th class units may move one average dice or one average plus one D6
Skirmishers may move an extra D6, Cavalry may move one or two extra D6
Formed troops get 1 DP for each 1 or 2 rolled, 1, 2 or 3 in woods.
Hessian infantry (except Jaegers and von Bose in South) move one average die or one average die + 2 inches.
Cavalry who charge must roll at least 3 dice. Can change speed 1 dice up or down per turn.
Moving in woods or uphill -1 inch from each die rolled.
Wheeling, as uphill get 1 DP.
Change formation of facing takes 1 turn, get 1 DP (2 if under fire).
Cross fence/wall,; stop at obstacle, continue nice next turn.
Retire facing enemy: ½ move get 1 DP if cavalry or under fire.

Morale: seeing friends retreat/rout within 6 inches
Troops ignore retreat of lower grade friends but get 1 DP if such rout within 6 inches.
If equal/higher grade friend retreats within 6 inches get 2 DPs.
If equal grade friend routs within 6 inches get 2 DPs and one stand deserts.
If higher grade friend routs within 6 inches get 3 DPs and one stand deserts.


 Combat occurs when a unit advances within 4 inches of enemy. Each side throws an average die modified by below:

+3 each training grade better than enemy
      defending fort or stone building
+2 defending fieldwork or wood building
      making bayonet attack
+1 terrain advantage
      officer spends 3 CPs inspiring troops
- 3 in skirmish order
     attacked in flank/rear
- 2 each DP, each casualty
- 1 outnumbered
- 2 outnumbered 3-2
- 3 outnumbered 2-1
- 5 outnumbered 3-1 or worse   1 cavalry figure = three infantry, one gun = six infantry

Result is difference in scores:
+4 or more: Easy victory get 1 DP. 1st/2nd/3rd class obey orders. 4th/5th class pursue.

+2/3: Successful get 1 DP and (vs. infantry or artillery, not in fort, building or fieldwork) one casualty. Halt one turn.

+1/even/-1: Stand off both sides halt fight continues next turn. Each get 1 DP and (unless infantry facing cavalry or bayonet attack, or in a fort, building or fieldwork) one casualty

-2/-3/-4: Driven back get 2 DPs and one casualty. Retreat one move at maximum speed.

-5/-6/-7/-8: Defeated get 2 DPs and 2 casualties. Retreat at maximum speed behind next line of friendly troops, or next terrain obstacle if no support.

-9 or worse: Routed run away at maximum speed to beyond enemy artillery range or next terrain obstacle, whichever is further. Get 4 DPs and 2 casualties.

House rules:
Must move full distance rolled unless point out stopping point (i.e. stop at fence line or top of hill, etc).

Can roll movement for entire brigade if moving together.

Corlears Hook Fencibles House rules: after 2nd stand off in a row both sides retreat 1 average die unless defending an obstacle, fieldwork, building or fort.

Militia units with 50% losses or more flee the field  remove from table. Other units with 75% or more losses flee. No further DP losses by friends who see this.


Thursday, April 27, 2017

Fife and Drum meets Mr. Madison

  Fife and Drum Mets Mr. Madison's War


The following are my interpretation and rules clarification of the Fife and Drum rules set as used by me for War of 1812. For a copy of the Fife and Drum rules please follow the link http://fifeanddrum-minis.com/rules--articles.html


Move first, fire second, move second, fire first:  when it is your turn to fire remove all casualties from hits.  No, casualties removed do not get to return fire that was the advantage of firing first.

Retire facing or not facing enemy:  deduct 2" from move to retire with back towards enemy.  Half move to retire facing enemy or move sideways.

Charges or moving into melee:  during your move declare charge.  Defender tests morale, if pass they stand and can fire at charger if not retire column distance back shaken.  There is no charge move bonus.  Fight two rounds of melee then loser (most casualties) tests morale.  If pass then winner tests.  If both pass then both retire column move back.

Routing units effect on other units:  ignore friendly units routing past if router is lower morale.  Take morale test if equal or better morale.  

Multiple units in melee:  If two units vs one distribute casualties evenly to both units.

Wheeling regiments:   Wheels are made from the left, right, or center of the unit only.

Fences, small streams:  Units move up to them and stop move.  Next move you cross obstacles and continue your move. If both units are touching the same fence line and facing each other across it neither gets the benefit of the fence.

Artillery:  one operation costs 1/2 move, this included fire.  So you can limber and move half movement;  move full move if limbered; unlimber and fire Artillery cannot enter woods, need infantry to knock hole in fences to cross.  Any friendly unit within a friendly artillery arc of fire, if the arc of fire goes through two opposite sides of that friendly unit the artillery can not fire.  Arch of fire is measured  from cannon barrell, with of stand forward like a bowling alley

Difficult terrain (fields, Rocky ground): cost 2" for every 1" of movement in it

Woods; units stop movement at edge of woods.  They enter next turn (similar to fences).  Once in woods skirmishers troops (skirmishes or Indians)  move their full movement, while formed troops move half their movement.  Small arm range is half.  Only skirmishes get cover modifiers. Yes, it sucks for regulars in the woods (please ask General Braddock).

Indians:  always unformed, in mass formation (I.e. in a bunch).  No penalty to change direction.  In woods move full movement.  Units fired at by Indians for first time check morale.  In open clear terrain go one step down chart for firing and morale (if on line "C" use line "D").  Indians are not shock troops. They race about being obnoxious and scaring volunteers and militia who are not used to them.


Rockets:  roll  d10.
   10 = hit, one casualty and test morale.
6 - 9 = test morale
3 - 5 = miss
     2 =  hit nearest friendly unit test morale
     1 = rocket doubles back,  destroyed battery


Monday, March 13, 2017

Battle of the Cross Roads...


  On the Fire and Drum miniatures website, Jim Purky has placed his Rev War rules.  There are one page, and contain all you need to play a game.

    The rules are a you go, I go type.  Each side rolls a dice at start of turn. High side gets to choose if they move first and fire second or move second and fire first.  Firing, melee and morale are on a matrix where you cross check troop type and situation.  The number shown is rolled for on a d10 looking for that number or less.  Morale checks flow down a chart as you take more casualties.  You roll two or more dice and have to get that number or less.    Fail on one die you become shaken.  Fail on two and you rout. You get additional dice for having a commander present or a terrain advantage.  But how ever many dice you roll you must pass on two of them.  The rules look simple enough, and people who have played them say they are fun.  I like simple rules.  They let you play the game and not the rules.  So, I wanted to give these a try.  I threw some terrain on the table, added a few regiments. The following game is not a tactical masterpiece, but a attempt to explain the rules and try them out.

  The Americans have the Cross road and the British want it.  The American commanders right flank had a woods and a small ridge behind it.  He placed his rifle regiment in the woods with a Continental line battalion backing them up on the ridge.  His center was held by two militia
battalions and two medium guns and the 3rd Light Dragoons.   The left flank was covered by the 1st and 2nd Maryland regiments.

  The British commanded advanced on the left flank with both battalions of the 71st Highlanders and the Loyalist lights against the rifles and militia.  The 23rd, 33rd and Lights advanced against the Marylanders. Cavalry was in reserve and artillery in the center.

Turn 1.  British rolled high;  they moved  second and fired first.  Americans held fast while British advanced into rifle range.  British artillery fired at long range and caused one casualty on the militia.  Because they suffered casualties the militia tested
morale.  They rolled two dice, plus a third dice because a commander was with them.  To pass they must roll there number or less on two of three dice.  They roll the number on two but not the third dice, so they pass.  American rifles missed by the wayy.

Turn 2.  British again rolled high, again picked move second fire first.  British continues the advance.  American Artillery fire and miss.  Rifles fire and hit causing two casualties on Loyalists who pass
morale.  Rules note;  casualties are removed after first fire.  So first fire is an advantage.  Also I test morale for each regiment after it suffers a casualty.

Turn 3.  British move first fire second.  2/71st charges rifles, who as skirmishes can retire.  But they must roll a morale check.  They pass on one dice but fail on the second so are shaken.  I let them retire shaken.  Not sure if this is correct but that is how I played it.  The Royal Artillery move into close range.  Artillery can do two actions (move and unlimited or limber and move) in addition to fire.  So they move, unlimber and fire.  The 1/71 fires at the militia who suffer six casualties from the artillery and Highlanders.  When they check morale they fail on two dice so rout!  I do not let them fire during there turn instead I
move  them back the routed distance.   The Light Infantry fire at the 1st Maryland who pass their morale test.  The 1st Maryland return fire and the Lights must test morale. They roll two dice and fail on both so they rout.

Turn 4.  Americans move second fire first.  Regiments on both sides charge.

 The 3rd Light dragons charge the 1/71st.  The 1/71st passes morale so I let them fire and they cause two hits.  The Dragoons pass so they fight!  Both sides roll one die per four figures. Dragons are looking for 6 or less (advantage charging infantry without secured flanks) while
Highlanders look for 5 or less.  I fight two rounds of melee one after the other and at end there are six dragons casualties and four dead highlander.  Dragons test morale and fail on one dice so are shaken. I have them retire.  Since  The dragoons retire I do not have the Highlanders check morale.

 The 23rd charge the 1st Maryland.  But the Marylanders were shaken by previous fire so they drop one level on the charts ( from C to D).
 After two rounds of melee the Marylanders have more casualties then the 23rd so they test morale first.  They fail on two dice so they rout.

At this point I called the game. Time to get to bed as I have work tomorrow!  What did I learn?  These are a fun set of rules.  They flow quickly.  There are serious advantages to who fires or moves first. If you fire first the other side has less figures to return fire (if you cause hits).  Moving first you can charge and pin an opponent.  Morale is interesting.  You always roll two dice and have to pass on two dice.  If you have a commander, or terrain advantage you add dice, but still must pass on two.  I need to play a few more times but what I like about these rules are you worry about tactics and not did I forget some obscure rule. Simple rules but not so simple results.