Showing posts with label Charge of the Light Brigade rules. Show all posts

Sunday, August 23, 2020

Action on the Bulganak River, 19 September 1854


Following their landed at Kalamita Bay on 18 September 1854, the Allied Army started south towards the port of Sebastapol.   During the March the armies became strung out over a great distance and the British and French forces had become separated.  Being outnumbered significantly by the Russian cavalry it proved very difficult for British patrols to locate the Russian forces, and so the Allies moved blindly forward.    The main Russian field army was positioned on the high ground overlooking the River Alma. The Russians had deployed a detachment forward of the main position under the command of General Kiriakoff, consisting of numerous cavalry and Cossacks regiments, two Infantry regiments (eight battalions) and artillery.

On the afternoon of 19 September the allied army reached a small river, the Bulganak, beyond which was a ridge that blocked the view to the south. On the summit of the ridge sat a group of Cossacks. At this point the British army was stretched out over several miles.  The British sent the Light Cavalry Brigade with a Horse Artillery battery to scout  the ridge.  

The battlefield before them consisted of a shallow river and ridge line beyond it.  From that ridge   the ground dropped away to a valley, beyond which was a second ridge. The British cavalry commande could see Russian Cossacks on the ridge but nothing beyond it.  He sent back for reinforcements and moved the cavalry forward to investigate.  He knew the British Light Division was near by for support.


At this is the point the historical narrative ends and our table top battle begins . 


The British Light Cavalry Brigade and Royal Horse Artillery advance into the valley.  Confronted by Russian cavalry they move forward to engage the enemy and give time for the Light Division to arrive.  


The Russian cavalry spend extra command points to move to contact (each unit has command points to do extra things.  Once spent they are gone.  Better units have more pounts, poorer units less).  In the ensuing melee the British cavalry is sent running from the field!  The Royal Horse Artillery keeps the Cossacks at bay and soon the 1st Brigade of the Light Division has arrived.  They take position on the Heights.  During this time the Russian commander has advanced his infantry across the valley determined to push the British off the field.


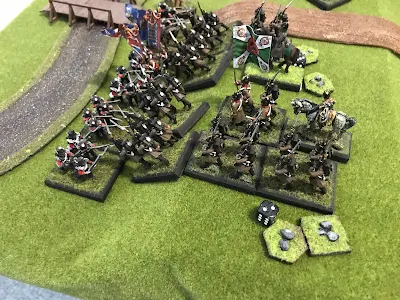
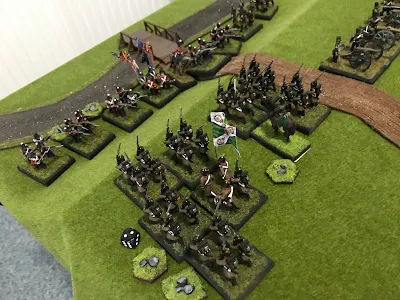
Deployed along the ridge line the British await the Russian assault.  The 1st Brigade of the Light Division firm line with artillery support.  The 2nd brigade  is just crossing the stream.  Lord Lucan arrives to try and rally the cavalry after Cardigan's folly.  


Meanwhile the Russian cavalry fall back behind the infantry and artillery numbers up to move forward to get into better range. Both regiments advance steadily maintain spacing.  The masses infantry makes a noble sight.   At this point aged veterans from the peninsula campaigns must be feeling deja vu which is not helped by Lord Raglan mumbling about the French coming in in the old way.


On the Russian left flank four battalion converge on the British.  The 7th Royal Fusiliers and Royal Artillery opened a devastating fire which killed one of the battalion commanders.  But not enough to stop the masses columns who closed and drove the Fusilier back.  In the center the Royal Welch Fusiliers held firm and stoped the columns while the 88th delivered a heavy fire that also stoped the attack on that flank.  Raglan moved the 19th Regiment to protect the British right flank.  The brigade and Division commanders rushed to rally the Fusilier regiment and organized a counter attack.


The British 88th drive back the two battalions in front of them but things were coming unglued. 


 The Russians continued their relentless advance.  They Drive back both the 19th and 7th Fusilier as well as over running the guns.  In addition the Russian cavalry double times it's movement to get into the fight on the left flank.  


The British flank uncovered, Russians mounted a counter attack also by the line and almost no reinforcements available the British commander orders a withdrawal.  The masses of Russian columns were too much for the British this time.  


Conclusion: This was a most enjoyable scenario that in have wanted to fight out for a while.  And I will return to it again.  I think the key to the Russian victory was aggressive use of their artillery (which is very good) and paying extra command points to move extra.  This gave them less time under fire and closing to close contact quicker. Due to the small size of the table and the large number of regiments I did not enforce the six inches between Russian columns rule.  


 I should have had the British use their command points to fire extra times.  The key for the British is to get a number of morale  markets onto the Russian columns to reduce their effectiveness. Remember that for each market you subtract 1 from every due roll.   But it was great fun getting these rules and figures out again.  I think another battle or two in the next month would be grand.  Perhaps the attack of the British 1st and Light Division at the Alma.  Or the French attack on the Russian position at the Akma.  We shall see.


One other thing I learned from this game was my table space here at home is too small.  I have two folding tables which create a six foot by five foot table.  I think this works for small games (see Hobkirk Hill) but not for this number of regiments.  I felt the board was too crowded.  Let's see what a second table can do!   


Friday, August 14, 2020

Battle of Blastoffski Bridge 1854


Russian commander massed his infantry and guns together and marched to cross the river South of the bridge and church.  He hoped to use his faster speed (marching in column) to get to the river and cross it and then close with the British infantry.  He unlimber his guns as quickly as he could to get them into play and cause some damage to the enemy infantry.   He sent his cavalry north of the bridge and hoped to cause mischief there.


The British formed line with his infantry and advanced forward in a most stately manner.  His Royal Horse Artillery took the high ground to get into a good firing position while the Light Cavalry Brigade protected their exposed flank.


Once the Russian infantry reached the river they came under fire from the superior range of the British infantry. Casualties were light but both forward battalions suffered a couple morale chips.  (The morale rules are simple but deadly.  For every morale chip you subtract one  each from every dice thrown.  Since dice are used for movement and firing this can have a cumulative effect.) 


The Russian cavalry quickly crossed the river and charged their enemy.  The Hussars tangled with the Light Brigade (who counter charged) while the Uhlans took on the guns and quickly over ran them!  The Light Brigade routed the Hussars and sent them flying.


Seeing the disaster to his flank the British brigadier turned the 23rd to cover his exposed flank.  He then spent two command points to fire twice at the Russian columns in front of him to cause as much damage as he could. (Each unit has some many command points in the game.  Each turn that unit can spend a CP to do an extra action.  Once you spend a CP it is gone).  


As the Russians closed with the British line they took one more volley before close quarters fighting.  The British easily saw them off due to the morale chips they had acquired.  As they retreated they blocked the guns so the British infantry was given a break.  With a single battalion left the Russian commander turned to his cavalry who were being chased off the field by the Light Brigade.  With no hope of victory he shrugged his shoulders and thought how best to compose his report and try and salvage something from the disaster.


If you liked this action and are curious about the rules used here is a link to my explanation of how the Rules work.  They are a fun set of rules which capture the flavor of the period and provide a fun and fast game.

https://bravefusiliers.blogspot.com/2019/11/rules-i-use-for-wargaming-crimean-war.html


It was great fun to bring out my Crimean Armies.  These are my oldest miniatures and I have a great sentimental attachment to both the armies and the period.  So, I will be planning on a couple more games in the Crimean War period soon.


Thursday, August 13, 2020

Return to the Crimean War


I return to the classic wargamer battle, but this time transport it to the Crimean War 1854.  The two sides are once again  looking to capture a vital bridge.

Rules used were "Charge of the Light Brigade " by David Rayburn.  A very clever set of rules which has always given me a fun enjoyable game.  The miniatures Wargame Foundry 25mm.  Here is a description of the rules and how I play them:
https://bravefusiliers.blogspot.com/2019/11/rules-i-use-for-wargaming-crimean-war.html


The photo above will give a good visual of the battlefield.  The British set up on the (viewers) left and Russians on the right.  The church blocks site only.  You can cross the river along most of its length except one foot in either side of the bridge.  


British Order of Battle:
Light Division: 1st Brigade.
7th Royal Fusiliers
23rd Royal Welch Fusiliers
33rd Regiment of Foot
Light Cavalry Brigade
"C" troop Royal Horse Artillery battery


Russian Order of Battle:
1st Brigade/16th Division
31st Vladimir Musketeer Regiment
(4 battalions)
Heavy artillery Battery
11th Kiev Hussars
Combined Uhlan Regiment


Friday, November 15, 2019

Rules I use for Wargaming: Crimean War


   I have been playing "Charge of the Light Brigade" since 2003.  These are home brewed self published rules from the author David Raybin so possibly only a few of you have tried them.   I thought I would share some of my impressions about the rules and how they play.  They provide a fun game which captures the spirit of the period and deserve a wider audience.

You can download a set of the rules here:
https://miniaturewargaming.com/blog/charge-of-the-light-brigade-rules/


  I will state right off I am a big fan of these rules. I like simple rules, but with a twist. I like regiments to look like regiments.  And it is important to me that that a group of colorful miniature soldiers represents such and such a regiment.  I want a game I can play in a evening, gives a period "feel" for the time period played, have fun with and come to a conclusion.  "Charge of the Light Brigade" does all of these.

   The rules are a simple I Go U Go but with a difference.  Each side rolls for initiative with high side getting first go.  If you won the roll last time you add one to your roll.  Each of your regiments or batteries do one action (move, change formation, fire or remove a morale point).  To move roll two dice (or more depending on formation) and that is how far you can move.   After all your units have moved  you may spend a command point (CP) per unit and that unit may do a second thing.

  Here is something that sets this set of rules aside from all others. The author has taken the simple move/counter move system and twisted it. Every unit has a commander (i.e. Colonel). He has so many command points (CP). More if he and the regiment are good, less if mediocare or poor. Russians often get around 8 (sluggish, dull)  while British line get 12 and elite Guards might get as many of 16.  Better units can do more at critical times. But when your CP are gone they are gone.


   OK, now it is your turn, and every unit on your side has done one free action. You may then spend a CP and do something else. Fire, remove a Morale marker or what ever. It gives you a chance to take advantage of something or react to what is happeneing on the table. BUT for every action there is a reaction and the enemy now gets to react against that unit and can either return fire at you or change position/facing.   But only against the enemy that spent that CP.   In a past game a Russian battalion removed a Morale pip by paying a CP. The British reacted by firing at the unit and puting 2 morale pips right on back (darn good shooting with the Guards who rolled four 6's). So you spends your money and takes your chaces.  This portion of the rules is what gets a lot of comments and attention from people who  have played this game for the first time. And rightly so. It is simple, inovative and fun. But I would recommend a GM to run the first few games you try to ensure you all stay on tract and not move ahead.  To track CP I put a sticky note under the command figure stand with the number of that units CP.


  Firing is simple. You throw 1D6 per stand for Infantry and 2D6 per artillery stand. Cross refinance with the firing chart for weapon vs. target and this gives you the chances for a hit. Since there is a possible saving roll you might not lose all those figures hit. Yes, the dreaded saving roll.  But here it takes the place of all those calculations you have to do with other rules.  Watch out for double 6's as they can cause a morale marker to drop onto your unit.  Each infantry stand has four figures. Once all four figures are gone you remove the stand.  Until then the stand fights on.

  To me, the neat thing about this system is that you forget about calculation, tables and charts. Hits, saves and morale are all tied into each other. The save chart also brings a little of the old "national modifiers" into the mix. With Russians, who get saved on a 5 or 6 no matter how many stands are left you have to beat each one with a stick until they are all dead. You get that steady, dogged feeling you read about. The British start with a high save chance (they dodge bullets like the bat man said the rules author) but as they loose stands save chances go way down so they wither away. A little fragile. Poor Johnny Turk never gets a save

   Morale is a sneaky system that most folks don't think a lot about until it bites them! You get a morale pip for any number of things (crossing an obstacle, being fired at or having friends route past you). Since you subtract 1 pip from every die roll morale effects everything you do. Move, shot or fight it ties into morale.  In a past game a Russia commander with three morale markers on a regiment found out fast that he could not shoot, or save casualties with that unit. With morale markers, once you get into trouble it comes fast and furious. To me this is a superior system then used in many rules. The unit is effected, and everything it can do is effected.

   Close Combats takes a bit getting used to since it is very different from most rules. You do not charge like in other rules. You move within 2' of the enemy. THEN, you would have to pay a Command Point or wait till next turn to close and fight. This gives the defender a chance to do something. Like blast the enemy with a close range volley that causes casualties or mabey a morale marker.  It is actually hard to close into close combat due to small arms fire.  But when you do it can be devastating.

  I really love these rules. The game feels like the Crimean to me based on my reading.  Also for a I Go U Go both sides get to do something so no sitting around. In my games Russians tend to form columns (or at least reinforced lines) and try and close with the British quickly.  (One player has nicked named them "Zulu's in overcoats.") Russian artillery is better then the allies and there is a lot of it.  Russian cavalry is, well, sluggish.  The British tend to want to shoot at things. And shoot a lot. Cavalry is small but very aggressive.  By the way small numbers of cavalry will not damage infantry who can usually shoot them down before they close. Many of my games have seen a single British battalion stopping massed charge like at Balaklva.  The French are interesting as their line have muskets while elite troops like Zouaves have rifles and  more CP.  So each army is very different from the other.  You have to work with what you have and get the best out of them.