Tuesday, February 22, 2022

Battle of the Four Arms: Conclusion


The battle continues......


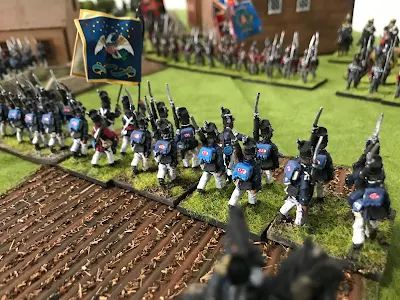
  Both sides attempted to rally shaken and routed units.  The 1st US Rifles had had enough and in spite of General Brown yelling encouragement ran for the hills.  On the other hand the Canadian militia and GLI both rallied and joined the fight. 


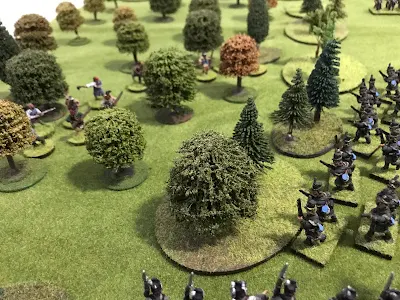
  In the woods the 11th US Infantry charged after the Mohawks.  Although the Canadian militia came to their help the Mohawks had enough for the day and left the field.  


  All along the line both sides threw in their final troops and blasted away at each other.  Over head the rockets continued to burst spectacularly but without causing g any damage to either side!


    Morrison felt the time had come for desperate measures.  Ordering the GLI to step aside, the tiny 19th Light Dragoons charged forward against the 1st US regiment.  Off to the side the combined Flank Companies joined in against the 21st US.  In the fight the 1st US easily defeated the 19th who then routed off the table.  But the Flank companies beat the 21st US who then failed their morale and routed!  The 1st US seeing this also tested morale and were shaken.


In the center the 100th Regiment charged the 9th US, who failed their morale test and retreated!  


Could the tide be changing?  


   Alas! A little too little and too late.  At the cross road General Scott threw in his battalions to break the center.  The 9th US charged the 89th Regiment while the 11th US and 25th US charged the 100rd Regiment.  In the woods the 22nd US advanced steadily and traded cookies with the Canadian Militia.  Although the 89th stood firm and defeated the 9th US the 100rd gave way and routed opening that side.


On the other side Ripley threw the 1st US against the GLI who were worn down from their long fighting earlier.  They we're defeated and retreated back.  At the sane time the 23rd US and 5th US overwhelmed the 1st Regiment.  To contain the Flank companies Ripley moved up the Light Dragoons and the 21st US.


With everything collapsing arround them the British commander ordered a retreat.  It had been a gallant defense but it was now time to try and save something.


Conclusion:

  As you have guessed the battle was a scaled down version of the Battle of Quatre  Bras.  As a game I think it worked out pretty good.  But I would give the British/Canadian side an extra battalion for the set-up and increase the Mohawks to 24 figures rather then twelve figures.  I think this might evan it out better and give them a better chance for winning. 

  The rules, an adaptation of Jim Purky's Rev War rules worked well.  They provided a fun and fast game and I would highly recommend them.

  One thing I noticed over the pictures was how bad the dice I used to mark casualties looked.  These were replaced by smaller markers with stones and grass which blended in better but still did the job.


Sunday, February 20, 2022

Battle of the Four Arms: part 2


  Lt.Col. Morrison at the cross roads of Four Arms quickly deployed his brigade.  


  The 100th Regiment and 89th Regiment marched to the British/Canadian right flank and took position along a rail fence line.   The combined Flank companies and 1st Regiment are sent to the left to protect that open side.  Meanwhile the 1st Militia, GLI and IM hold on.

 General Brown ordered Ripley to take his 2nd Brigade and go around the village. He ordered his artillery and cavalry to support them.


  Ripley pulled the 5th US Infantry back to rally and sent the 23rd US Infantry to settle up with the Incorporated Militia.  They quickly charged and routed what was left of the militia then moved up to support the rest of the Brigade.  The 1st US and 21St US took position out flanking the village.


The 1st Regiment and Flank battalion having formed line moved into musket range.  For the next couple turns the two lines blasted away at each other.  Neither giving way all taking casulties.


  General Scott continued to bull forward determined to take the cross roads.  He pulled the 25 US Infantry out of line to regroup and pushed the 9th US Infantry and 11th US Infantry forward.  The fresh troops were too much for them and the Canadian Militia and GLI both gave way and retreated.  


  In the woods the 1st US Rifles continued to skirmish with John Norton's Mohawks.  Moving back and forth casualties mounted until the Rifles broke and routed.  fleeing the woods General Brown tailored up to rally them.  

  With their enemy gone Norton moved his warriors against Scott's Brigade.  From the cover of the woods they skirmishes against them.  This forced Scott to pull one battalion back to deal with them.  


  At this point a final push from either side could win the battle.  The initial battalions holding the crime roads for the British/Canadian had been forced back.  But now fresh regiments had taken position.  The United States forces had taken heavy casualties but continued to advance.  


Friday, February 18, 2022

Battle of the Four Arms: Part 1


  Our game commenced with the British/Canadian Brigade marching on the table on the north and the United States army entering from the south. In addition a second British Brigade could enter the table on either the north or east side road on a turn to be determined by rolling 2d6.   Both sides needed to control the vital cross road by the end of the game.  


  The American army entered the table on its south side.  With the advanced corps leading the way the 1st US Rifles crossed the bridge, and deployed into skirmish line.  The cavalry moved up to the stream, and the next turn crossed.  All three units moved forward to engage the enemy to give the rest of the army time to cross the stream.  


  The rest of the army deployed to the right and left of the bridge.  The 1st Brigade to the left of the bridge, the 2nd Brigade to its right.   The artillery was kept together and moved across the bridge when it was clear.


While this was occurring the British commander deployed his brigade.  Outnumbered he hoped to delay the enemy and buy time for reinforcements to arrive.  The 19th light dragoons were sent to guard the far left flank, while John Norton and his Mohawks occupied the woods on the right flank.  


  The Glengarry light Infantry and Incorporated Militia Regiment moves forward and occupied the fence lines in front of the village while the militia were held in reservee.  The Royal Marine Artillery crew manning the rocket battery held the cross road where it had A very good field of fire.


  Although the cavalry regiments for both sides were tiny, thus do d not stop the players from charging madly about.  On the United States right flank the New York Volunteer Dragoons charged the 19th Light Dragoons, who then counter charged.  The New Yorkers were defeated and fell back.  On the opposite side the US Dragoons charged the Glengarry LI and were shot down and failed their morale.  Not a good day for cavalry.

  The 1st US Rifles got into A shooting match with the Glengarry LI.  Protected by light cover the Glengarry held firm and shot up their opponents.  The rifles were quickly pulled out of a losing effort and sent to deal with the Mohawks.

  The sacrifices of the rifles and dragoons had not been in vain.  By this time most of the United States infantry had crossed the Stream and were advancing towards the cross roads.  The United States Artillery was also unlimbered and targeted  the Canadian regiments behind the fence line.  


  Moving forward the 25th US Infantry charged the Glengarry whole the 1st US charged the Incorporated Militia.  Although they inflicted casulties both Canadian units lose their moral tests and had to fall back.   All along the front the British/Canadian regiments fall back.  

!


Wednesday, February 16, 2022

The Battle of the Four Arms 1814: Introduction


  I have noticed I did not play a lot of War of 1812 last year.  Not sure how it happened.  They are one of my favorite armies, and have an incredible toy soldier look and feel to them.  So its time to correct this in justice and put on a game!

Battle of the Four Arms:

   A small force of (British/Canadian) is sent to guard a major cross road.  A larger force (USA) is sent to capture it.  Although the United States forces outnumber the British/Canadian defenders the terrain is not friendly.   A minor stream hinders their deployment. There are a number of fenced in fields that make good positions to defend.  The flanks are protected by woods to the west and a lake to the east.  It will take A few turns to bring superior numbers on to the field.  So the defenders must dig in a fight a delaying action until reinforcements arrive.  Victory goes to the side who holds the cross roads at the end if the game.  


  British/Canadian Army

On the table:

2nd (Light) Brigade: Lt.Col. Parsons

Glengarry Light Infantry. (24) 

Incorporated Militia Upper Canada (24) 

1st Militia Brigade (24) 

2nd Militia Brigade (24)

Mohawk Warriors (12)

Royal Marine Artillery Rocket Battery (light)

19th Light Dragoons


Reinforcements:

at start of game roll 2d6 for turn they enter the game.

3rd Brigade Lt.Col. Morrison

1st Regiment

89th Regiment

100th Regiment

Flank Companies (Light Infantry and Grenadier)

Royal Artillery (medium)

United States Army: Maj.Gen. Brown

Enter on road on south side of table on first turn.  All units in road column.  This is the order of march.

Advanced Corps:

United States Dragons

New York Volunteer Dragons

1st US Rifles 


2nd Brigade: Brig. Gen. Ripley

1st Regiment

21st Regiment

23rd Regiment

5th Regiment

Artillery (medium)


1st Brigade: Brig.Gen. Scott

9th Regiment 

11th Regiment

22nd Regiment

25th Regiment

Artillery (medium)


Rules used are "Mr. Madison's War"

Scale is 25mmm

Game will last 14 turns.

Terrain:  stream is fordable.  Units move up to it and stop.  Next move cross and full move.  

Woods:  Artillery and cavalry can not enter.  Formed units must be at half speed.  Skirmishes move full speed.

Fences provide soft cover.  Takes one move to cross.