
Our game commenced with the British/Canadian Brigade marching on the table on the north and the United States army entering from the south. In addition a second British Brigade could enter the table on either the north or east side road on a turn to be determined by rolling 2d6. Both sides needed to control the vital cross road by the end of the game.


The American army entered the table on its south side. With the advanced corps leading the way the 1st US Rifles crossed the bridge, and deployed into skirmish line. The cavalry moved up to the stream, and the next turn crossed. All three units moved forward to engage the enemy to give the rest of the army time to cross the stream.

The rest of the army deployed to the right and left of the bridge. The 1st Brigade to the left of the bridge, the 2nd Brigade to its right. The artillery was kept together and moved across the bridge when it was clear.


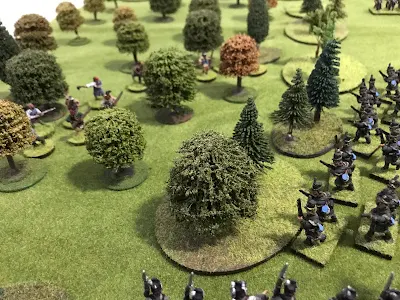
While this was occurring the British commander deployed his brigade. Outnumbered he hoped to delay the enemy and buy time for reinforcements to arrive. The 19th light dragoons were sent to guard the far left flank, while John Norton and his Mohawks occupied the woods on the right flank.


The Glengarry light Infantry and Incorporated Militia Regiment moves forward and occupied the fence lines in front of the village while the militia were held in reservee. The Royal Marine Artillery crew manning the rocket battery held the cross road where it had A very good field of fire.


Although the cavalry regiments for both sides were tiny, thus do d not stop the players from charging madly about. On the United States right flank the New York Volunteer Dragoons charged the 19th Light Dragoons, who then counter charged. The New Yorkers were defeated and fell back. On the opposite side the US Dragoons charged the Glengarry LI and were shot down and failed their morale. Not a good day for cavalry.
The 1st US Rifles got into A shooting match with the Glengarry LI. Protected by light cover the Glengarry held firm and shot up their opponents. The rifles were quickly pulled out of a losing effort and sent to deal with the Mohawks.

The sacrifices of the rifles and dragoons had not been in vain. By this time most of the United States infantry had crossed the Stream and were advancing towards the cross roads. The United States Artillery was also unlimbered and targeted the Canadian regiments behind the fence line.


Moving forward the 25th US Infantry charged the Glengarry whole the 1st US charged the Incorporated Militia. Although they inflicted casulties both Canadian units lose their moral tests and had to fall back. All along the front the British/Canadian regiments fall back.

!
That's a very nice looking game Mark and am looking forward to the next instalment of the battle. It reminds me that I really must paint up my Native American warriors!
ReplyDeleteI find painting native warriors great fun but very time consuming. I try and make each one different.
DeleteNot a great start for the outnumbered Crown forces. At what point did you roll for reinforcements? If is a high roll, the Brits are in a pile of trouble!
ReplyDeleteBefore the first turn roll 2d6 and they come in that turn. I rolled a "6"
DeleteLets see how it turns out. But I may have to adjust the troop totals next time I try this.
Yes, good looking game. Not looking good for the British side, though, is it? Look forward to the next instalment...
ReplyDeleteCheers,
David.
I may have to add another British/Canadian battalion next time. But lets wait and see how it ends first. You never know!
DeleteMust resist… must resist…. 😆
ReplyDeleteWhy?
Delete