
As I have mentioned in the previous post my game at game day was a last minute addition. Dave, who had been working incredibly hard on his Seminole war game came down with Covid. Fortunately he and his wife Pam are doing much better. I quickly volunteered to put on a game in his place.
Having a short period of time to put something together I decided to do a War of 1812 game. Since I had been working on the Battle of Lundy's Lane that was what I would go with. I had the order of battle and troops ready, I had the terrain ready. But since I was still struggling with the night fighting I decided to ignore that part of the battle. I would play it out as a daylight action. Scott's Brigade would be exposed for one turn only in my game rather then the almost two hours in real life. Reinforcements would arrive by d6 roll; 1-3 = turn 2, 4-6 = turn 3 for Americans and 1-2 = turn 2, 3-4 = turn 3 and 5-6 = turn 4 for British. A medium size group of Native Warriors were historically near the field but did not take part in the fighting. I decided to let the British play roll for their possible arrival each turn; a 1 on a 10D let them join the fight. All of which was to make the game more playable and translate into a fun afternoon game. One member of the club, Allen Wright (AJ) said "So we are fighting the battle of Fundy's Lane;" and the name stuck! Rules used were "Mr Madison's War" from Fife and Drum miniatures and figures are 25mm from Knuckleduster miniatures. George and Warren took the Americans while AJ and I were the British/Canadians. Let the game begin!
 |
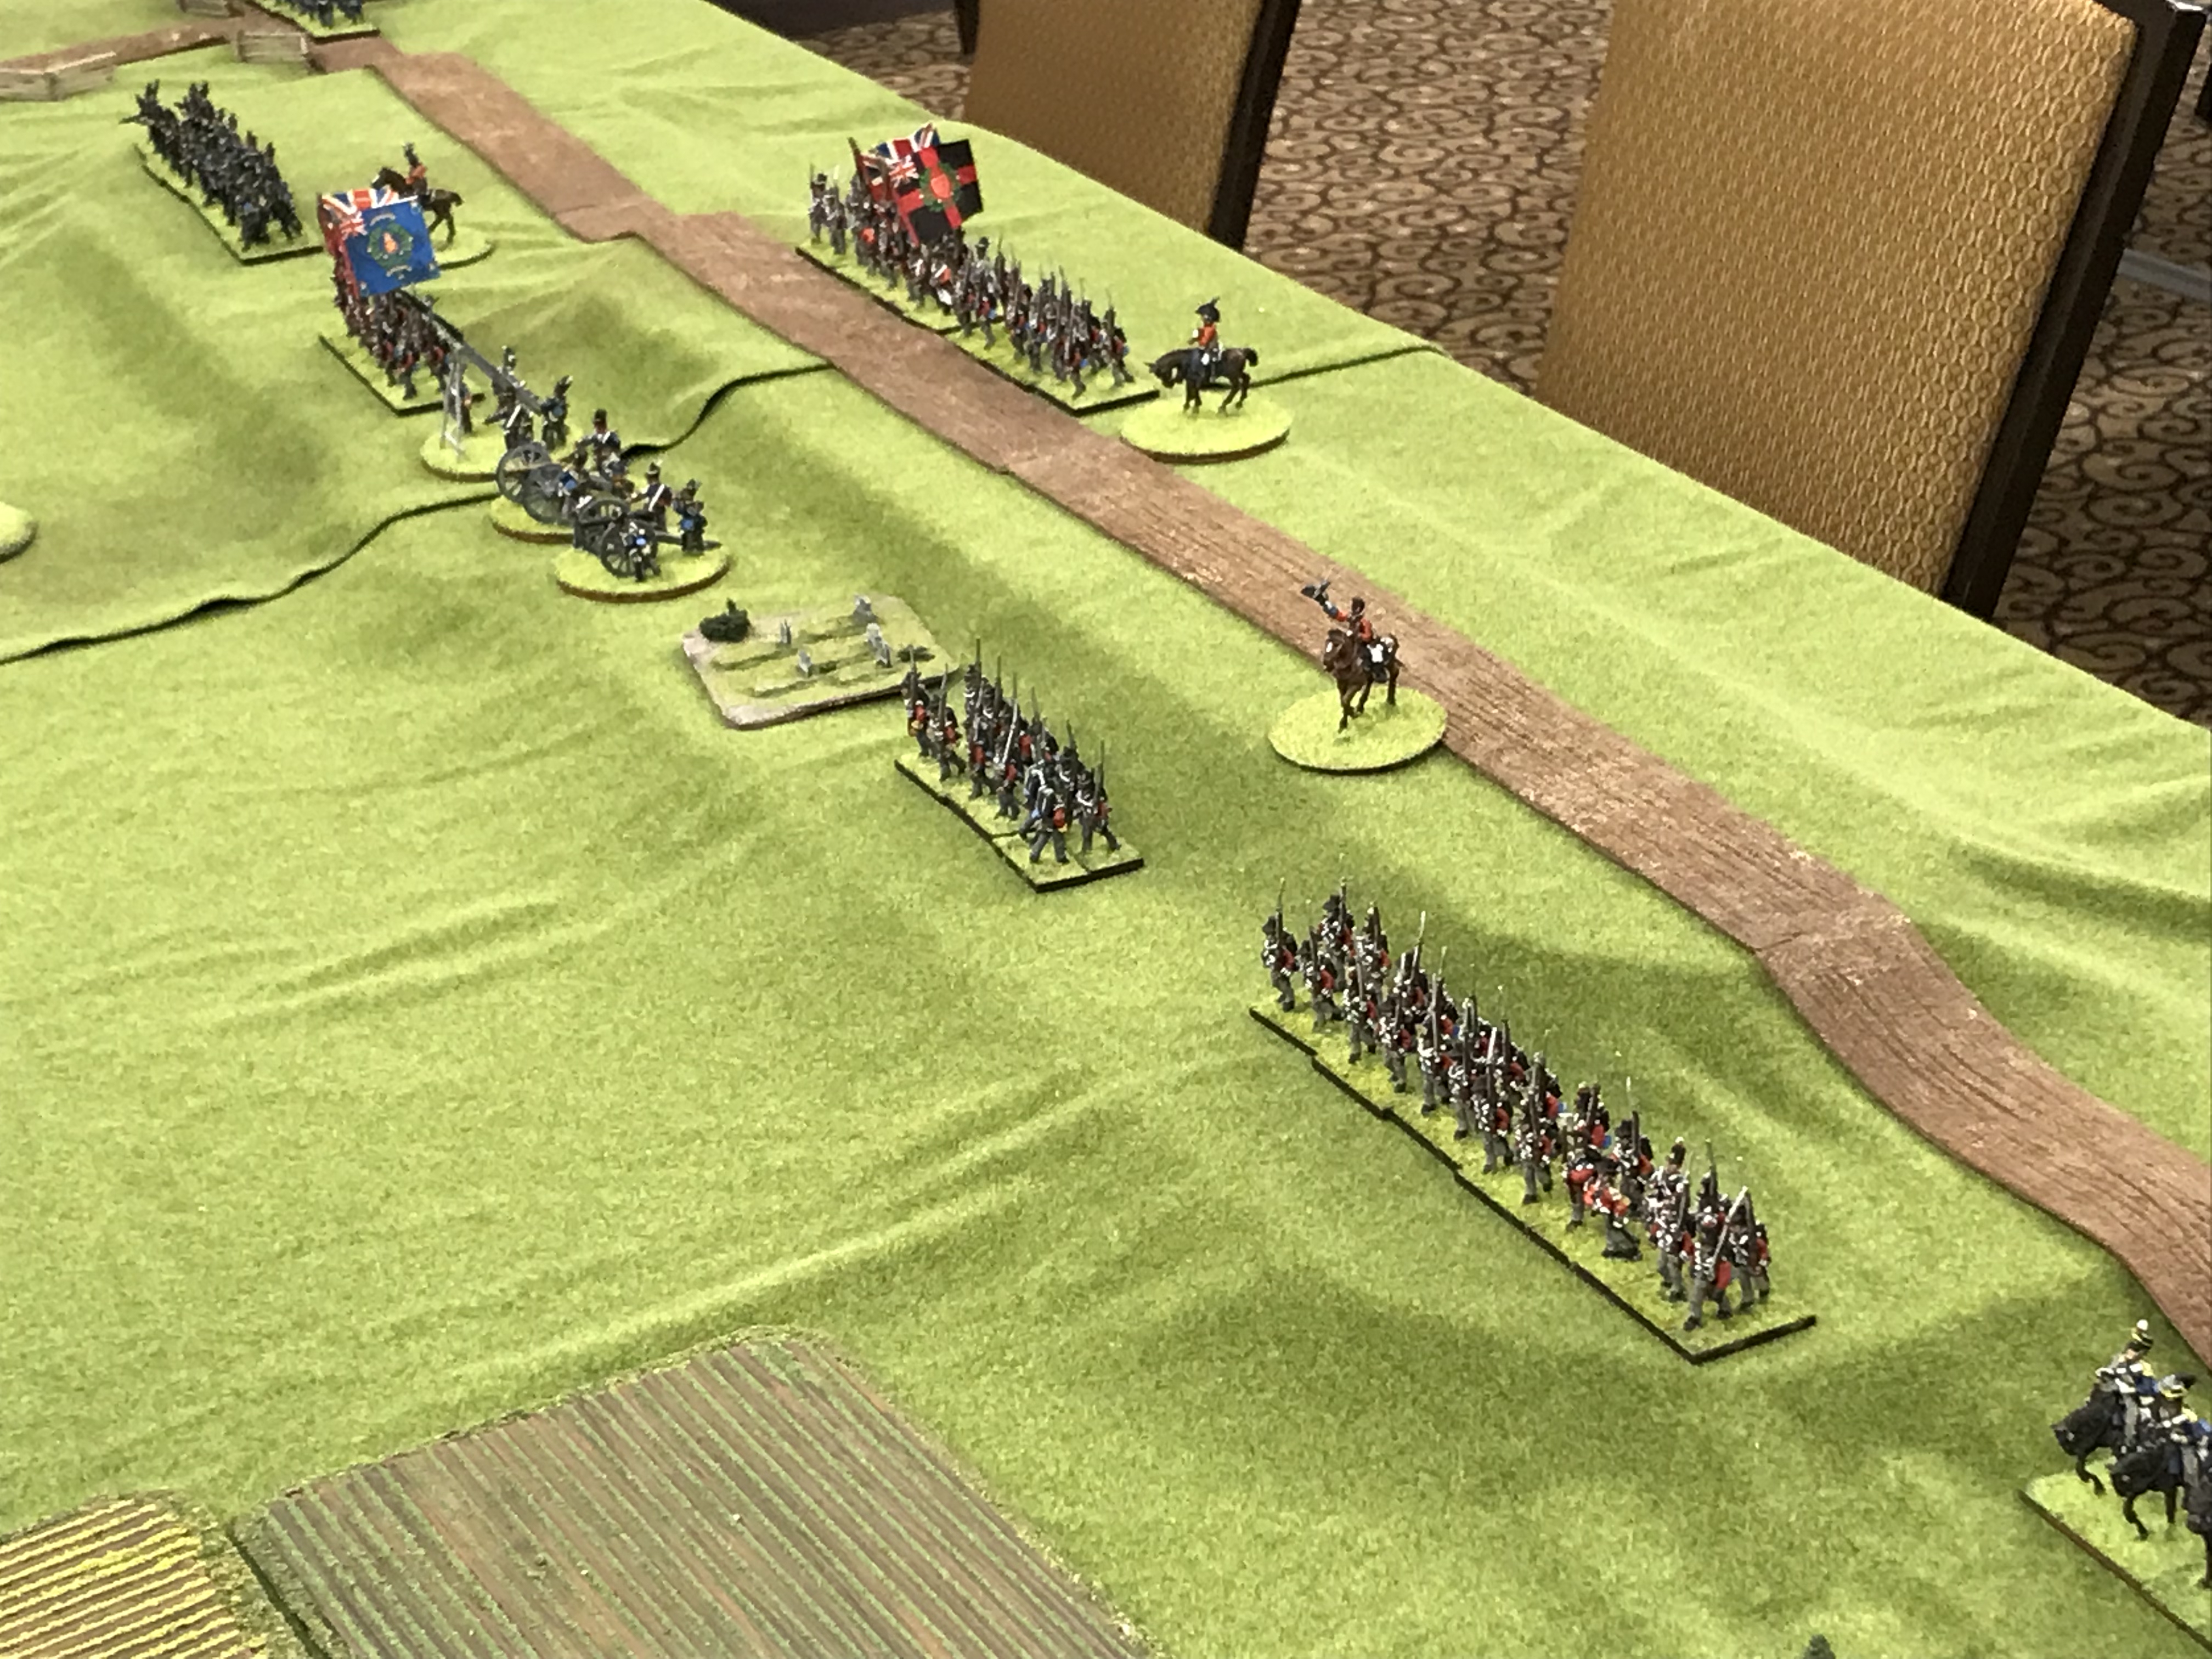
| British/Canadian forces on the right and American forces on the left. |
Our game starts with Pearson's and Morrison's British/Canadian brigades placed on the high ground along Fundy's lane. Winfield Scott's American Brigade is deployed along a narrow country road outside musket range but with artillery range of the British. Woods cover the British/Canadian left flank. Otherwise its open ground. In the upper right of the picture Captain John Norton is concerning with his Native Warriors to see if he can convince them to join the white mans fight.
 |
| Scott's Brigade deployed behind worm fence. |
Scott's Brigade, deployed behind a worm fence consists of the 9th, 11th and 22nd US Infantry regiments in their famous gray jackets and Captain Towson's artillery. Unknown to the other side he has sent Major Jesup with his 25th US infantry regiment and Captain Ketchum's light infantry company to out flank the enemy line. They will emerge out of the woods on turn two. Each regiment is made up of six stands of four figures, and the light company is two stands of four figures on split stands so they can skirmish.
 |
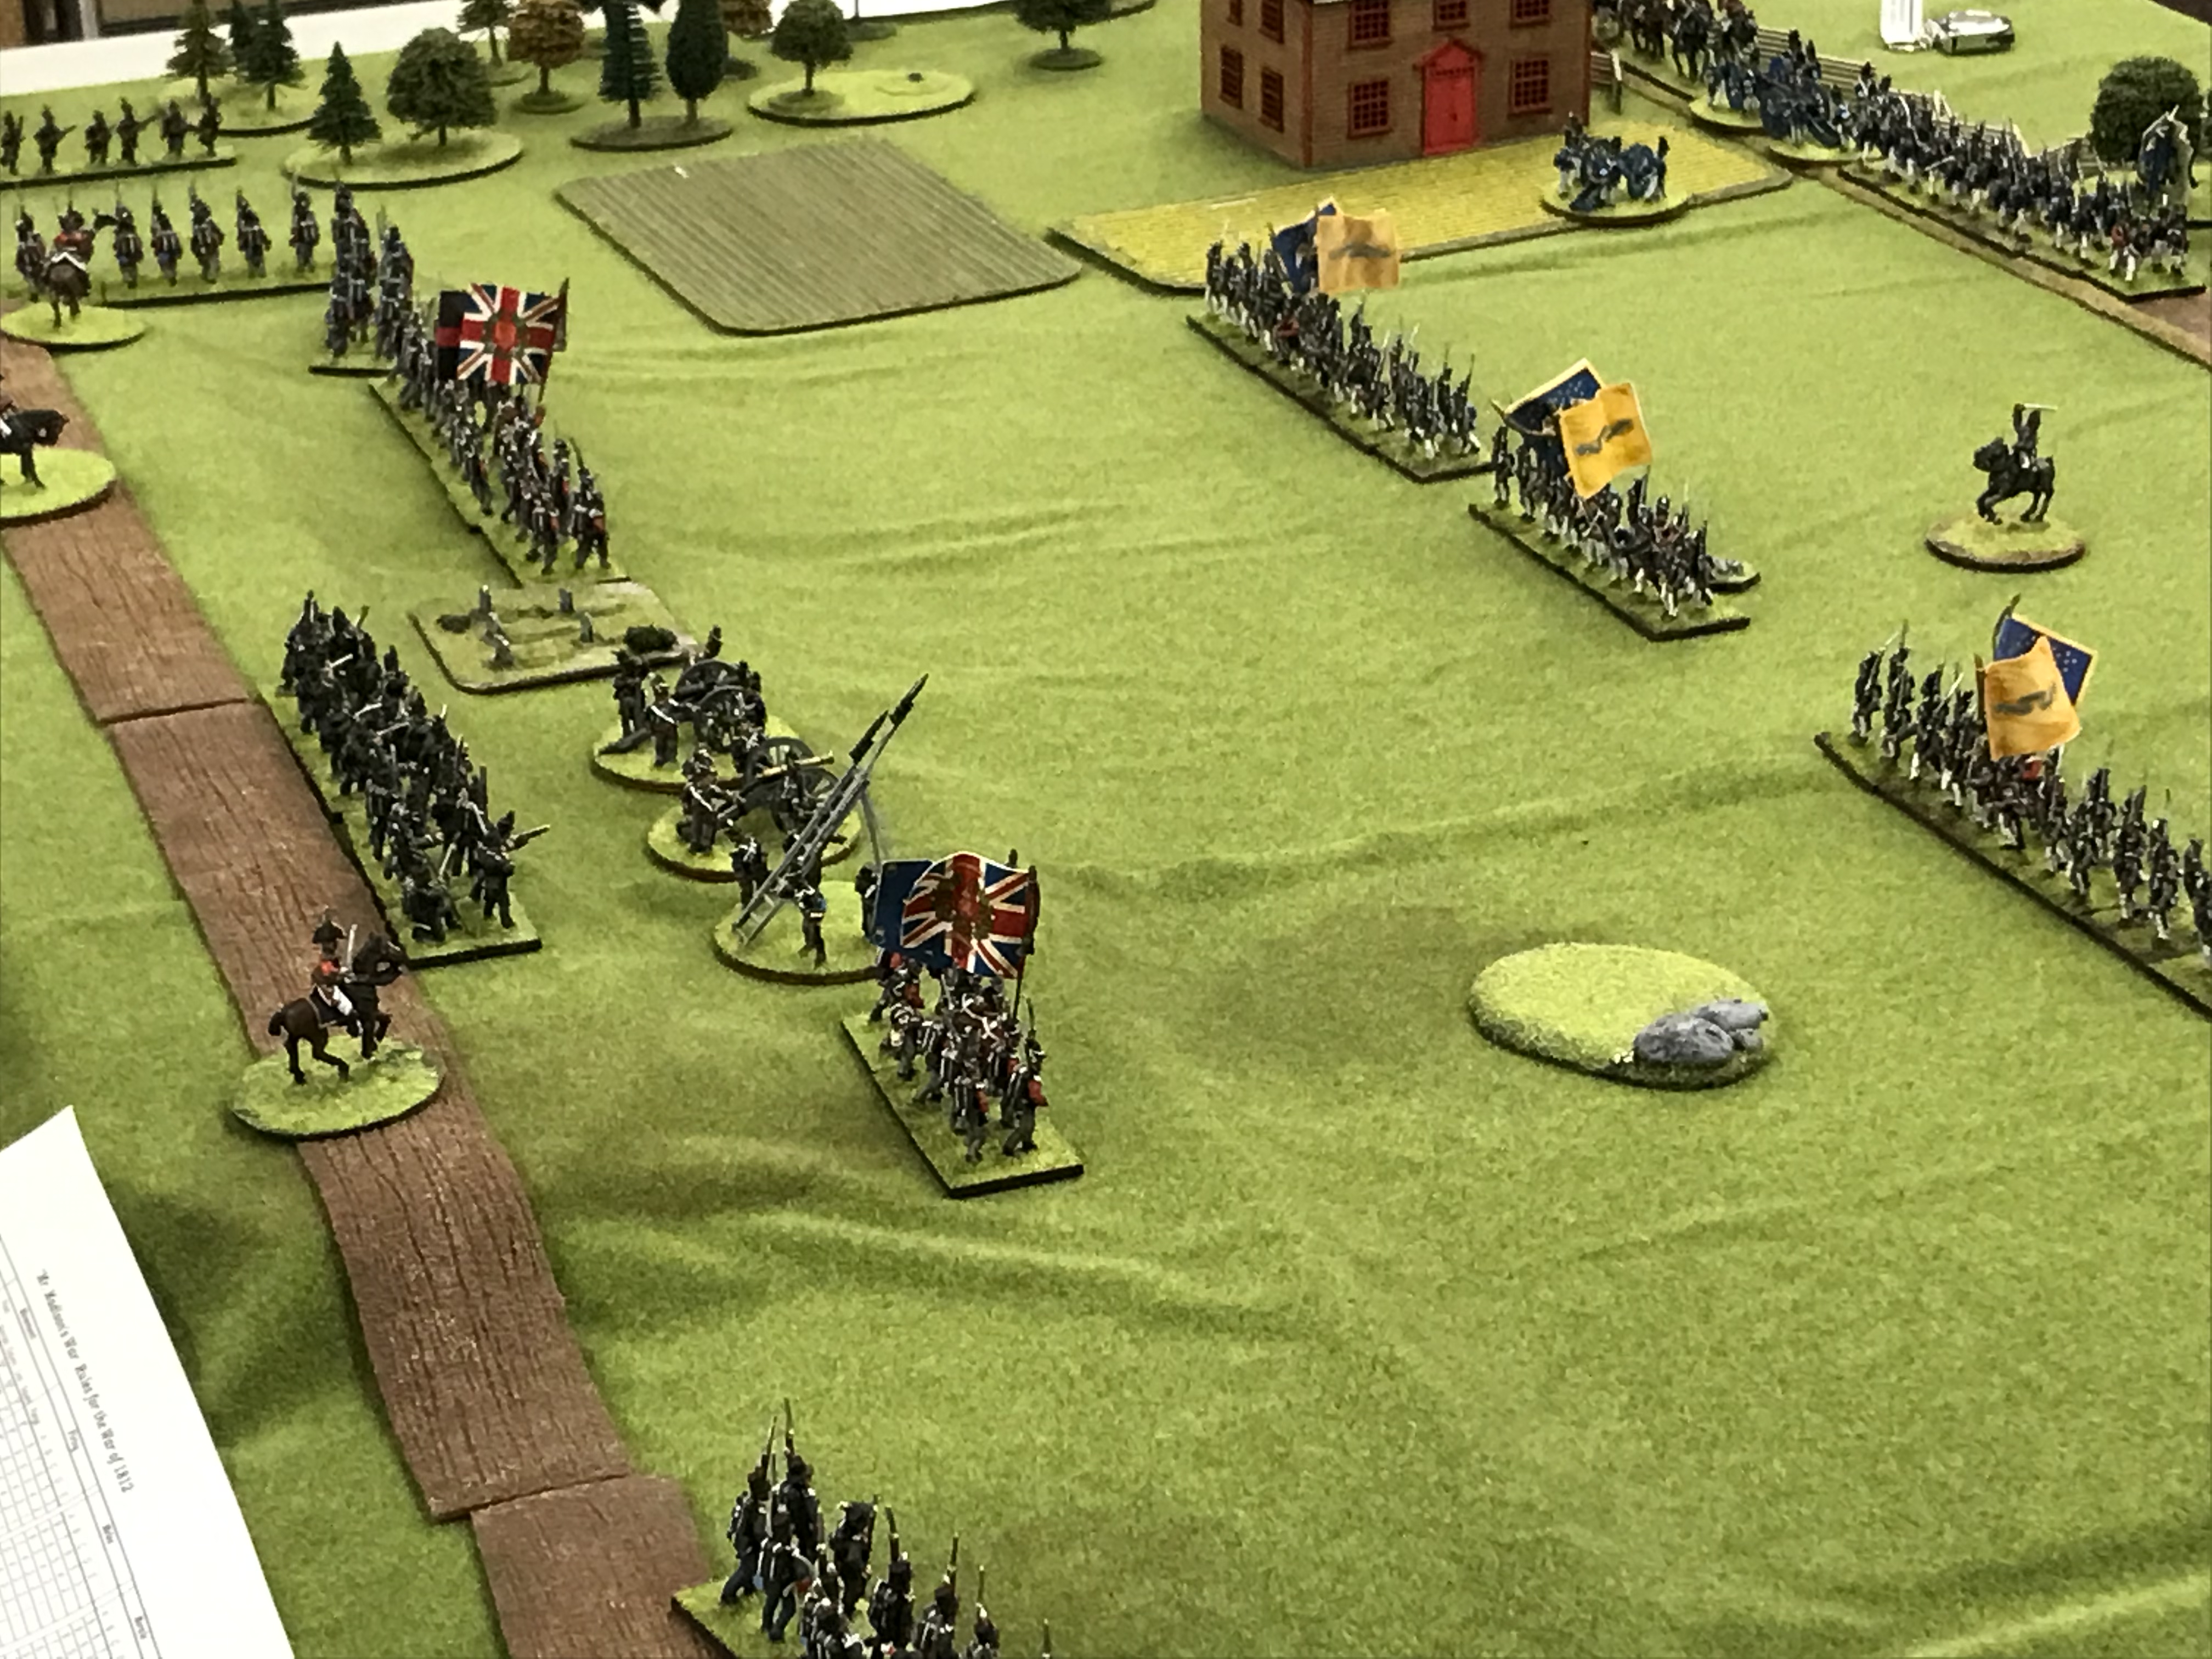
| British/Canadian position at start of game. |
On Fundy's lane the Crown forces are made up of (from left to right); 19th Light Dragoons, Incorporated Militia of Upper Canada (IMUC) , 8th and 41st light companies, 1st Regiment of Foot, the Glengarry Light Infantry (GLI), and just off the ridge the Canadian 1st Militia Brigade. The 89th Regiment of Foot is in reserve. In the center is a battery of a heavy gun, a medium gun and a rocket battery. Reinforcements are expected to arrive on the road at the top of the picture.

The game started with a surprisingly aggressive move on the part of the Americans. In the rules you roll to see who gets to either move first and fire second or move second and fire first. There are advantages and disadvantage to both and it makes each turn interesting. Warren, choosing to move first advanced the Americans towards the British/Canadian line! Obviously he was challenging the spirit of Scott! For the next couple moves he advanced boldly towards the guns. Which of course returned fire....

On turn two not only did American reinforcements start to arrive along their side if the table but the 25th US Infantry and Ketchum's light company arrived on the flank of the British position. The UMUC and 19th LD turned to face the enemy.

And the American infantry continued their advance as the Royal Artillery continued hitting them with long range fire. The British cheered when AJ rolled seven dice for possible hits and all seven dice scored a hit each!


Due to casualties the 9th and 22nd US Infantry fell back shaken, and later routed off the table. The 11th continued and charged the 89th Regiment.


The 25th US and IMUC engaged in a close range musket duel; the 19th LD charged the light infantry who calmly stood their ground and shot the cavalry to pieces. The poor 41st/8th light companies tried to charge Towson's gun but misjudged the distance and failed to connect. The gunners blasted them with canister and sent the survivor running for cover.

In the close combat on the hill the 22nd US was driven back by the 89th. At this same time Captain Norton convinced his braves to enter the fight. They raced forward and fired at the 22nd US as they were attempting to rally. This sent them routing off the board.


But on the flank the 25th US charged forward and routed the IMUC. The GLI attempted to plug the gap but they too were driven back. Things looked grim on the flank. Now, if the Americans could just feed in additional troops perhaps they could break the British line.

In the race to feed reinforcements it was the British who won. They additional British regiments finely arrived. Colonel Hercules Scott (isn't that a great name for an officer!) Arrived with the 1st, 8th and 103rd regiments, the flank companies of the 104th, the 2nd Militia Brigade and an additional battery. One Regiment was hurried along the ridge to support the 89th and artillery while the rest marched to flank the Americans.


Although the 2nd Brigade (1st, 21st and 23rd US infantry and two batteries) and 3rd Brigade (Pennsylvania volunteers, New York volunteers and Canadian volunteers) had marched into the table they were experiencing traffic control problems. Attempting to sort out the infantry became a problem as Norton's warriors harassed them and caused all types of mischief!
Because of this, the American side threw in the towel and conceded the game. It was felt they could not rally and reorganize the regiments before being hit by the advancing red coats.
I feel this was a fun scenario and one that will be played again. The various reinforcements helped swing the game first one way then the other. The early advance by Scott's brigade was bold and threw the brutish side off there game first a couple turns. That and the out flanking by Jesup's regiment. Unfortunately due to traffic issues they could not feed more troops forward. I think I will look into that to see what I can do to fix it.
On the British/Canadian side they played a conservative game and did well. All agreed the not knowing if the warriors would join the fight and the rolling for when reinforcements could arrive added suspence. All agreed the rules worked well and provided a easy to learn and fun game.
Thank you to AJ, George and especially Warren for playing g in the game and making it such a fun experience.
Great looking clash, Mark. Kudos to you for stepping in to fill an empty slot on short notice. Your collection and your organizational skills are in top form when you can do this at the drop of a hat.
ReplyDeleteThank you very much for the very kind words. The club officers were going to cancel the day but Mike, Ed and I stood up and the day was a success. I greatly appreciate your comments.
DeleteA great looking game and excellent result Mark - I don't think you need to change a thing - if the Americans can't sort out their infantry reinforcements, that's their problem - let the British keep winning, I say! (Not that I am biased or anything LOL)
ReplyDeleteI thought you might like it!
DeleteA great report on on great looking game!!
ReplyDeleteThank you Ray very much.
DeleteCracking stuff Mark…
ReplyDeleteA great scenario nicely presented and played out…
All the best. Aly
Thank you Aly, appreciate the compliment.
Delete