Thursday, November 12, 2020

New Rivers, a wonderful gift


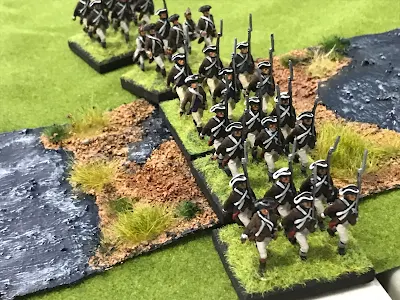
I received an incredible surprise the other day.  In response to a post I made here and on the Fife and Drum Miniature forum I received a new set of rivers for my table set up.  These were made by Bill Nevins who runs Kings Mountain miniatures.  Bill makes incredible terrain and the terrain of his bases for figures. Tgey are diorama like in quality.  Turns out Bill was working in making roads for one of his displays and took up this as a challenge.  Can I make something like this?

There are two sets of rivers.  The largest is 6" wide and about 12' long.  It includes a number of pie shaped pieces to add twists and turns.  There us also a section with a ford and another section with a smaller stream branching off from it.  Then there are. A number of smaller streams about 2" wide.  More then enough for any game.  


Basic canvas with chalk applied.

Then painted blue and gloss added.


The rivers were made from stretched canvas that artists use for painting on.  Acrylic caulk is then spread over the canvas and painted with acrylic gloss paint.  I asked for a very deep dark blue but you can use any color really.  Lastly it us given A couple of coats of gloss medium.  Smaller details like highlighting and a few dashes of white to represent waves add to the effect. The fords have small islands on them.  They are covered in a static grass.  


Most of the pieces layer out.

A big piece with a narrow stream branching off of it.


A wide and a narrow river ford.  


I like these very much and in the future will be seeing much use on my table.  they are a very flexible system which is just what I was looking for.  Bill mentioned that this system can also be used for making roads.  


Thank you Bill!


Crossing the River.

Get off my lawn


Wednesday, November 11, 2020

Armistice Day


   My grandfather, Edward McNamara from Lexington Massachusetts served with the 101st Regiment (Medical company), 26th Yankee Division in the first world war.  He seldom talked about it, and when he did it was a terrible memory which haunted him.  It was only later that I found out  he was mentioned in the division's orders and was decorated for heroism.  He never mentioned this to me.  I found out later through my own research.  But  I will always remember his smile when he told me how at 11:00 A.M. on 11th November the guns stopped and he and his friends knew they would live, knew they had survived.  He went on to raise a family and contribute to society.  During the next war he built ships for the Navy at the Charlestown Navy yard.


   And as this date is now called Veterans Day I say thank you to my father in law, Aldrich Stevens  who served in the  3rd Ranger Battalion (Darby's Rangers) in the Second World War.  He saw service with them at North Africa, Sicily and Italy.  Seriously wounded he did not make the Anzio landing and thus missed the action at Cisterna (although he may have listened to the last radio calls while at headquarters).   Like my grandfather he too was haunted by the memories of what he saw, experienced and especialy those he lost.  But again he went on with life.  Due to the GI bill he got a education, raised a family and contributed to society.  

I remember their sacrifices and hope both men  have found peace.

Sunday, November 8, 2020

The Battle of Cowpens 1781


General Morgan gets ready for some down right fighting!

The battlefield from the American point of view.  Cavalry in reserve and main line of Continental infantry.  Ahead are militia regiments and ahead of them rifle armed skirmishers.

The British line.  Ahead are the (r to l) light infantry, legion infantry, light artillery and 7th Regiment.  A troop of cavalry are to both flanks.  In reserve (not on board yet) are the British Legion dragoons and 71st Highlanders.


Turn #1

British line advances onto board.  They advance steadily against the American line.  They will have to close with the enemy quickly due to limited  number of turns.

7th Regiment of Foot


The British Cavalry fan out on both flanks and approached American skirmish line.  The American skirmishes stay ahead of them peppering them with accurate rifle fire.  The light infantry split move lets skirmishes fall back after firing.


The American fire causes both cavalry troops to check morale, which they fail and fall back.  They are later rallied and return to the fight.


Turn #2 - 4

British line continue their advance.  The Royal Artillery takes aim at enemy and starts a slow but steady fire against the American Militia regiments.


Turn #4 and 5

Reinforcements arrive edge of board.  Tarleton brings the remainder of the British Legion Cavalry and the 1/71st Highlanders onto the field.

Artillery hits militia line and causes a morale check, but the  Militia holds. They are helped by the presence of the two American commanders, Morgan and Pickens.


Legion cavalry.


Turn # 6 and 7


The American combined cavalry under It. Col.  William Washington charge the British left flank.  In the melee both the Light and Legion infantry fall back to rally after their defeat.


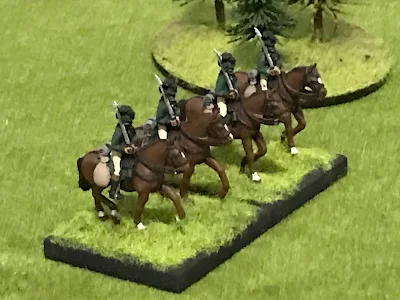
 Tarleton Counter charges the victorious Americans. With two troops he fights Washington's continental dragoons and sends them fleeing back.  But the milita horse defeats his other troop.  Both sides then pull back to rally.


Turn #8 and 9

The American militia and rifles fall back to join the Continental line.  The rifles, using the rules split move are able to move into range, fire and then fall back out of danger.


Morgan readies his main line for the advancing British.  The Continentals firm the center with Militia and Rifle units to both sides.


Turn #10

The British line all move into musket range.  The 71st and 7th exchange fire with the Americans militia.  Pickens and Morgan steadied them and the line holds.  The return fire causes the 7th to rout.  The poor 7th had been steadily losing men advancing against first the rifles then the militia.  They have been slowly whittled down.


On the other flank the Legion Infantry and British Lights destroy the rifles, but take serious hits from the Militia and Continental line. In the exchange of musketry that follows  both units take hits against their commanders and have to test morale. Both fail and rout back.  In these rules light troops can aim at enemy commanders in a battalion.  It's hard to hit them but when they do it causes morale problems.


The 71st now alone!  They have  the Continental Light battalion and the Militia to its front and is heavily outnumbered.  The officers look about for support, where us Tarleton?

Turn #11

Tarleton, must test morale of his horse after the infantry routes past them.  They fail and turn about and race from the field.  Morgan, waves his hat and the entire American line moves forward to clear the field.  The poor 71st is an island surrounded by American troops.  

The commander of the Highlanders is heard to mutter, " This is what comes of being led by a beard less boy."


It was not my day!


Epilogue:

A decisive battle much as the historical one was.  The rules used worked very well and provided a fun and enjoyable game.  The split move of the light troops works very well in giving skirmishes the ability to shoot and run away.  

I think the results of the fight are pretty much pre ordained.  The British have but one commander who cannot be everywhere at once.  The Americans have multiple commanders who can steady troops.  Also, putting a time limit on the game forces the British to just move forward quickly and no fancy tactics.  But in the end Morgan had an excellent battle plan designed to defeat his enemy.


Saturday, November 7, 2020

Setting up Cowpens


  Cowpens is one of the more interesting actions fought during  the  American Revolution.  General Daniel Morgan with a mismatched command won one of the most decisive battles of the war.  He understood how his opponent Banastre Tarleton fought and designed his battle plan for him.  He understood the various strengths and weakness of each of his troop types (rifles, Continental line regulars and militia) and set them to maximize their strengths not their weaknesses.
It is also one of the best preserved battlefields I have visited.  

In fighting this out on the table top I will be using  the historical order of battle at a 1:10 scale.  The rules used are "Whites of Their Eyes" by Steve Haller.  I am limiting the game to 12 turns.  This is to force the British to rush into the fight as historically they did.  The battlefield was very slight rolling ground.  There were scattered trees, mostly pines but they did not effect the fighting.  Here are a couple pictures from the actual battlefield to show how it looks.


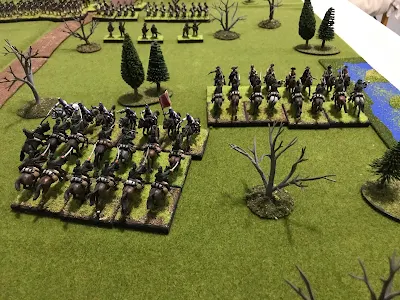
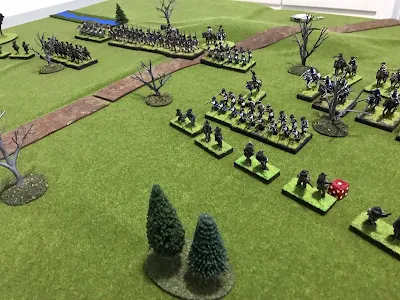
The Americans are set up with the cavalry hidden in a swale along one edge of the field.  The American main line of Continental line troops is 15 inches from them.  A line of two militia regiments are 10 inches in front of them with another line of rifles 10 inches in front if them.  The plan was for each line to cause casualties before falling back.  The British will enter the board in two lines.  The first is made up of the 7th Regiment, Royal Artillery (3 pounder), British Legion Infantry and Light Infantry battalion.  A troop of the Legion Cavalry and 17th Light Dragoons protect each flank.  On turn 3 the remainder of the British Legion Cavalry and 1/71st Highlanders enter.  The British must attack and destroy the enemy as quickly as possible.


A hidden advantage of the game is the American command structure.  Morgan is the commander, assisted by Howard who commands the Continentals and Pickens who commands the Militia.  The British have only Tarleton.  This will effect starting troops and assisting with close combat and rallying routed troops.  So it will be a difficult battle for the British to win.


Cowpens Order of Battle

Morgan's Light Division

Cavalry Brigade: Lt. Col.Wm Washington
Continental Light Dragons (8) (regulars)
McCall's Militia Horse (6) (militia)

Continental Brigade: Col. Howard
Maryland-Delaware Light bn. (24) (elite)
VA. State Troops (12) (regulars)
Tripplett's VA. Rifles (12). (regulars)


Militia Brigade: Pickens
1st Spartan SC militia. (24 (militia)
2nd Spartan SC militia (24)  (militia)
(Hays Little River Militia Divided between the two militia regiments)
McDowell's Rifles. (12)  (militia)
Cunningham's Rifles (12) (militia)

(134 figures)


Tarleton's Flying Column
Lt. Col. Tarleton commanding

17th LD troop (4)
British Legion Troop (4) (regulars)
Royal Artillery 3pounder (regulars)
British Legion Infantry (20) (regulars)
British Light Infantry (16) (regulars)
7th Fusiliers (18) (regulars)
1/71st Highlanders (24) (regulars)
British Legion  Dragoons (20)  (militia)
(106 figures)

(Light bn made up of light companies 71st regiment, and companies from the 16th Regiment and Prince of Wales American Regiment. A most unusual unit indeed!)

Thursday, November 5, 2020

Uniforms of the Hessian Grenadier battalions


Hessian Grenadier Reenactors

One of the more interesting looking units for the American Revolution war gamer would be the combined Hessian Grenadier battalions.  Made up from the detached Grenadier companies of the Hessian force sent to American they are most colorful and imposing on the table top.  I am looking to add some next year so have been doing some research on them.


The treaty between Hesse Cassel and Great British determined the army sent to America would be made up of  4 Grenadier battalions, 15 Infantry battalions, 2 companies of Mayer and 2 artillery pieces and crews per regiment or battalion.  Each Grenadier battalion was to have  16 Commissioned Officers, 44 Non Commissioned officers, 1 non combat officer, 20 musicians, and 429 rank and file.  Actual field strength would be much lower.  After the attack on Red bank the two Grenadier battalions who fought there fielded 192 men total.

 Here is a field report from 1777 following the campaign to give actual field strength rather then paper strength.

Strength Report 25 November 1777

Battalion          Off.   NCO.  Mate.   D&F.  R&F.   Total

Linsing.               7        28       3           20      216     274

Minnigerode       6       28       3           20      217     274

Lengerke.           17       33       3           17      316     386

Kohler.               12       36        2           16       250    317


The four Grenadier battalions were made up of four companies each, and were named after their commanding officer.  With slight modifications this stayed the same throughout the war.  


Grenadier Battalion von Linsing

In 1776 the battalion was composed of the Grenadier company from the Leib, Mirbach, 2nd bn. Guard and 3rd bn. Guard regiments.  These stated together until February 1783 when a company from the Landgraf replaced the company from the Mirbach.  In May 1783 the organization changed to a company from the 1st, 2nd and 3rd bn. Guards and a company from the Erbprinz regiment.


Grenadier Battalion von Block

In 1776 it was commanded by Ltc. Justus Heinrick Block.  He was replaced after that year by Ltc. George Emanuel von Lengerke.  The battalion was composed if the Grenadier company from the Wutginau, Prinz Carl, Donop and Trumbach regiments.  In 1783 the company from Jung von Lossberg replaced the Trumbach company.


Grenadier Battalion von Minnigerode

In 1776 the battalion was commander by Col. Frederick Ludwig von Minnigerode.  He was replaced in 1780 by Col. Wilhelm von Lowenstein.  The battalion was made up of the Grenadier company from the Erbprinz, Ditfurth, Lossberg and Knyphausen regiments.


Grenadier Battalion von Kohler

In 1776 commanded by Ltc. Johann Christopher Kohler.  He was replaced in 1778 by Maj. Wilhelm Graf, who was replaced in 1782 by Maj. Fredrick Platte.  The battalion was made up if the company from the Rall , Wissenbach, Stein and Bunau regiments.


Hessian Reenactors


For more information please see:

The Hessian Grenadier Battalions in North America, 1776-1783"

Weinmeister, Oscar K., Jr.

MCH, 27 (Winter 1975), pp. 148-152.