 |
| General Morgan gets ready for some down right fighting! |
 |
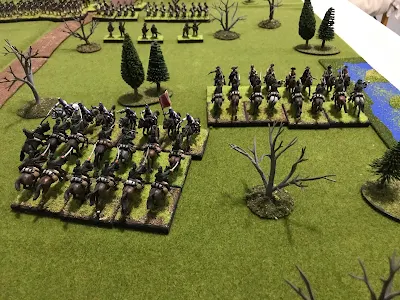
| The battlefield from the American point of view. Cavalry in reserve and main line of Continental infantry. Ahead are militia regiments and ahead of them rifle armed skirmishers. |
Turn #1
British line advances onto board. They advance steadily against the American line. They will have to close with the enemy quickly due to limited number of turns.
 |
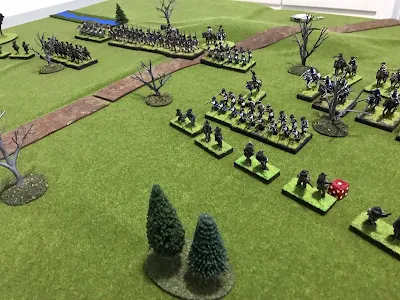
| 7th Regiment of Foot |
The British Cavalry fan out on both flanks and approached American skirmish line. The American skirmishes stay ahead of them peppering them with accurate rifle fire. The light infantry split move lets skirmishes fall back after firing.
The American fire causes both cavalry troops to check morale, which they fail and fall back. They are later rallied and return to the fight.
Turn #2 - 4
British line continue their advance. The Royal Artillery takes aim at enemy and starts a slow but steady fire against the American Militia regiments.
Turn #4 and 5
Reinforcements arrive edge of board. Tarleton brings the remainder of the British Legion Cavalry and the 1/71st Highlanders onto the field.
Artillery hits militia line and causes a morale check, but the Militia holds. They are helped by the presence of the two American commanders, Morgan and Pickens.
 |
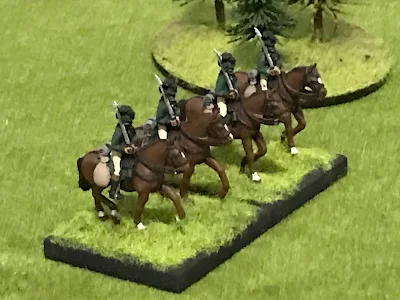
| Legion cavalry. |
Turn # 6 and 7
The American combined cavalry under It. Col. William Washington charge the British left flank. In the melee both the Light and Legion infantry fall back to rally after their defeat.
Turn #8 and 9
The American militia and rifles fall back to join the Continental line. The rifles, using the rules split move are able to move into range, fire and then fall back out of danger.
Morgan readies his main line for the advancing British. The Continentals firm the center with Militia and Rifle units to both sides.
Turn #10
The British line all move into musket range. The 71st and 7th exchange fire with the Americans militia. Pickens and Morgan steadied them and the line holds. The return fire causes the 7th to rout. The poor 7th had been steadily losing men advancing against first the rifles then the militia. They have been slowly whittled down.
On the other flank the Legion Infantry and British Lights destroy the rifles, but take serious hits from the Militia and Continental line. In the exchange of musketry that follows both units take hits against their commanders and have to test morale. Both fail and rout back. In these rules light troops can aim at enemy commanders in a battalion. It's hard to hit them but when they do it causes morale problems.
The 71st now alone! They have the Continental Light battalion and the Militia to its front and is heavily outnumbered. The officers look about for support, where us Tarleton?
Turn #11
Tarleton, must test morale of his horse after the infantry routes past them. They fail and turn about and race from the field. Morgan, waves his hat and the entire American line moves forward to clear the field. The poor 71st is an island surrounded by American troops.
The commander of the Highlanders is heard to mutter, " This is what comes of being led by a beard less boy."
 |
| It was not my day! |
Epilogue:
A decisive battle much as the historical one was. The rules used worked very well and provided a fun and enjoyable game. The split move of the light troops works very well in giving skirmishes the ability to shoot and run away.
I think the results of the fight are pretty much pre ordained. The British have but one commander who cannot be everywhere at once. The Americans have multiple commanders who can steady troops. Also, putting a time limit on the game forces the British to just move forward quickly and no fancy tactics. But in the end Morgan had an excellent battle plan designed to defeat his enemy.


Beautiful and impressive lines of battle, what a great (and decisive!)
ReplyDeletelooking game...
Thank you!
DeletePoor old Banastre, he was well whupped. Great stuff as always Mark.
ReplyDeleteRegards,
Paul.
It was not his day....
DeleteExcellent battle report of Cowpens. Thanks you!
ReplyDeleteThank you. Glad you enjoyed it!
DeleteYes much as I expected and as happened in real life! The limitations you put on the British to force them to fight the same way as Tarleton did historically prevented a more sensible tactical plan. The War of Independence was certainly not the British Army's finest period!
ReplyDeleteIf you play it historical ( time pressure, no sub commanders) its a very difficult for the British to win. Take way the time pressure and let the British set up different and they can win. Morgan knew his enemy and fought accordingly.
ReplyDeleteGood report, and as you point out, not easy for the British to pull off a victory.
ReplyDeleteFirst AWI battle I ever fought whilst on holiday in Cornwall in 1983. Based on Stuart Asquith’s article in Mil Mod, I used Newbury colonial rules and card strips on a bare coffee table! Oddly, it didn’t look as good as this... 😆
ReplyDelete