Monday, May 6, 2019
Impudent Mortals MDF buildings
Among the items I bought at Cold Wars this year were a number of MDF buildings. Most of these were by a new (to me) company called Impudent Mortal (https://www.impudentmortal.com). They make a wide variety of interesting items. These include paint racks and buildings. The buildings include a number of North American 25mm type structures which fit in nicely for my Rev War and 1812 table tops. The prices are very reasonable and they also bundle buildings in evan more reasonably priced packages. I bought the bundle which included a really nice Georgian House (I want to get a couple more of these). Perfect for my time periods. The company has on line instructions available directly to down load to assist in assembling the buildings.
I am having great fun with these. They go together very well and paint up nicely. I think they will give my table top a lift. And provide some structures to fight about in future games. Perhaps the nefarious Canadian Volunteer will want to wreak havoc on a small village in a future game? Stay tuned to see!
Sunday, May 5, 2019
A visit with Scott Leach and his miniatures.
I visited with my friend Scott Leach recently. Scott has been a mentor over the years in all things miniatures. He has taught me more about painting and miniatures then I could remember. And inspired me in all my miniature projects.
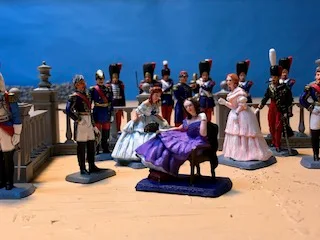
During our recent visit Scott was kind enough to show me some of his new 54mms figures. Many of these are conversions from existing figures. His latest work included figures from the court of Napoleon III, French Vivandiere's and Cantinere's, two Civil War regiments and a Santa for Christmas.
Many visitors to my blog may have seen or visited Scott's blog here:
https://ilikethethingsilike.blogspot.com
Saturday, May 4, 2019
Fife and Drum Miniature Rules for American Revolution
As readers of this blog know I very much enjoy the wargame rules from Fife and Drum miniatures. These are a simple one page set of rules. A move, counter move set; but with some interesting twists. A side may move first and fire second or move second and fire first. Casualties are taken as they happen so there is A advantage to firing first. But, you can charge into contact if you move first so there are advantages to that too. A very interesting twist to the old move counter move system. They are very morale driven which I like. Casualties are moderate so regiments do not disappear too quickly. And there are a number of morale and trading grades so a regiment can be flexable.
In addition to using these rules for my War of 1812 games I have also started using them for American Revolution. These were the rules used in my recent Cowpens-Guilford Courthouse Campaign.
The rules provide a fun and fast game and are easy to learn. They are great for game nights as players quickly pick up the rules and can concentrate on play rather then looking up how to do things. This makes for a much better gaming experience.
As with anything we have made a few house rules and interpretations. The rules can be here to be downloaded:
http://fifeanddrum-minis.com/rules--articles.html
In addition a rules tutorial with examples of play are here: http://altefritz.blogspot.com/2017/08/fife-drum-awi-rules-tutorial.html
These are my house rules and interpretations:
Move first, fire second, move second, fire first: when it is your turn to fire remove all casualties from hits. No, casualties removed do not get to return fire that was the advantage of firing first.
Retire facing or not facing enemy: deduct 2" from move to retire with back towards enemy. Half move to retire facing enemy or move sideways.
Charges or moving into melee: during your move declare charge. Defender tests morale, if pass they stand and can fire at charger (who tests morale if casulties), if fail retire column distance back shaken. There is no charge move bonus. When defender turn to move they cannot counter charge or add regiments to melee. r
Fight one round of melee then side with most casualties tests morale. If pass then other side tests. If both sides pass then attacker is considered to have failed to push back defender from their position. The attacker retired one column move back towards their line facing the enemy.
Routing or shaken units effect on other units: ignore friendly shaken units retreat past if they are lower morale. Otherwise check morale. If regiment routes past test morale.
Multiple units in melee: If two units vs one distribute casualties evenly to both units.
Wheeling regiments: Wheels are made from the left, right, or center of the unit only. measure outside arc.
Fences, small streams: Units move up to them and stop. Next move you cross obstacles and continue your move. If both units are touching the same fence line and facing each other across it neither gets the benefit of the fence.
Artillery: Heavy guns one operation per turn. Medium guns two operation per turn. Light guns three operations per turn.
Operations are limber, unlimber, prolong and fire.
Artillery cannot enter woods. They need infantry to knock hole in fences to cross.
Any friendly unit within a friendly artillery arc of fire, if the arc of fire goes through two opposite sides of that friendly unit the artillery can not fire. Arch of fire is measured from cannon barrell, with of stand forward like a bowling alley
Difficult Terrain: (fields, woods and rocky ground or up hill): Cost 2" for each 1" moved.
Woods; units stop movement at edge of woods. They enter next turn (similar to fences). Once in woods open order troops (skirmishes or Indians) move their full movement, while formed troops move half their movement. Small arm range is half. Only skirmishes get cover modifiers. Yes, it sucks for regulars in the woods (please ask General Braddock).
Indians: always unformed, in mass formation (I.e. in a bunch). No penalty to change direction. In woods move full movement. Units fired at by Indians for first time check morale if second class or Militia. In open clear terrain go one step down chart for firing and morale (if on line "C" use line "D"). Indians are not shock troops. They race about being obnoxious and scaring volunteers and militia who are not used to them.
Friday, May 3, 2019
Cowpens-Guilford Courthouse Campaign Refought: epilogue
So, how did the campaign turn out? Most excellent if I say so. The campaign generated a number of interesting battles. Due to the variable order of battle determined by dice roll fighting the same battle over could be very different. In addition there were a number of actions that did not get fought which with a different roll could have. So playing the campaign out again could provide very different results.
Interestingly the campaign followed the historical one very closely up to the end. The results of the fight between Morgan and Rawdon mirrored the Cowpens results. And the Cowen's Ford action mirrored the historical one. Although with that battle Davidson lived to fight another day which I am sure his wife appreciated.
The only oddity was the final battle with Greene attacking Cornwallis. The Crown forces had a superb army, including the units from Cowpens. Yet the Americans destroyed them in a decisive victory. This I feel was due to the unusual British set up and lack of aggression in the part of the British commander. But hats off to the three American commanders who fought a excellent battle. I am sure they received the thanks of Congress and a sword. Future generations will name numerous schools, ball fields and streets in their honour.
War game rules used for the battles were the set from Fife and Drum miniatures. These are a one page set of rules which provide a fun and fast game. I will post a more detail explanation about the rules and the interpretation and house additions we use with them.
This has been a long goal of my mine to fight this campaign out since I first read Steve Haller's article in The Courier (vol. 1, no. 1). It was great fun and I hope to do it again next year.
Sunday, April 21, 2019
Cowpens-Guilford Courthouse Campaign Refought: Battle of New Garden Meeting House.
For the final battle of the campaign Greene and Cornwallis armies fought a meeting engagement at New Garden Meeting house. The Americans fielded the army they would have at Guilford Courthouse. I gave them a additional North Carolina Militia battalion and Maryland-Delaware light battalion intact instead of returning it to its parent battalions. The British got both battalions of the 71st regiment, the light battalion and the British Legion infantry since Cowpens had not been fought. Lastly since the battle was so large it was fought at club game night since we had additional players and more room.
 |
| Peaceful farm before The Battle with The now famous geese! |
The Americans set up on the north side of the table. They had a large woods with a road running through it on their left with more open fields in the center and right. This area was dotted with fences, crop fields and two ridges. Woods were rough going exception on road.
 |
| Riflemen in the woods. |
 |
| Continental line battalions. |
The American commander placed his Continental line regiments (1st & 2nd Maryland, 4th and 5th Virginian and the Light battalion and a medium gun) in his center. On his right he massed his cavalry (Lee's, William Washington's and Militia horse) and supported them with four Virginian militia battalions and a medium gun. Both commands were to attack the British and try to push through. In his left he placed two rifle battalions in the woods and four North Carolina Militia battalions to support them this command was to try and hold off the British.
 |
| Com Bose and 33rd Regiment |
 |
| British Legion and Light troops advancing through the woods. |
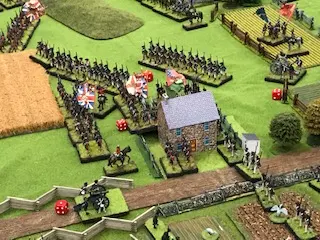
The game started by the Amercans aggressively advancing in the center and right. Their guns were placed to support the advance. The British countered this by advancing the von Bose, 33rd and 23rd in the center. In the woods the British pushed forward, but at reduced speed. All the time sniped at by the riflemen.
Because the British commander advanced the Von Bose 33rd and 23rd one behind the other. The Continental line was able to mass against them. First artillery and muskets fire forced the von Bose to check morale. Poor dice saw the Germans rout off the board! The two Maryland regiments then attacked the 33rd regiment supported by the Light battalion. Heavily outnumbered the 33rd routed. The Royal Artillery went down fighting as their gun was over run.
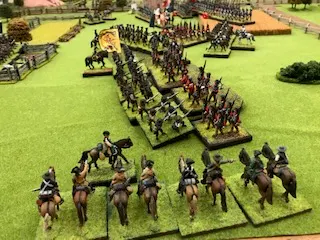
Seeing the mass of cavalry approaching the commander of the 71st moved out to meet them . He advanced his two battalions against the cavalry and four battalions of militia. Trying to support his commanders he moved one battalion towards the center and the Continental line while the other faced off against the militia. This left the American cavalry to swing around the British flank.
The Highlanders charged the militia and caused numerous casualties. But the militia morale held and the Highland 23rd fell back disordered. Unfortunately the American cavalry were there in their flank and rear. With no where to go the Highlanders surrendered. The other battalion advancing towards the Continental line was ridden down by cavalry who attacked them from the rear.
 |
| 23rd Royal Welch Fusiliers fighting the Maryland regiments. |
 |
| last stand of the Fusiliers. |
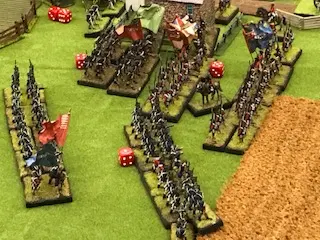
In the center the gallant 23rd Royal Welch Fusiliers stood their ground. A devastating volley caused the Light battalion to retire in disorder. The two Maryland regiments charged but could not make a dent in the Fusiliers. Both regiments fell back disordered. Looking over their shoulders for support the Fusiliers saw the Brigade of Guard's move in the direction of the woods!
The British Legion had made slow but steady progress. They had pushed the Riflemen back. The British light infantry and Jagers, supported by a squadron the the Legion attacked the militia along the stone wall and routed them. At this point the rest of the Legion Cavalry were moving out of the woods and ready to attack the American flank. But what he saw was the entire Continental line in position to fight him. Additional militia battalions were moving up. And the American cavalry were moving forward to engage. Deciding to save what was left of his army the British commander ordered them to retreat and save what they could.
This ended the Cowpens-Guilford Courthouse Campaign. The American had crushed the British army and won a decisive, but unexpected victory.
Subscribe to:
Comments (Atom)


