Tuesday, May 9, 2017

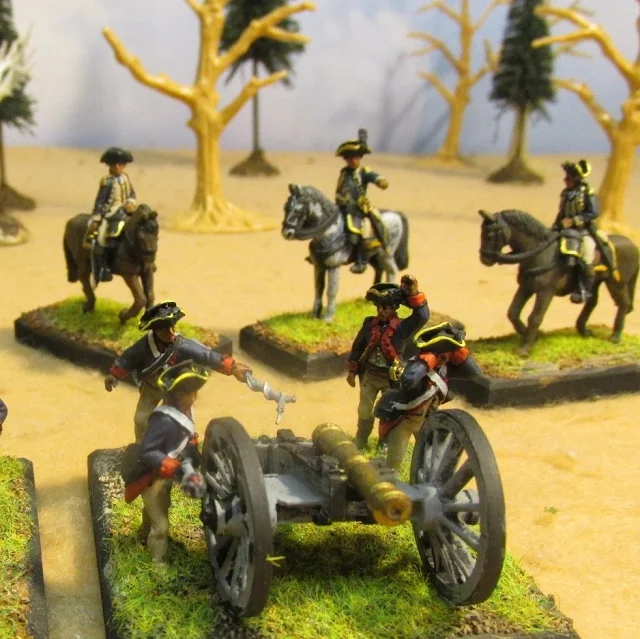
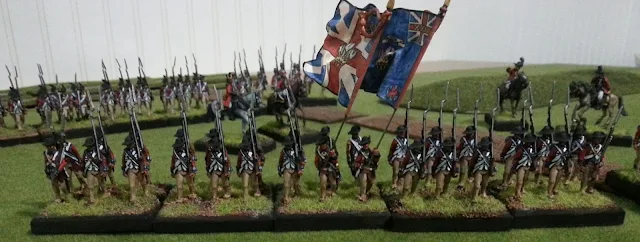
The Cowpens - Guilford Courthouse Campaign refought .


 In volume one issue one of The Courier Steve Haller wrote an article about wargaming campaigns without maps.  in this article he refought the Cowpens -Guildford Courthouse campaign using this method.  Always a big fan of his writing in the Courier, I recently revisited his article with a mind to use his suggested campaign.


   In his introduction Haller wrote, "War gamers who enjoy the variety that acampaign offers for the use of their collections are often discouraged by the time and clutter involved when maps are used.  An alternative method might employ the use of an scenario based on a historical campaign (complete with OB's, etc) which allows elements of choice and chance to determine the nature of each battle of the campaign.  Each battle is assigned a number of points that are awarded based on the results of the Battle (e.g. comparison of casualty ratios). "   To me this has always been a fascinating idea which I wanted to try out.  Taking Steve Haller's article and work I have slightly modified it by changing some of the options for battles and created my own order of battles based on historical returns.  But the spirit of the campaign remained what Steve wrote way back in the early 1980's.  Here is my outline and rules for the Cowpens -Guilford Courthouse Campaign.  The campaign order of battle including militia desertion (i.e. going home) and reinforcements will be in the next post as part 2.


Campaign Guide Lines:
1.  Rules used are Loose Files and American Scramble.
2. Figure scale is 10:1
3. Terrain to be based on historical battles in the area.
4. After each battle 25% of casualties will be returned to each unit.  One month after that battle all American units (including loyalists) receive an additional 25% returned.  Two months after battle British and Hessian units receive back 25% casualties.  Units that drop to under 20% of their original strength after a battle are eliminated.
5. Staff Officers return after battle if roll a 4-6 on a D6.
6.  Players should be familiar with the historical campaign.


THE CAMPAIGN:
1. January 1781
General Morgan invades South Carolina with his Light Troops.  He can successfully link up with Pickens' South Carolina brigade by rolling 1-4 on a D6;  Sumter's brigade will join on a roll of 1-3.

Morgan now has three options:

1.  Fight Cowpens as the historical battle with historical order of battle.
2.  Attack Camden.  The garrison under Rawden will march out to fight him at the Hobkirk Hill area.  After that battle Tarleton will try to intercept Morgan by rolling a 1-3 for an encounter battle.
3. Attack the Fort Ninety-Six garrison. A defense will be set up by Cruger based on a Steve Haller scenario.   The garrison can be reinforced by Tarleton by rolling 1-4 on a turn determined by a die roll.


2. February 1781
Cornwallis'  and Tarleton chase Greene's and Morgan's forces through North Carolina.  The following battles are possible and determined by a die roll:
1. Cowen's Ford will be defended by Davidson's militia brigade as the historical battle by rolling 1-4.  Greene can detach elements of the Continental Light Division to assist on a turn determined by a die roll.
2.  A meeting engagement on random terrain involving all units if a 5-6 is rolled.


March 1781
Greene's reinforced army turns to fight Cornwallis army.
1. Guilford Courthouse as the historical battle by rolling 1-4.
2. Greene attacks Cornwallis army at Guilford Courthouse by rolling 5-6.

Victory is determined by casualties and condition of army at end of campaign.  Forces available for certain battles or each month will be posted in addition order of battles.

I am presently finishing the last couple of regiments for this campaign.  Once done I will be reporting the progress of how this turns out. I am looking to set this up for June 2017.  


Saturday, May 6, 2017

Henry Clifford's Crimean Watercolors


   Watercolor from Henry Clifford VC  of the British army of the March towards the Alma, 1854. Love the two soldiers talking in lower right corner and especially the soldier resting!


 Rifle Brigade skirmishing


A Rifleman close up and supply donkey

The Guards fighting at The battle of the Alma.

Thursday, May 4, 2017

Niagara 1814 Campaign


  My Niagara 1814 project is finally nearing completion.  I have long wanted to do this, but have ways had a reason to put it off.  I started a couple times, once in 15mm  but again it never amounted to much so isold the figures off.  It was the Knuckleduster miniatures line of figures for 1812 which finally got me going.  An almost complete line with a great variety of figures and competitive priced.  I started in March 2016 after Cold Wars and a little over a year later I am playing games with the collection.  Is it completely?  No collection is and there are some holes and additional regiments I want to add.  But for now I am very happy with it.

-----------------------------------------------------------------


 Left Division, U.S. Army:
Major General Jacob Brown: Commander

1st Brigade : Brigadier General Winfield Scott
9th Infantry  (Major Leavenworth) (24)
11th Infantry (Major McNeil)  (24)
22nd Infantry  (Colonel Brady)  (24)
25th Infantry (Major Jessup)  (24)

2nd Brigade : Brigadier General Eleazer W. Ripley
1st Infantry  (Lt. Col. Nicholas)  (24)
21st Infantry ( Lt. Col. Miller)  (24)
23rd Infantry (Major McFarlane)  (24)

3rd Brigade : Brigadier General Peter B. Porter
5th Pennsylvania (Militia) Regt (Colonel Fenton)  (24)
New York Volunteers. (24)
1st Rifle Regiment. (24)

Artillery : Capt. Nathan Towson, U.S. Artillery Corps
Foot Artillery (Towson)
Foot Artillery (Richie)
Foot Artillery (Biddle) :

Cavalry : Capt. Samuel D. Harris
U.S. Light Dragons (6)


------------------------------------------------------------------


 British Right Division 1814
Lieutenant General Gordon Drummond, commanding

1st Brigade: (Colonel Scott)
8th (King’s) Regiment
100th Regiment
 Royal Artillery

2nd "Light" Brigade (Lieutenant Colonel Pearson)
Glengarry Light Infantry Regiment
Volunteer Battalion of Incorporated Militia
2nd Lincoln Militia
Niagara Light Dragons
Native Warriors
 Royal Artillery

3rd Brigade: (Lt. Col. Morrison)
1st (Royal Scots) Regiment
Royal Artillery

At present I have on the painting table the 5th York militia regiment, the 41st and 89th regiments, Royal Marine rocket battery and the 19th Light Dragoons. For the Americans I would like to add a couple more volunteer regiments, and another regular regiment.  For cavalry, although it is wrong I would love to paint up some of the Kentucky mounted Riflemen.  Perhaps in the future I will do the Battle of the Thames!   So more to do!


Wednesday, May 3, 2017

Crimean War Armies 1854


   My oldest and most favorite of my armies would be the Crimean war collection.  At present it includes British, French and Russian.  Someday I plan on adding Turks.


Russian Army in Crimea:
Army Hqs (Prince A. S.Menshikov)

16th Division (Lt. Gen. Kvetinski)
1st brigade:
Vladimirski Regt. (4 bns)
Susdal'ski Regt. (4 bns)
2nd Brigade :
Uglitski Regt. (4 bns)
Kazanski Regt. (4 bns)
16th Artillery Brigade (2 light btry, 2 heavy btry)
Cavalry Brigade:
Kievski Hussar Regt.
Ingermanlandski Hussar Regt.
Uhlan regiment


Total:
400 Infantry figures
  39 Cavalry figures
  24 Gunners and 12 Cannon
     5 Brigade commanders
-----------------------------------------------------


French Army in Crimean
1st Brigade (Espinasse) Reinforced
1st Zouaves (2 battalions)
7th Ligne. (2 battalions)
20th de Ligne (2 battalions)
1st Chasseurs d'Afrique
Artillery

Total:
150 Infantry figures
  13 Cavalry figures
     6 Gunners and 3 Cannon


---------------------------------------------


British Order of Battle 1854
Lord Raglan
commanding

1st Division (Duke of Cambridge)
1st Brigade (Bentinck)
Grenadier Guards
Coldstream Guards
Scots Fusilier Guards I
2nd Brigade (Sir Colin Campbell)
42nd Black Watch Highlanders
79th Cameron Highlanders
93rd Sutherland Highlanders
Royal Artillery (2 Batteries)

Light Division (Brown)
1st Brigade (Codrington)
7th Royal Fusiliers
23rd Royal Welsh Fusiliers
33rd Duke of Wellington
2nd Brigade (Butler)
19th Yorkshire Regt.
77th  Middlesex Regt.
88th Connaught Rangers
Royal Artillery (1 battery)

Cavalry Division (The Earl of Lucan)*
Light Brigade (the Earl of Cardigan)
Heavy Brigade (Scarlett)
Royal Horse Artillery (1 battery)
*because of their small numbers I field both cavalry brigades as a single regiment.

Total:
300 Infantry figures
   26 Cavalry
   18 Gunners and 9 Cannon


Monday, May 1, 2017

American Rev War Armies


 Returning from vacation I stole a couple hours to inventory my miniatures armies.  I do this periodically to remind myself of what I have, what I need and what I have to finnish up. It is also good in fighting the butterfly in me which wants to start projects I will never Finnish.  There is also a certain satisfaction in seeing what one has accomplished.  So my next couple posts will be order of battles for my collections.

  let's start with my American Rev War armies.  These included both painted and unpainted regiments. Unpainted are in italics, but all regiments must have castings bought to be included.  The army is based on Greene's Southern Army in 1781.  Each brigade is based on a historical brigade or command.  I have combined many militia units into a larger regiment since then they fight better on the table top. There are a unusually large number of unpainted regiments as I am setting up a campaign and have finally gotten myself to finnish up this project.


Major General Nathaniel Greene's  Southern Army 1781

Continental Light Brigade: (Col. John Edgar Howard)
Maryland-Delaware Light Battalion (30)
Trippletts''s Virginian militia Regiment (30)

Virginia Continental Brigade (Brigadier-General Isaac Huger)
1st Virginia Regiment (Lieutenant-Colonel John Green) (30)
2nd Virginia Regiment (Lieutenant-Colonel Samuel Hawes) (30)

Maryland Continental Brigade (Colonel Otho Williams).
1st Maryland Regiment (Colonel John Gunby) (30)
2nd Maryland Regiment (Lieutenant-Colonel Benjamin Ford) (30)

Washington's Dragoons (Col. W. Washington) (10)

Lee's Legion (brigade): (Col. Henry Lee)
Legion Dragoons (12)
Legion Infantry (12)

Singleton's Continental Artillery (2 guns and crew)

3rd South Carolina Brigade of Militia: (Colonel Andrew Pickens)
1st Spartan SC Militia Regt. (30)
2nd Spartan SC Militia Regt. (30)
McCall's State Dragoons (6)
Cunningham's Rifle Battalion (mounted) (12)

1st S.C. Brigade of Militia: (BG Thomas Sumter)
Left Wing/Sumter (mounted) 24)
Right Wing/Sumter (mounted) (24)
Hampton's South Carolina State Dragoons (6)
Campbell's Rifle Battalion (mounted) (12)

Salisbury District North Carolina Militia Brigade: (Brigadier General William Davidson)
Surrey County, North Carolina Militia Battalion (30)
Mecklenburg Militia Battalion (30)
 N.C. State Dragoons (6)
McDowell's North Carolina Riflemen (12) (mounted)


-----------------------------------------------------------------


 My Crown forces contain not only British but Loyalist and Hessian as well.  Again they are based in historical brigades which served Cornwallis from Camden through Guilford Courthouse.

British Southern Army:  December 1780 to March 1781

Lieutenant General Lord Charles Cornwallis commanding


Webster’s Brigade: Colonel James Webster
7th Regiment of Foot (24)
23rd Regiment of Foot. (30)
33rd Regiment of Foot. (30)


 Brigade of Guards: General Charles O'Hara
Guards Light Infantry Company (12)
Guards Grenadier Company (12)
1st Guards Battalion (30)
2nd Guards Battalion (30)


Reserve Brigade: Major General Leslie
1st Bn/71st Highland Regiment (30)
2nd Bn/71st Highland Regiment (30)
von Bose Regiment (Trumbach)  (30)

Unbrigaded:
British Light Infantry battalion (12)
 Jaeger company (9)
Royal Artillery ( 2 x 6-pdr & 3-per)

British Legion: Lt. Colonel Banastre Tarelton
British Legion Dragoons
1st Squadron/British Legion Dragoons: (8)
2nd Squadron/British Legion Dragoons: (8)
3rd Squadron/British Legion Dragoons: (8)
British Legion Infantry (24)
British Legion Artillery (3-pdr)
 17th Light Dragoon (6)

Camden Brigade:
 Lt. Colonel Lord Rawdon
Royal North Carolina Regiment (30)
Volunteers of Ireland Regiment (30)
New York Volunteers Regiment (24)
South Carolina Royalist (24)
Camden District Loyalist Militia (30)
Coffin's Dragoons (6)


Thursday, April 27, 2017

Fife and Drum meets Mr. Madison

  Fife and Drum Mets Mr. Madison's War


The following are my interpretation and rules clarification of the Fife and Drum rules set as used by me for War of 1812. For a copy of the Fife and Drum rules please follow the link http://fifeanddrum-minis.com/rules--articles.html


Move first, fire second, move second, fire first:  when it is your turn to fire remove all casualties from hits.  No, casualties removed do not get to return fire that was the advantage of firing first.

Retire facing or not facing enemy:  deduct 2" from move to retire with back towards enemy.  Half move to retire facing enemy or move sideways.

Charges or moving into melee:  during your move declare charge.  Defender tests morale, if pass they stand and can fire at charger if not retire column distance back shaken.  There is no charge move bonus.  Fight two rounds of melee then loser (most casualties) tests morale.  If pass then winner tests.  If both pass then both retire column move back.

Routing units effect on other units:  ignore friendly units routing past if router is lower morale.  Take morale test if equal or better morale.  

Multiple units in melee:  If two units vs one distribute casualties evenly to both units.

Wheeling regiments:   Wheels are made from the left, right, or center of the unit only.

Fences, small streams:  Units move up to them and stop move.  Next move you cross obstacles and continue your move. If both units are touching the same fence line and facing each other across it neither gets the benefit of the fence.

Artillery:  one operation costs 1/2 move, this included fire.  So you can limber and move half movement;  move full move if limbered; unlimber and fire Artillery cannot enter woods, need infantry to knock hole in fences to cross.  Any friendly unit within a friendly artillery arc of fire, if the arc of fire goes through two opposite sides of that friendly unit the artillery can not fire.  Arch of fire is measured  from cannon barrell, with of stand forward like a bowling alley

Difficult terrain (fields, Rocky ground): cost 2" for every 1" of movement in it

Woods; units stop movement at edge of woods.  They enter next turn (similar to fences).  Once in woods skirmishers troops (skirmishes or Indians)  move their full movement, while formed troops move half their movement.  Small arm range is half.  Only skirmishes get cover modifiers. Yes, it sucks for regulars in the woods (please ask General Braddock).

Indians:  always unformed, in mass formation (I.e. in a bunch).  No penalty to change direction.  In woods move full movement.  Units fired at by Indians for first time check morale.  In open clear terrain go one step down chart for firing and morale (if on line "C" use line "D").  Indians are not shock troops. They race about being obnoxious and scaring volunteers and militia who are not used to them.


Rockets:  roll  d10.
   10 = hit, one casualty and test morale.
6 - 9 = test morale
3 - 5 = miss
     2 =  hit nearest friendly unit test morale
     1 = rocket doubles back,  destroyed battery


Tuesday, April 25, 2017

American Brigadiers


  My American Army for Niagara 1814 is nearing completion.  Not that I will not be adding regiments, but close to what I had originally planned.  While most of my regiments have been spotlighted here one part I have neglected is the command.

  Knuckleduster Miniatures makes very nice mounted command figures of the American top commanders for this campaign.  Brown, Scott, Ripley and Porter are all done.  And very well at that.

Brigade Winfield Scott
1st Brigade

Brigade Porter
3rd Brigade


Brigade Ripley
2nd Brigade