Tuesday, August 14, 2018

Hessian Regimental Colors


  I have been doing research on Hessian uniforms and colors for an upcoming painting project involving the Rall Grenadier regiment, Fusilier Regiment Lossburg and Fusilier Regiment Knyphausen.  In looking for documentation on regimental colors I found the following article, "Colors of the Hessian flags in North America 1776 - 1883",  Military Collector and Historian, Winter 2003-2004, vol. 55, issue 4.  This is simply brilliant and a must have article if researching this topic.


  The author is Steven Hill.  He is one of (if not the) best historians on the topic of military flags.  Is using his career he was responsible for restoring and maintaining many historical flag collections.  I had the pleasure of meeting him many years ago when he was working to restore and maintain The Civil War collection of flags in the Massachusetts State House. 

   If you want to know which regiments carried what colors, what they looked liked and what happened to them this is where you look.  There are pictures of fragments of colors captured at Trenton.  How often do you see these?  In addition there is also some documentation on uniforms.  So my friends, do yourself a favor and download this article.

Here is pdf of the article:
dupagemilitaryflag.com/files/33395736.pdf

Here is his flag site:
www.dupagemilitaryflag.com

Lastly, if you want a coffee mug with a regimental color in it here is where you go.  My kids, when they do not know what to get me for a present shop here.  Nothing better than sipping coffee while painting or playing with you soldiers that has The regimental colors of the Royal Welch Fusiliers.


www.cafepress.com/historicflags


Saturday, August 11, 2018

Battle on McKenzie Heights 1854


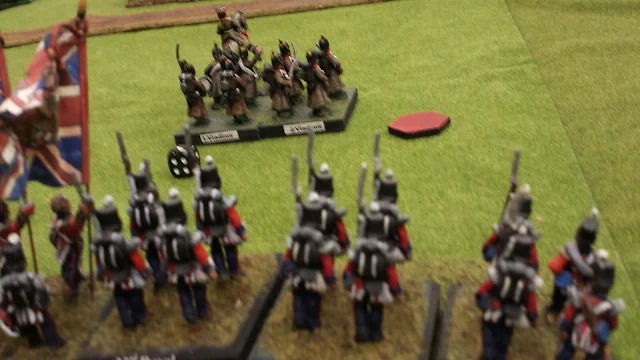
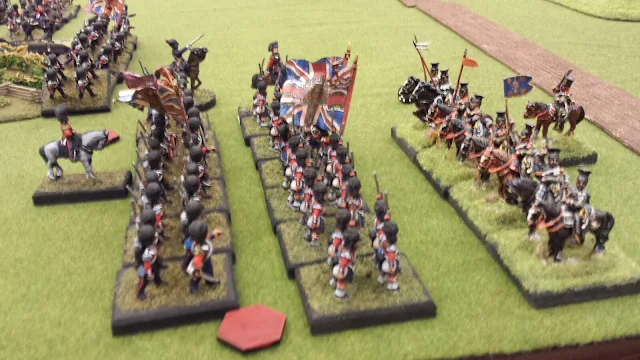
   The battle on McKenzie Heights saw a Russian division of 12 infantry battalions, four batteries and three cavalry regiments defending a cross roads.  Fortifications have been added to add strength.  Meanwhile two British divisions advance to capture the same cross roads.  Rules used were Charge of the Light Brigade, and all figures were 25mm from Wargames Foundry and North Star miniatures.


  The Russian commanders placed all four batteries behind fortifications along the front line.  Four battalions defended the tiwn, and four more battalions were placed on each flank.  Two cavalry regiments guard the Russian right flank while one cavalry regiment guard the left flank.


 The rules are a U-Go-U-Go but with a twist.  Each regiment gets so many command points.  These can be used to do addition actions.  When it is your turn each unit can do one free action (move, fure, change formation, lumber or unlimber).  After The free action they can spend a command point and do a second action.  They can do a third action which cost two command points.  And so on.  But once spent command points are gone.  Better units have more command points, poorer have less.  When you spend a command point The other sides gets to react to it by returning fire.  Intetesting!  You can get morale chips for being under fure, or losing a close combat.  For each moral marker you get you subtract one pip from every die roll.  So this quickly becomes dangerous.


The Game:
  The British placed the 1st Division (Guards and Highlander) on their right with orders to outrank the village.  The Light Division crossed a minor stream to attack the village in front and hold most of the Russia's attention.  The Light Cavalry brigade was held off table.

On the Russian Right Flank:
Supported by a battery two Russian battalions advance against the British line.

   As the British came into the board and crossed the stream, the Russian commander launched an attack.  Two infantry battalions and a Hussar and Cossacks regiment charged the British  line.  During his move the Russian commander spent an extra command point to move his forces more quickly forward. But he was hampered by poor dice rolling (movement is by five roll and he rolled very low).


  The British commander not believing his good luck spent a command point and got his artillery into line and unlimbered, while his infantry fired twice at the Russians causing high casualties.


When the charges went in they were easily defeated and sent routing back with high casualties and multiple morale markers.  The Russian commander then advanced two more infantry battalions, this time in line to exchange fire with the British.  Superior rifles and numbers told and the decimated Russian infantry retired.  The British proceeded to silence the batteries with long range rifle fire.

Russian Left Flank:


  The British 1st Division advanced into range to engage the Russians with rifle fire.  Good die rolling from the Russians saw the British battery silenced very quickly. The Russians used a number of command points to change formation from double line into line to bring more muskets  against the British.  This did not work.


  In a desperate effort to stop the British the Russian commander charged the nearest enemy with his cavalry regiment.  Ironically, that was the 93rd Highlander of the  thin red line fame.   This time history did not repeat itself and the cavalry win the close combat.  The retreating highlander caused disorder as they retired and the Russian cavalry charged into the next unit the 42nd.  This time, supported by the Guards the Russian cavalry broke and retired off the board.  With little opposition in from This them the British continued their advance.


 At this point the game was called.  Both flanks were wide open and two batteries silenced .So the Russians had little chance of stopping the British.

  The game was fast paced and great fun.  All agreed that the rules were easy to understand and provided interesting twists with the command points. one point were All agree on was in future battles more Russian infantry needs to be on the table to counter British superior rifle range.  All are interested in playing again soon.

Thursday, August 9, 2018

Battle on McKenzie Heights, A Crimean 1854 wargame


   For club game night rather then do my usual American Rev War or War of 1812  I am putting on a Crimean War 1854 game.  These are some of my favorites armies, and my oldest.  They are the only figures saved from the great house disaster of 2004.  The battle will see a Russian fortified post attacked by a combined British and French force.


   In the center of the table will be a fortified church and house along with a redoubt.  It is defended by two infantry regiments (8 battalions) and two batteries.  Russian reinforcements rushing to their assistance are 2 Infantry regiments (8 battalions),  two batteries and three cavalry regiments.  Orders are to hold the fortified area.


   The Allies attacking consist of two British Infantry divisions (1st and Light Divisions of 12 battalions total) with attached artillery and the Light Cavalry brigade.  They are assisted by a French division consisting of four line infantry battalions, two Zouave battalions, a battery and the Chassaurs de Afrique.

  Rules used are the tried and true "Charge of the Light Brigade" by David Raybin.  These are the second edition which have a few newer rules modifications.  These include artillery getting command points (and possible ammunition loss), better melee additions for certain troops (guards and highlanders) or formations (Russian attack columns), and  attack columns being six inches apart. Brigade command integrity has also been added.   For my review of the rules please see:
http://bravefusiliers.blogspot.com/2016/08/charge-of-light-brigade-rules-review.html

  The game features very different foes.  The gallant Russians have superior artillery, terrible musket fire and very good column attack.  Russian cavalry is numerous but poor quality.   British are very Napoleonic with thin lines and superior fire power (those new rifles don't you know).  French line have muskets,  Zouaves rifles.  So each army fights very differently with serious advantages and disadvantages.  In other words a fun time for all!

Stay tuned....

Monday, August 6, 2018

1776 Project update


1776 Army Organization:
  My American army for 1776 is marching along very nicely. I made a error in the uniforms of the 13th Continental Regiment concerning their facings and regimental color.  I will be posting a correction about this in another post soon and how I corrected it.

   Both Glover's and McDonald's brigades are near completion. I have a single battalion to finnish for McDougall (19th Continental Regiment), and two battalions (14th and 26th Continental Regiment) and a command figure for General Glover.   Lincoln's militia brigade needs a single battalion and command stand.  Alexander Hamilton's Artillery will be represented by two guns and eight crew.  Uniform will be blue coats faced buff.

Here is my order of battle.  Units not yet started or finished are in italic

Alexander McDougall's brigade :
 3rd New York Regiment, (blue faced green coats blue vest)
19th Continental Regiment (drab coats faced blue)
William Smallwood's Maryland Regiment (hunting shirts and red coats)
1st New York Regiment  (blue faced green, green vests)

Glover's Brigade:
3rd Continental Regiment (brown faced red)
13th Continental Regiment (brown faced buff)
14th Continental Regiment ( drab faced red and sailor clothing)
26th Continental Regiment (brown faced buff with Light blue vests)

Lincoln 's Militia Brigade:
Brook's MA militia bn.
Graham's MA militia bn.
MA Militia bn.
MA Militia bn.

Divisional troops:
Hamilton's Artillery (blue coats faced buff, buff small clothes)

Hessian:
   So far my lone Hessian regiment has been  the Regiment von Bose.  No longer.  Next up will be the Rall Grenadier regiment and the Fusilier regiments Lossberg and Knyphausen and a small nine figure group of Jager's for my southern armies.  This will give me a nice four battalion table top command and let me re fight Trenton and White Plains in the future.  Figures are from Fife and Drum miniatures.

British:
  How can you not have a Rev War army and not have  Grenadier and Light Infantry battalions in your British armies!  So a Grenadier and Light Infantry battalion are also in the painting line. Grenadier are wearing their unique head gear while the Light Bob's are in roundabout jackets and slouched hats.  Also from Fife and Drum.  Oh, and more Royal Artillery in a two gun right figure battery.  Just because I could that's why!


Wednesday, August 1, 2018

A Very Brilliant Afair: The Battle of Queenston Heights 1812


   "His Majesty's arms gained a complete victory over those of the United States yesterday in a very brilliant affair"  Captain William Holcroft  Royal Artillery

   Robert Malcomson who many readers will be familiar was the dean of War of 1812 historians. Although most of his works center  on the naval side of the war, this book finds him describing a land action.   The site of Queenston Heights was very special to him and the staff  there still refers to him with great respect.  Possibly because of this this book is a gem.  Great writing, great research and a better understanding of a complicated event.

   The Battle of Queenston Heights would set a pattern for other battles during the War of 1812.  An inexperienced mixture of American regulars and militia commanded by a politically appointed General tasked with a overly complicated plan against a professional General with a handful of regulars, militia and Native warriors.  A pattern that would exist until the 1814 Niagara campaign.

   Malcomson has written a narrative that sets the stage for why the battle happened and the course of the fighting.  He is at pains to describe why commanders did what they did based on circumstances at that time.  Finally he addresses many of the myths that have grown up about the battle and obscured its actual details.  Was General Isaac Brock the true hero of the day? What  role did General Roger Hale Sheaffe play?  Was this a victory for the Canadian militia alone?  What were the role of John Norton and his Native Warriors?  Were the  often ­maligned New York militia really responsible for their armies defeat?  Could the American invading force have won?  During the reading of the book you are introduced to many amazing and interesting people.  The politically appointed General Stephen Van Rensselaer.  The dynamic General Isaac Brock.  Professional to the core Captain William Holcroft. John Norton who lived in two worlds. And the larger then life Winfield Scott who is seen striding  across the battlefield in full dress Chapeau and plume. And many others.

   All in all a wonderful read and a scholarly book that should be on the shelf of any War of 1812 buff.  Highly recommended!

Wednesday, July 25, 2018

"I'll try sir!” A Visit to the Lundy’s Lane Battlefield, Niagara Falls, Canada


   If Chippawa is a battlefield preserved, Lundy's Lane is a battlefield lost—or at least obscured.  The urban sprawl of the modern day town of Niagara Falls has almost obliterated the battlefield.  Still, there are hidden nuggets to be found to reward a visitor searching for a link to the past.  After all, the history of one of the largest, deadliest and most confusing battles of the War of 1812, can still compel one to visit the site.


  Lundy's Lane Battlefield was a tourist tradition from about 1820 until 1865, in part because both Americans and Canadians claimed victory, contributing to its popularity.  Large observation towers were constructed and veterans from the battle served as guides.  After the American Civil War the appeal of visiting Lundy's Lane was eclipsed by more recent and vast battles in places like Gettysburg and Antietam.  The Lundy’s Lane observation towers were eventually torn down, which helped make room for attractions more familiar to us now.


   Today, it's almost like the town has become one giant theme park!  Because the battlefield is so built up, with a major roadway cutting across it, carrying buses and cars with people from all over the world to see the natural wonder of Niagara Falls. And all the tourist trappings such as wax museums, fast food places, parking lots, and souvenir shops, it takes some imagination to walk the land and picture how it was back in the summer of July 25, 1814. Thanks to the personal efforts of Miss Ruth Redmond, a schoolteacher, who bought up parcels to keep from development, at least some of the battlefield was saved.


Thank you Miss Ruth Redmond

  To help in your time travel,  I recommend you start with a visit at The Niagara History Museum, about two blocks down the road.  The very friendly Canadians there gave me an excellent walking tour map which is a must-have to visit the area.  In addition, the Museum has a succinct exhibit about the Battle of Lundy’s Lane and the War of 1812. There are uniforms, artifacts and stories about soldiers from each side.  A short audio visual presentation features reenactors in period uniforms.  Best of all there’s a hands-on opportunity to try on reproduction uniform coats and shakos from the 8th Regiment of Foot, and heft a reproduction musket.  It was great fun watching children (as well as a few adults!) enjoying these items.


   From the Museum you can walk up the road to Lundy’s Lane Battlefield as parking can be difficult.  Or, you can follow our lead and stop at the nearby Starbucks.  I got a head start, marching off, books and maps in hand to explore, while Janine parked and got us an iced coffee.  (Hey, if they had it, they would’ve used it!)

The Red painted meeting house on Drummond hill in 1814.

   After successfully navigating the onslaught of traffic, across the busy street I found the site of the Red Meeting House (which is still a church) and the cemetery (which has greatly expanded).  These landmarks allow one to mark out positions of the British line and American attacks with some accuracy.  


Looking from the British lines towards where Scott's brigade stood.

British artillery line was along the hill top.

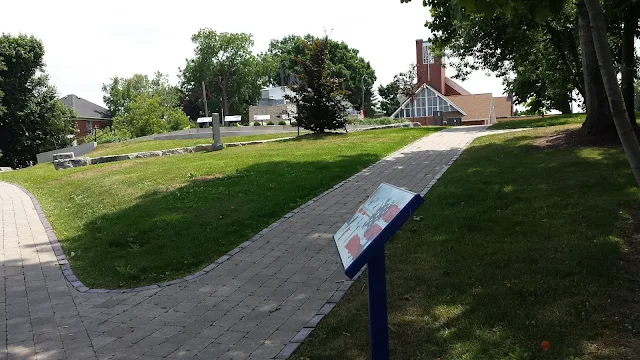
Colonel Miller advanced under cover and fading light to overrun the gun line in this area.

Modern view of Miller over running and capturing the British artillery.

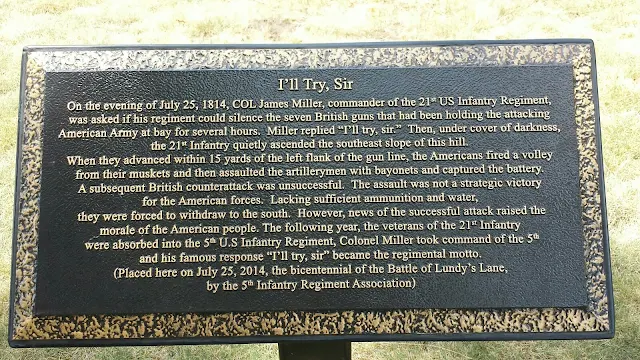
   My march across the paths to the southeast corner of the cemetery led me to find the area where American Colonel James Miller and his 21st US Infantry regiment surprised and captured the British artillery line.  His iconic answer when asked if he could capture the guns, "I'll try sir!" is the motto of the present day 5th Infantry Division. Examining the folds of the ground and imagining the fading light, I could better understand how he managed this.


Graves of Captain Hull and American soldiers.

  In the cemetery there are a number of markers and monuments.  As a resident of Massachusetts, I looked for and found the marker to Captain Abraham Hull of the 9th US Infantry regiment who was killed during the battle and buried on the field.  He was the son of General William Hull who surrendered Detroit and nephew of Commodore Isaac Hull of the USS Constitution.  With him are buried nineteen other American soldiers who were discovered in 1900 and reburied here.  There is always something moving and mysterious about the graves of unknown soldiers.


The battleground Hotel was not open the day we visited.

Area Drummond rallied his troops and launched assault to recapture the guns.  The American line was Montenegro of the hill.  Between these two groups Scott marched his brigade with ddisastrous results.


Modern rendition of fighting in this area.  British charging up hill to recapture the guns.  The Americans holdings hill top.   By this stage of the battle it was pitch black darkness.

   On the Starbucks side is a park with waysides, markers and displays (along with the small Battle Ground Hotel Museum which was closed).  Walking down the slope I found where General Drummond rallied the British and Canadian forces to try and retake the captured cannon atop the hill.  It was near here, between the Americans on the top of the hill and the British on the lower slope where General Winfield Scott stumbled in the dark with the remnants of his brigade.  This was after dark and the fighting had been raging at point blank range.  Marching his brigade between the two antagonists in the pitch darkness his men were decimated by musket fire of friend and foe and he himself badly wounded.  Fighting in this area continued until just after midnight.  Exhausted, both sides withdrew ending the fighting.


   I enjoyed my visit very much and came away with a better impression of what happened during the battle.  I’d like to emphasize the value of a good map, as it will reward a visitor with a better understanding of this complicated and confusing battle, as well as sort through the modern day landscape for clues to what it once looked like.  I walked the field with A Crucible of Fire, by Robert Feltoe, which greatly assisted me.

   Thanks again to my dear wife, Janine, who accompanied me to Lundy’s Lane in 1985 when I scrambled up the side of the hill by a Seven Eleven because the cemetery gates were locked!  And returned again with me in 2018.  Thanks especially for enjoying the history with me, and editing this story! 

Thank you!