Thursday, March 3, 2022

A Visit with Mr. Ed of Ed M's Wargames Meanderings


  On Monday I drove up north to the "Live Free or Die" state to visit with Ed and play in one of his games.  If you have been following his blog you know he is experimenting with using Kriegsspiel maps and blocks but using the rules "Bloody Big Battles" to fight it out.  As this interests me very much I was excited to play in one of his games.  Plus any visit with Ed is a tremendously fun time.  The time and effort he puts into his game is amazing.


   The game today was a small section from the Battle of Koniggratz.  The Prussian army of the Elb had to drive through the Saxon Corps and two Austrian divisions to capture three towns.  A small Austrian Corps of a infantry division and artillery battery was available as reinforcement but they had been badly handled in previous actions and were very timid.   I was to command the Saxon/Austrian forces while my friend George commanded the Prussian. Ed acted as umpire and kept the game running smoothly and quickky.


A word on the game itself.    Ed had created a series of cheat sheets for the game which helped me to understand.  Everything you needed were at your finger tips.  In addition small clear counters helped identify who your commands were.  It was all very neat and tidy and helped me understand a set of rules I had never played.  I wish all game masters could be as organized and well set up ad Ed.

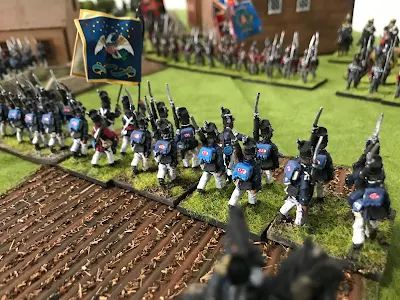
I set up my two Austrian divisions on the forward slope of a long ridge.  They were in rifle pits and within range if the bridges over the river.  The Austrian battery had a clear field of fire on either bridge or the ground between. My Saxons were set up in a similar manner. Their artillery battery was near the Austrian one and could add its firepower.


George brought on the Prussian divisions in column.  Afterwards he admitted he should have swung them into line quicker.  That was because my guns decimated one of his divisions while still in column.  Its a learning experience.  Firing in BBB you add up all units firing and go up or down the firing chart BTW.  Took me a turn to remember that and not fire my guns then say I am firing g my rifles.  Its a learning g experience.  

My Austrian division marching in support failed its activation roll and did not move.  This was repeated throughout the game and that division moved not an inch.

  Not wishing to beat his head against my artillery George's Prussian divisions over to flank my position. He had enough troops that they could demonstrate to hold me in my position while side stepping around me.   One part if the rules I have to get used to as the activation roll to move troops.  my out flanked Saxon division refused to leave its rifle pits and failed its roll.  So instead of pulling back I had to bring up my cavalry and a battery to try and rescue them.  I was also funding out how deadly the needle gun was at close range!


At this point with my position being out flanked and one of my infantry divisions being destroyed we called the game.  I think the Prussians would have on as they could move forward and take their objectives and I was out of position to stop them.


All in all it was a great day and a wonderful experience.  The game worked very well and was mist enjoyable.  I think for a truly big battle this system worked well.  Reinforcements, defense in depth can all be utilized better then in a miniatures game.  On the other hand at battalion at tactics and combat resultion work better with minuatures.  The map and blocks were very effective and looked cool.  I am looking forward to playing this again and soon.


Thank you again Ed!  It was an amazing day and a great experience.


Tuesday, March 1, 2022

Saint David's Day and Royal Welch Fusiliers


"1st March 1775, this being St. David's Day the officers of the 23rd Regiment or Royal Welch Fusiliers, dinner together according to the custom.  All the general & Staff officers, the Admiral, and several other persons were invited to dine with the Regiment..."

From the diary of Lieutenant Frederick MacKenzie

23rd Regiment of Foot or Royal Welch Fusiliers

On this day I hope a  Happy Saint David's Day to the Welch, and to all Royal Welch Fusiliers,  both past and present.


Tuesday, February 22, 2022

Battle of the Four Arms: Conclusion


The battle continues......


  Both sides attempted to rally shaken and routed units.  The 1st US Rifles had had enough and in spite of General Brown yelling encouragement ran for the hills.  On the other hand the Canadian militia and GLI both rallied and joined the fight. 


  In the woods the 11th US Infantry charged after the Mohawks.  Although the Canadian militia came to their help the Mohawks had enough for the day and left the field.  


  All along the line both sides threw in their final troops and blasted away at each other.  Over head the rockets continued to burst spectacularly but without causing g any damage to either side!


    Morrison felt the time had come for desperate measures.  Ordering the GLI to step aside, the tiny 19th Light Dragoons charged forward against the 1st US regiment.  Off to the side the combined Flank Companies joined in against the 21st US.  In the fight the 1st US easily defeated the 19th who then routed off the table.  But the Flank companies beat the 21st US who then failed their morale and routed!  The 1st US seeing this also tested morale and were shaken.


In the center the 100th Regiment charged the 9th US, who failed their morale test and retreated!  


Could the tide be changing?  


   Alas! A little too little and too late.  At the cross road General Scott threw in his battalions to break the center.  The 9th US charged the 89th Regiment while the 11th US and 25th US charged the 100rd Regiment.  In the woods the 22nd US advanced steadily and traded cookies with the Canadian Militia.  Although the 89th stood firm and defeated the 9th US the 100rd gave way and routed opening that side.


On the other side Ripley threw the 1st US against the GLI who were worn down from their long fighting earlier.  They we're defeated and retreated back.  At the sane time the 23rd US and 5th US overwhelmed the 1st Regiment.  To contain the Flank companies Ripley moved up the Light Dragoons and the 21st US.


With everything collapsing arround them the British commander ordered a retreat.  It had been a gallant defense but it was now time to try and save something.


Conclusion:

  As you have guessed the battle was a scaled down version of the Battle of Quatre  Bras.  As a game I think it worked out pretty good.  But I would give the British/Canadian side an extra battalion for the set-up and increase the Mohawks to 24 figures rather then twelve figures.  I think this might evan it out better and give them a better chance for winning. 

  The rules, an adaptation of Jim Purky's Rev War rules worked well.  They provided a fun and fast game and I would highly recommend them.

  One thing I noticed over the pictures was how bad the dice I used to mark casualties looked.  These were replaced by smaller markers with stones and grass which blended in better but still did the job.


Sunday, February 20, 2022

Battle of the Four Arms: part 2


  Lt.Col. Morrison at the cross roads of Four Arms quickly deployed his brigade.  


  The 100th Regiment and 89th Regiment marched to the British/Canadian right flank and took position along a rail fence line.   The combined Flank companies and 1st Regiment are sent to the left to protect that open side.  Meanwhile the 1st Militia, GLI and IM hold on.

 General Brown ordered Ripley to take his 2nd Brigade and go around the village. He ordered his artillery and cavalry to support them.


  Ripley pulled the 5th US Infantry back to rally and sent the 23rd US Infantry to settle up with the Incorporated Militia.  They quickly charged and routed what was left of the militia then moved up to support the rest of the Brigade.  The 1st US and 21St US took position out flanking the village.


The 1st Regiment and Flank battalion having formed line moved into musket range.  For the next couple turns the two lines blasted away at each other.  Neither giving way all taking casulties.


  General Scott continued to bull forward determined to take the cross roads.  He pulled the 25 US Infantry out of line to regroup and pushed the 9th US Infantry and 11th US Infantry forward.  The fresh troops were too much for them and the Canadian Militia and GLI both gave way and retreated.  


  In the woods the 1st US Rifles continued to skirmish with John Norton's Mohawks.  Moving back and forth casualties mounted until the Rifles broke and routed.  fleeing the woods General Brown tailored up to rally them.  

  With their enemy gone Norton moved his warriors against Scott's Brigade.  From the cover of the woods they skirmishes against them.  This forced Scott to pull one battalion back to deal with them.  


  At this point a final push from either side could win the battle.  The initial battalions holding the crime roads for the British/Canadian had been forced back.  But now fresh regiments had taken position.  The United States forces had taken heavy casualties but continued to advance.