Sunday, July 3, 2022

Our Noble Foes


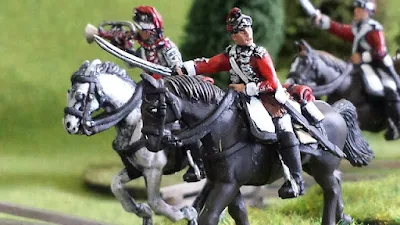
  Before I do my usual 4th July posting commemorating our national holiday I wanted to give a moment to the other side.  The crown forces from Great Britain, the Germanic states and of course those Americans who disagreed with the rebellion and stayed loyal.  During the course of the war these same soldiers fought with great courage and skill and deserve our respect.  


Friday, July 1, 2022

"Liberty"


  A late Father's day present from my son Nathaniel is the book  Liberty  by the artist Don Troiani.  Its a collection  of some of his battle and soldier paintings.  A nice coffee style book its perfect for relaxing with a cup if coffee and being inspired to paint or set up your next battle.  Each section has a different author writing about the event or battle and these are all well done and interesting.  I was especially delighted to see an old friend from my Park Service days, Anthony Wayne Tommell who wrote the section on the second battle of Saratoga.  I had worked on details with Tony at both Saratoga and Fort Stanwix. He us an outstanding authority on the campaign and over the years I had learn a lot from him.  So its especially great to see he us still doing great work.


Tuesday, June 28, 2022

Spare your reserves: The Battle for The Farm


Turn 1 & 2


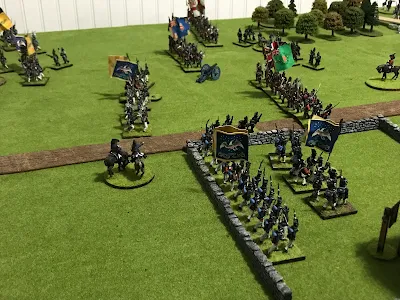
Both sides march onto the table.  

The American 1st Brigade will flank the farm while the 2nd Brigade marches in column towards the farm.  The 1st and 2nd US Rifles will race to secure the farm.

The British brigades march onto the table in column heading towards the farm.


Turn 3:


The American 1st Brigade and British 2nd Brigade both deploy into line.  The 1st US Rifles fire at the advancing redcoats but draw heavy fire on themselves and they retreat shaken.


The 2nd US Rifles charge over the walls into the farm buildings.  They are met by the GLI who they chase out of the enclosure.  


Meanwhile both sides bring up the regulars for the next round of fighting.

(Neither side calls for reinforcements) 


Turn 4:


The Americans 1st Brigade closes with the British 2nd Brigade.  Both sides exchange heavy fire with the 22nd US shaken and the 25th US steady but with heavy casualties.  In the return fire the 8th Regiment of foot is shaken taking both musket cannister . 

 General Morrison, riding up to steady them is shot and killed!


In the farm enclosure the 1US advances over the stone wall but us treated by heavy fire from the 89th Regiment of foot.  


And on the other side of the farm the 21st US marches steadily unto the combined fire of the Royal Artillery and the 1st Regiment of Foot.  The US Artillery dashes to assist but is too late, as are the Rifles.


Turn 5:


The British commander Lord Drummond races over to take command of the 2nd British Brigade.  He feeds some skirmishes into the line to give additional fire power.

The US  1st Brigade is decimated by the heavy fire from the British line.  The 22nd US breaks and rout while the US25 goes shaken as dies the US Artillery.  

On the far side of the farm some US Rifles and Artillery arrive to help but it us too little too late.  The 21US us barley holding on.

The Americans call for reinforcements.  But they will not arrive until turn 8!


Turn 6:


Disaster!  The British 2nd Brigade sweeps the remnants of the US 1st Brigade off the field!  The 25th and  22nd US break and rout while the Artillery is overrun.  The 41st, 49th and 8th Regiments of Foot advance forward!

On the far flank both the 1st Regiment of Foot and the 21st US retreat with broken morale.  But the 100th Regiment of Foot advances to secure the front.

In the farm the 1st US is broken and routs from a hard fight with the 89th Regiment.


At this point the game is called.  Although the Americans hold the farm both flanks are gone and reinforcements will not arrive in time to save the day. I could add up points but why bother rubbing it in.


Conclusion:

  This proved a fun and challenging game.  Although reinforcements could have effected the outcomes they didn't because they would have arrived too late.  The game translated well to another time period.  I cut the number if regiments back due to the smaller size of my table and using 25mm figures.


  In the rules I use each side rolls initiative every turn.  High side decide if they move first and fire second or fire first move second.  This works great for solo play.  I used a d6 roll to see if a side called for reinforcements.  1-3 no, 4-6 yes.  Simple.


 I highly recommend this game.  Its fun and fast and adapted well for other time periods within the Horse and Musket period.  


Thank you my friend for you recommendation!


Monday, June 27, 2022

Spare your reserves


  Recently, on the Fife and Drum miniature forum I complemented fellow member "Dinthedin " on a great and very interesting game he put on.  Each side has the same forces.  They are to capture a walled farmed building in the center of the table.  Both sides have possible reinforcements they can call on.  But, calling on reinforcements will negatively impact your chances of winning.  You have been criticized for calling for help too many times.   And reserves are needed for future battles.  What do you do?   Do you try and win with what you have on the table?  Or bring in extra troops to swing the balance in your favor but negatively effect the campaign?  Its all up to you.  Interesting and frustrating.  

After complimenting Dinthedin, he sent a message to me;  "Thank you!  As it can be played with any rule set and for any Horse and Musket period, I would be extremely glad if you ever gave it a try!  Cheers!"

Ok Dinthedin!  Here is my  take on your game. I am transferring your Seven Years War battle to the Niagara frontier during the War of 1812.  So there will be a slight change in the possible reinforcements.  Hope you like it!


Game Scenario:

Each side has the same troops and possible reinforcements.  Each side enters the table on opposite side of the table on the road.  

Order of Battle:

First Infantry Brigade

3xLine Infantry

1xLight Artillery

Second Infantry Brigade

3xLine Infantry

1xLight Artillery

Independent: 

2 x Light Troops

Possible reinforcements - these reserves may enter only if you call for them:

Foot Brigade:

1xMilitia

1xMedium Artillery

OR

Horse Brigade: 

2xCavalry


Reinforcements can only be call for on turn number 3 or turn number 5.  The player must decide which Brigade (Foot or Horse) to call on.  To bring them onto the table roll D6.  On a 1 or 2 enter on turn +1;  3 or 4 turn +2; 5 or 6 turn +3.  

Example: on turn 3 you call for reinforcements and roll a 4 so that brigade enters the table on turn 3 + 2 = turn 5.

Infantry enter the table, in column on the road your side entered the table from. Easy!  For the cavalry, they are wondering about b the countryside.  To see where they arrive roll a d6 to see where they enter the table.  Note the markers on the map numbered 1 - 6.  That tells you where they arrive on to the table.

Victory! Or how to win:

At the end of each turn count your victory penalties points.  IF a player has 7 victory penalties points then they have lost the game.   If by turn 12  neither side has 7 points, the side that has the least victory penalties points wins a marginal victory.

Points:

Each unit lost lose 1 VP

Each unit reforming (shaken or routed) lose  .5 VP

Holding farm buildings at end of turn 12 win 2 VP

Asking for Foot reinforcement turn 3 lose 1.5 VP

Asking for Horse reinforcement turn 3 lose 2 VP

Asking for Foot reinforcement turn 4 lose .5 VP

Asking for Horse reinforcement turn 4 lose 1 VP


Wednesday, June 22, 2022

Big Fight at Cook's Mill Part 2


With the arrival of British reinforcements the balance of the battle has appeared to swing away from the Americans.  


Turn 6:

  General Scott wanted to try and smash the remaining Canadian units on the table before the British regiments arrived. It would take them a move or two to deploy and be wanted to take advantage of it.


  The 11th US quickly  charged the 2nd militia  who had turned from the ford to guard the Canadian left flank.  The 25th US  charged the rallied IMUC and the 22nd US move forward to deal with the GLI on the American flank.  


In the close fought fighting,  the Militia defeated the 11th US who fell back shaken. But the militia also failed their morale check and also fell back shaken!

The 25th US again defeated the IMUC who fell back shaken and Lt.Col. Parsons was lightly wounded.

Lastly the 22nd US easily defeated the wing of the GLI who retreated into the woods to regroup.

The remnants of the 1st US Rifles passed their morale check and rallied for next turn.  They turn to face the oncoming militia.  Where did they come from?


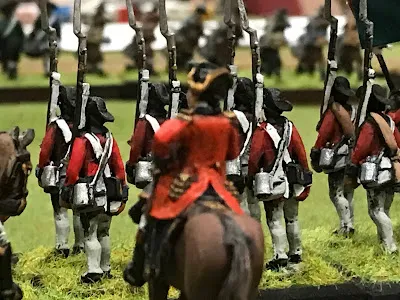
Ignored by the Americans the 1st Militia deployed into the road in the rear if the American line!


Turn 7:


Both sides rallied the shaken troops and steadied themselves for the fight.


Morrison deployed his Brigade.  Scott sorts out his troops.


Turn 7:


The 9th US Infantry moves forward into the woods to drive the Mohawk away.  Rather then standing and fighting they fall back and continue a harassing fire. In addition the 2nd militia across the river join in with long range fure.  The casualties mount and the 9th US goes shaken.


The 1st militia takes cover by the stone wall and exchanges fire with the 1st US Rifles.  Its too much for the already decimated rifles who break and rout.


  Finally the wing of the GLI and the 89th Regiment gang up on the 22nd US who take big casultues.  To add insult to injury the Rocket battery finally scores a hit and the 22nd US fails its morale check to also go shaken.

  All in all a bad turn for the US!  With no help on the g prison and both his flanks gone General Scott deciedes to beat a hasty retreat across the river and calls the game.


Conclusion:

All in all a fun and enjoyable game.  I played this out over a week and a half .  its nice to be able to set up a game and leave it in place to continue later.  The rules worked well and the game could gave gone to either side although this was a massive win for the British/Canadian side.  Reinforcements arrived in time for them and General had been just too aggressive.  Much like real life!  American reinforcements were not to arrive until turn 12.  If they had cone in earlier could they have turned the tide?  Try the game out yourself and see!