Monday, September 4, 2017

Work in progress: French Infantry 1745


  Projects are funny.  Sometimes you start a new project because it's a period you love.  Other times it's a long time you just wanted to do it.  There are lots of reasons why. Some good, some well justified.  A few it's just because.   And so in a moment of not right mindedness i have decided to paint French, and later British for the mid eighteenth century.

A new project you say?  Well, projects (in our wargaming world) are funny things.  At times they blossom into wonderful table top armies.  Other times they sputter out as massive piles of lead.  Some are favorite time periods, or long held desire to just create it.  Too many are flights of fancy that do not last the month and leave unpainted mounds of lead.  My Crimean armies are almost done;  someday I will add Turks but not now.  My War of 1812 has taken up all my time for a year but now I need a break before returning.  My Rev War armies are still growing but again i need a time away from the painting table and something different.

   So here I am looking down the tunnel of a small project.  I have always enjoyed the writing of Charles Grant, both father and son.  Many hours have I spent in their company via their books and articles.  This past vacation a I had a most excellent time reading their imagination campaign series.  The Table top teasers series are always a source of inspiration. And, I would enjoy refighting them on my table.  I could do so with any of my other armies.  But that would not seem right.  Instead I would like to do so in the eighteenth century.  A pair of traditional foes seems right. Nothing against Prussia and Austria but I lean towards the the French And British Armies.   My plan is for a handful of regiments, from the Crann Tara and Minden Miniatures range of figures.  More War of Austrian Succession then seven years war.

  Painting is interesting as having started with French they are so different from what I have been painting that I have to seek advice on how to paint white uniforms. They are a mystery to me.  Fortunately many out there have come to my assistance.  I post a half done picture of my first attempt with the French having used off white grey then highlighted with white.  Still experimenting.  So stay tuned for more.


Sunday, September 3, 2017

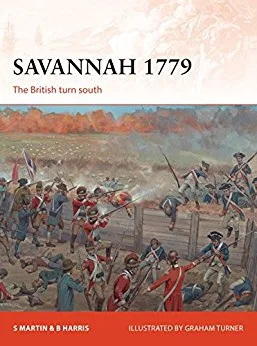
Savannah 1779


By 1778 the war in the North had turned for the British.  Burgoyne had surrendered which brought the possibility of French intervention.  Following the battle at Monmouth both sides had fallen into a war of posts and skirmishing.  Refugees from the southern colonies recommended moving south where a land of loyalists awaited the British with open arms.

   And so, Sir Henry Clinton decided on a small gamble with limited forces.  Colonel Archibald Campbell was Sent south with a small force of 3,000 men consisting of the 71st Highlanders, four loyalist battalions and two Hessian battalions.  He over ran Georgia and in his words removed one star and one stripe from the new American flag. American reinforcements joined together and a see saw campaign resulted back and forth across the South Carolina Georgia border.    The landing of A French army with naval support push the British into Savannah in a scenario similar to  Yorktown but with different results.   Savannah 1779 details that campaign.

   A often forgotten campaign in the Rev War it is nevertheless a fascinating campaign and perfect for the war game table.  Armies and battles are small and colorful.  There are linked battles which could form a neat campaign.  Uniforms are colorful. Personalities are fascinating.  And you can field a French army which actually fought!  Battles range from full sieges to small skirmishes to battles between.  In addition it is a good read which is in itself a good reason to pick up this book.  Highly recommended!

Thursday, August 17, 2017

SUPERMARINE SPITFIRE MK.IX


After watching the Spitfire that landed here at Worcester airport the other day I wanted to learn more about it.  What I found out was truly amazing.

Supermarine Spitfire MK.IX tail number BR601 first flew in June 16, 1942.  It was the sixth conversion from a model M.V into a MK.IX.  During its history it flew 116 combat missions and was piloted by two aces.  These were Australian ace Tony Gaze who had 12.5 victories and also Colin Grey from New Zealand who had 27.5 victories.
So what I saw landing the other day was a true piece of history in front of me.

For more on BR601 and it's long distinguished history please see the Collin's foundation website.  Here is a link with much more details:
http://www.collingsfoundation.org/aircrafts/supermarine-spitfire-mk-ix/

And if you are in the area please come to the Worcester airport on September 22 - 24, 2017 to see many of these restored aircraft fly once again.


Monday, August 14, 2017

Always something interesting at Worcester airport!


At work the other day, while waiting for flight 2020 to land a customer ask what kind of aircraft that was that just landed.  Distracted by printing off the flight dispatch and other items for the arriving flight I mentioned that there are a number of small private planes which use the airfield.  Turning to look out the window I was shocked to see a Spitfire!  It had just landed and was taxiing past us and up to the hanger.


  The  spitfire is owned by the Collins Foundation.  It is part of a fleet of aircraft and other vehicles from WW2.  Turns out they rotated smaller aircraft around the country for air shows. There are a few others coming in soon.  If you are interested there will be a show here at the Worcester Massachusetts airport the weekend of September 22 to 24.  More information to follow.


Sunday, August 6, 2017

Mr Madison's War rules for War of 1812


These rules for gaming the War of 1812 originally started out as a set of rules for The American Revolution by Jim Purkey at Fife and Drum miniatures.  These are offered free on his miniature site.  I liked them, and made a few changes to better reflect the new time period.  In addition i have posted a few clarifications and additions here to how we play the game.


Move first, fire second, move second, fire first:  when it is your turn to fire remove all casualties from hits.  No, casualties removed do not get to return fire that was the advantage of firing first.

Retire facing or not facing enemy:  deduct 2" from move to retire with back towards enemy.  Half move to retire facing enemy or move sideways.

Charges or moving into melee:  during your move declare charge.  Defender tests morale, if pass they stand and can fire at charger if not retire column distance back shaken.  There is no charge move bonus.  Fight two rounds of melee then loser (most casualties) tests morale.  If pass then winner tests.  If both sides pass then attacked is considered to have failed to push back defender from their position.  The attacker retired one column move back towards their line facing the enemy.   

Routing units effect on other units:  ignore friendly units routing past if router is lower morale.  Take morale test if equal or better morale.  

Multiple units in melee:  If two units vs one distribute casualties evenly to both units.

Wheeling regiments:   Wheels are made from the left, right, or center of the unit only.

Fences, small streams:  Units move up to them and stop move.  Next move you cross obstacles and continue your move. If both units are touching the same fence line and facing each other across it neither gets the benefit of the fence.

Artillery:  one operation costs 1/2 move, this included fire.  So you can limber and move half movement;  move full move if limbered; unlimber and fire Artillery cannot enter woods, need infantry to knock hole in fences to cross.  Any friendly unit within a friendly artillery arc of fire, if the arc of fire goes through two opposite sides of that friendly unit the artillery can not fire.  Arch of fire is measured  from cannon barrell, with of stand forward like a bowling alley

Difficult terrain (fields, Rocky ground): cost 2" for every 1" of movement in it

Woods; units stop movement at edge of woods.  They enter next turn (similar to fences).  Once in woods skirmishers troops (skirmishes or Indians)  move their full movement, while formed troops move half their movement.  Small arm range is half.  Only skirmishes get cover modifiers. Yes, it sucks for regulars in the woods (please ask General Braddock).

Indians:  always unformed, in mass formation (I.e. in a bunch).  No penalty to change direction.  In woods move full movement.  Units fired at by Indians for first time check morale.  In open clear terrain go one step down chart for firing and morale (if on line "C" use line "D").  Indians are not shock troops. They race about being obnoxious and scaring volunteers and militia who are not used to them.


Rockets:  roll  d10.
   10 = hit, one casualty and test morale.
6 - 9 = test morale
3 - 5 = miss
     2 =  hit nearest friendly unit test morale
     1 = rocket doubles back,  destroyed battery

Here is a link to Jim's blog where he explains how to play his rules.  Very well done explanation with clear examples of play.
http://altefritz.blogspot.com/2017/08/fife-drum-awi-rules-tutorial.html

Thursday, August 3, 2017

Loose Files & American Scramble Quick Reference Sheet


I found this quick reference sheet on the internet. My favorite Rev War set of rules which have given me great games for a very long time. As I will be posting a couple of my Rev War battles soon readers may like to try these out. I have added a few house house rules we used over the years.  Hope you enjoy!

 I believe these were done by Vincent Tsao and can be found here:

http://www.wfgamers.org.uk/resources/callan/callan.htm


Order of Play in a Turn (all movement is simultaneous)

  1. Compulsory Retreats/Routs following combat in previous turns.
  2. Calculate Morale effects provoked by 1 above.
  3. Firing
  4. Allocate Command Points. Move commanders and couriers.
  5. Move units. Announce attempted advances to contact/charges before moving.
  6. Combat.
  7. Re-dress ranks (according to training) of units that did not move this turn.

Command Points CP
Move own commander up to 1 die (choice of average or D6) inches = 1CP
Inspire troops in combat (give +1) = 3 CPs *
Rally (remove) one DP = 2 CPs *      * must be in contact with unit

Disorder/demoralization points DP
1st class (elite, veteran) may remove up to 2 DPs per turn if stationary and not in combat
2nd class (line) may remove 1 DP per turn as above
3rd class (green, partisans) may remove 1 DP per turn if stationary, not in combat/shot at
4th class (militia, Indians) may only remove DPs with aid of an officer
5th class (unmotivated Indians) may only remove DPs with the aid of the Army CO

Artillery Fire range under 10 inches close, 10-30 long (light) 10-36 long (medium)
Roll one D6 for each stand firing modified by below:
+1 heavy gun, target column or limbered artillery, same target/range as last turn
- 1 new target, each DP of firing stand, light gun
- 2 target in fieldwork or stone building or target in skirmish order/unlimbered
Long range inflict 1 DP for 4 or higher.
Short range inflict 1 DP for 2 or 3, 2 DPs for 4 or 5, 1 DP and 1 casualty for 6 or higher.

Infantry fire Only skirmishing infantry can fire and move in the same turn.
Musket range 8 inches, rifles 10 inches. Roll 1 D6 for each stand firing, minus DPs of firing unit. Halve result shooting at skirmishers/unlimbered artillery, halve if target in fieldwork or building. Round up.
1 DP for each 6 rolled. Skirmishers roll again on 5, with subsequent 4,5,6 = 1 DP.

Movement is the number of dice score X inches
1st/2nd/3rd class units may move one or two average dice
4th/5th class units may move one average dice or one average plus one D6
Skirmishers may move an extra D6, Cavalry may move one or two extra D6
Formed troops get 1 DP for each 1 or 2 rolled, 1, 2 or 3 in woods.
Hessian infantry (except Jaegers and von Bose in South) move one average die or one average die + 2 inches.
Cavalry who charge must roll at least 3 dice. Can change speed 1 dice up or down per turn.
Moving in woods or uphill -1 inch from each die rolled.
Wheeling, as uphill get 1 DP.
Change formation of facing takes 1 turn, get 1 DP (2 if under fire).
Cross fence/wall,; stop at obstacle, continue nice next turn.
Retire facing enemy: ½ move get 1 DP if cavalry or under fire.

Morale: seeing friends retreat/rout within 6 inches
Troops ignore retreat of lower grade friends but get 1 DP if such rout within 6 inches.
If equal/higher grade friend retreats within 6 inches get 2 DPs.
If equal grade friend routs within 6 inches get 2 DPs and one stand deserts.
If higher grade friend routs within 6 inches get 3 DPs and one stand deserts.


 Combat occurs when a unit advances within 4 inches of enemy. Each side throws an average die modified by below:

+3 each training grade better than enemy
      defending fort or stone building
+2 defending fieldwork or wood building
      making bayonet attack
+1 terrain advantage
      officer spends 3 CPs inspiring troops
- 3 in skirmish order
     attacked in flank/rear
- 2 each DP, each casualty
- 1 outnumbered
- 2 outnumbered 3-2
- 3 outnumbered 2-1
- 5 outnumbered 3-1 or worse   1 cavalry figure = three infantry, one gun = six infantry

Result is difference in scores:
+4 or more: Easy victory get 1 DP. 1st/2nd/3rd class obey orders. 4th/5th class pursue.

+2/3: Successful get 1 DP and (vs. infantry or artillery, not in fort, building or fieldwork) one casualty. Halt one turn.

+1/even/-1: Stand off both sides halt fight continues next turn. Each get 1 DP and (unless infantry facing cavalry or bayonet attack, or in a fort, building or fieldwork) one casualty

-2/-3/-4: Driven back get 2 DPs and one casualty. Retreat one move at maximum speed.

-5/-6/-7/-8: Defeated get 2 DPs and 2 casualties. Retreat at maximum speed behind next line of friendly troops, or next terrain obstacle if no support.

-9 or worse: Routed run away at maximum speed to beyond enemy artillery range or next terrain obstacle, whichever is further. Get 4 DPs and 2 casualties.

House rules:
Must move full distance rolled unless point out stopping point (i.e. stop at fence line or top of hill, etc).

Can roll movement for entire brigade if moving together.

Corlears Hook Fencibles House rules: after 2nd stand off in a row both sides retreat 1 average die unless defending an obstacle, fieldwork, building or fort.

Militia units with 50% losses or more flee the field  remove from table. Other units with 75% or more losses flee. No further DP losses by friends who see this.


Tuesday, August 1, 2017

Eutaw Springs: The Final Battle of the American Revolution's Southern Campaign


Eutaw Springs: The Final Battle of the American Revolution's Southern Campaign
by Robert M. Dunkerly

  This hard fought battle has been over shadowed by the victory at Yorktown.  When written about it had usually been dismissed as a near victory by Nathaniel Greene who lost only when his troops dissolved into a mob after looting the British camp.  The battlefield itself has long thought to be submerged under flooded lake Marion.  But no more. Robert Dunkerly  in this new book has rescued the Battle from obscurity and given us a excellent account of one of the  hardest fought actions of the war.


Fought between American General Nathaniel Greene's Southern Army of Continental and local militia and State forces and British General Alexander Stewart's mix regular and loyalist force on 8 September 1781 outside Charleston South Carolina.  The Americans had an slight advantage in numbers (about 2,000 to 1300) and especially cavalry ((200 to 60).  The battle started with the Americans capturing a unarmed  foraging party of about three hundred men.  Greene used his militia and State regiments to engage the British line first, and  then his continental went in and broke the British.  As the British fell back, the New York Volunteers created a Chew house type defense in a barricaded building, while the flank companies under Major Marjabanks held the flank giving the British a chance to rally.  Greene's exhausted veterans fell back and the Battle was over.  Stewart later said if he had had more cavalry he could have routed the Americans.

   Controversy plagued its history and myth making  distorted the fighting.  Friends and enemies attacked and defended Henry "Light Horse" Lee's actions that day.  Did Greene's army dissolve into a mob while over running the British camp? Or was that an excuse?  And what of the battlefield ?  Was it really submerged under lake Marion?

  The author has researched the battle and located numerous primary accounts.  He reconstructed the Battle based on topography, first person accounts and archeological finds.  There are very good maps and excellent order of battles.  In short a great find for miniature gamers wanting to re fight this battle.  I enjoyed this book very much and highly recommend it.

Monday, July 24, 2017

One year anniversary


  On July 24, 2016 I posted my very first blog post.  Although I had toyed with the idea of doing a blog to share my interest in miniature war games and toy soldiers it was not till then that I took the plunge and started my blog.


  Since that time I completed 115 posts and had over 27500 visits from interested people. Best of all there are now 37 kind people who have signed up to follow this blog;  and a great number of others who drop by.    It has turned out so much better then I had ever hoped for.  In addition to sharing my latest painting endeavours, projects and battle reports I have also gotten to meet (through the internet) a very nice group of people who share my interest.  It has been especially fun to share with you my progress on the Niagara 1814 project.  In a little over a year I have put together my War of 1812 armies and now completed multiple games with them.    It has been great fun to see what others are doing and especially to learn from you.


  For the future I plan to publish more campaigns and battle reports.  While one never ever finishes a project in the world of war games I have enough painted regiments in my chosen periods to set up and play games and campaigns.  So now I want to get out and fight more table top battles.  These will be both with the club and with friends both here and away.  Also a few solo games.  Not satisfied with my battle reports I have been studying how many of you have done yours to have a better product and more interesting read.  I have more terrain items I wish to add.  Some are for visuals, like better mounting for woods and adding some hills.  Others are for items like camps and buildings and ducks and geese in a pond!  Civilians wondering about the table or farming their fields?  More items to make the table more interesting.  Lastly I plan on being much more proactive in answering comments and publishing comments on my and other people's blogs.  I tend to be a silent lurker but hope I can change that in the future.


So thank you all so very much for spending some time here.  I am most grateful for each and every visit here, and delight in your comments and encouragement.  I hope in the future to continue to make this blog interesting that you continue coming back.  Thank you!


Thursday, July 20, 2017

19th Light Dragoons


  19th Light Dragoons were  raised by Colonel Sir John Burgoyne (a cousin of General John Burgoyne of Saratoga fame) as the 23rd Regiment of Light Dragoons on 24 September 1781 for service in India. The regiment arrived at Fort St. George, Madras in 1782 and became the first British cavalry regiment to serve in India.  In 1786, the regiment was renumbered as the 19th Regiment of Light Dragoons.


   After long and varied service in India the 19th embarked for England on 20 October 1806, and remained in Britain until the outbreak of war with the United States in 1812.  They arrived in Quebec in May1814.  They were involved in the blockade and re-capture of Fort George, and the destruction of Black Rock and Buffalo in New York State. They also participated in Colonel Thomas Pearson's delaying action against Brigadier General Winfield Scott's brigade during the American invasion of 1814.  subsequently they fought at the Battle of Chippawa in July 1814, the Battle of Lundy's Lane later in the month and the Siege of Fort Erie in August 1814. Later they  pursued American raiders who had struck at Battle of Malcolm's Mills in November 1814. For these actions, the regiment earned the battle honour of "Niagara".


Sunday, July 16, 2017

Chippewa July 5, 1814


   This was the battle which sparked my interest in the War of 1812.  We visited the battlefield in 1985 and I have wanted to recreate this battle on the table top since.  It has simple terrain, balanced equal forces and colorful uniform.  British regulars, gray jackets Americans, volunteers in mixed dress and native Indians.  You would have a difficult time finding a more perfect battle to fight in miniature.


  For this battle I used the maps out of Richard Feltoe's book, Tides of War.  To fit the battlefield on a six foot by eight foot table I divided the field in half to represent the plain and the woods.  Fences outlined the woods and defined the roads.  This way I could place trees in the wooded area but players could move the trees to not interfere with troop movement.   I did not include either river.  Instead both sides had to enter the table on the road in road column.  Light troops for both sides were already deployed in the woods.  Historically I should have had the players in the woods fight for three or more turns before the regulars entered the table.  But I did not  want players just hanging around doing nothing  ( no fun there).  So for the first couple turns players commanding the regulars entered the table and deployed while the light troops fought it out in the woods.

American Command:
9/21st Regiment (24 figures)
11th  regiment. (24 figures)
25th regiment  (24 figures)
Towson's battery (2guns)
Richie's battery  (2 guns)
American dragoon  (6 figures)
Pennsylvania Volunteers (24 figures)
Native Warriors (12 figures)

British/Canadian forces:
19th Light Dragons. (6 figures)
1st Regiment of Foot. (24 figures)
8th Regiment of Foot. (24 figures)
100th Regiment of Foot. (24 figures)
Light companies  (12 figures)
Royal Artillery. (2 guns)
Lincoln Militia. (24 figures)
Native warriors. (12 figures)

The game:
In the woods both sides marched directly at each other.  Militia volunteers fought militia volunteers while native warriors fought each other.


  During this time the regulars of both sides marched up the road and onto the field.  Although both sides advanced with the cavalry leading, the Americans brought their infantry up fast while the British made sure their artillery was to the front.


Once they spotted each other the cavalry could not help themselves and both sides
charged.  A good war gamer cannot do otherwise.  Although the melee was inconclusive, the American morale broke and they
scampered back.  The victorious 19th Light Dragons held the field and covered the royal artillery.


 Meanwhile both sides deployed along parallel rail fences.


In the woods the great melee was coming to a head.  The American Indians forced their British counterparts to fail morale and retire shaken.  But the Lincoln militia forced the Pennsylvania Volunteers back also.  The American Indians raced behind the Lincoln's to attack them from the rear but the British Indians had recovered their morale and attacked them in their rear  and routed them in turn! The Lincoln Militia marched on chasing the Pennsylvania volunteer off the boards!


On the plain, the British commander massed three gun sections and commenced target practice on the U.S. 9/21st Regiment.  The American commander could only reply with two gun sections, the other guns were masked by his cavalry.


  Seeing the 9/21st being shot to pieces the British commander advanced his light companies in skirmish order against him supported by the 19th Light Dragoons.  This must have been the moment the American Artillery commander waited for.  He unmasked his guns and unloaded a devastating round against the dragoons which decimated them.  The American dragoons charged the skirmishes.  Although the skirmishes were shaken, they in turn caused the dragoons to fail their morale which tumbled them back.


The 9/21st failed their morale in the face of the British advance and retired off the board.


By this time the Lincoln Militia and Indians in the woods were positioning themselves on the flank of the American line.


 The British line advanced against the Americans, who now have a major gap in their line and are facing enemies on three sides.


At this point, with the full weight of the British line on them, and the Lincoln's in position to out flank them we called the game.  It was a British victory and future cadets at West point would wear anything but gray!

Conclusion:

All felt it was a fun and balanced game and would enjoy replaying it.  Perhaps I have found my "go to" scenario for War of 1812?

In the future a couple things to improve the game.  I plan on buying more trees to make the woods look better.  Also I am working on better buildings.  I will add rivers and bridges to both ends to make both sides remember their escape (should things go wrong) is a small bridge.

  Thank you Byron, Dave and Warren for commanding the Americans. And thank you Charlie and Ed for commanding the British/Canadians.  I am most glad you played in my game and more importantly had a good time.


Saturday, July 15, 2017

Club game night


  Last night was club game night and fun evening it was.  Attendance was great, with over 20 people in attendance.  The three games put on were  Fire and Fury American Civil War game in 15mm, a X Wing Star Wars game and War of 1812 in 25mm.

  The X Wing game put on by Mike  saw a large variety of space ships spread across an very nice space mat.  Ships big and small battled it out.  From across the room it looked like great fun.


  Phil put on a 15mm Civil War game based around the historical battle of the Anna River.  It looked good and again people were having fun.


  Finally I put on a battle based around Chippewa  on July 5, 1814.  This time it was a British victory and cadets at West Point will wear anything but grey coats in the future.  This is one of my favorite battles of the war, one I have long wanted to firefight.  So there will be a longer post, and more pictures in a separate posting.  But let me say it was a fun game which may become my go to War of 1812 game scenario.

Monday, July 10, 2017

Lee's Legion 1781


  The 2nd Partisan Corp or as it's better known as Lee's Legion was formed in April 1778 when it was detached from the 1st Continental Light Dragoons.  Through its commander, "Light Horse" Harry Lee and his memoir the Legion's service is one of the better known regiments during the American Revolution.  As to if it was an elite unit, that is up to the reader to decide. But what is not debatable is it could be, at times as ruthless as the British Legion with whom it fought. It was a very active part of Greene's army so I had to include it in my collection.

   Incidentally, Lee's  memoir was written partly to adress the controversy over Lee's action at Eutaw Springs.  His son, Robert E. Lee would continue the defense of his father in later editions of the book.


There are numerous interpretations of how the Legion looked.  This could be because the uniform was changed during the War and also supply problems.  In addition different infantry elements were assigned to the Legion during its history.  I have of course focused on it activities in 1781.


  I understand that suggesting Lee's Legion were not dressed in green might go against current excepted knowledge this is usually suggested that Lee ambushed Pyle's loyalists because they were dressed similar to Targets 's British Legion.  When I painted them up I used the painting of Lee himself in a tan/brown faced green coat. In addition I also used the following quote from private Shaw of the 33rd regiment of foot. He was captured just prior to guilford courthouse and wrote later:
"Scarcely had we gone half way up the lane, when seven of Lee's light horse made their appearance: my companion swore there was Tarleton's light horse coming, and, says he, ‘we shall be taken up on suspicion of plundering, and get 500 lashes a piece.' ‘No;' said I, upon observing their brown coats, and white cockades, ‘no, friend, you are deceived; these must be the rebels.' Having therefore discovered his mistake, he began to cry;--but for my part, I thought it very good fortune.—As they were advancing towards us, we concluded to go and meet them; which we accordingly did, and falling on our knees begged for quarter; which they granted ….


While the evidence, and most authorities agree on the inform of the Legion cavalry the Infantry are much more of an mystery.  I think the evidence suggests the Legion infantry had a different uniform from the mounted element. There was an issue of enough cloth to three officers to make coats of blue faced red and lined white (see p40 Katcher Uniforms of the Continental Army). This was by the clothier general of Maryland in 1782. Coincidentally it was at the same time the portrait of Harry Lee
painted by Charles Wilson Peale. There is also a portrait of an officer of the Legion Infantry,  Laurence Manning who was
shown in a blue coat faced red.

  So I feel confident the Infantry element of the legion in 1781 at least we're in standard blue faced red coats.  There is no evidence helmets were issued so I outfitted my infantry in standard infantry uniform.

  For my table top Legion I have once again used the most excellent figures from Fife and Drum miniatures.  While they do not make a figures for the Legion figures in their existing range work well.  The cavalry comes from the 16th light dragoons. Minor filing was all the work they needed.  For the Infantry I am using existing painted figures. Half of the Light battalion are used as Kirkwood's Delaware company, so the other half of the battalion are now the Infantry of the legion.  Thus I get double duty out of that group.  No flag for the unit.  Although some sources suggest one I am unsure of the documentation.  If better information comes available later to convince me I will add it then.  And now I look forward to Lee tangling with Tarleton in the battle of the legions on my table top!


Saturday, July 8, 2017

49th Regiment of Foot 1812


  At the time war broke out, the 49th Regiment of foot was one of the only regiments of regulars in Canada.  Having arrived in Canada in 1803 the regiment was stopped returning to Great Britian by the declaration of war.

  Divided up into smaller commands the 49th was stationed around the Niagara area.  The Grenadier and Light infantry companies were at Queenston Hieghts in October 1812 and played a prominent part in the battle.   The regiment's  commanding officer, Lietentant Colonel Isaac Brock (and commander of all British Forces in Canada) was killed at the head of the Grenadier and Light companies leading a charge against the Americans.

In November 11, 1813 at the Battle of Crysler's Farm the 49th and 89th regiments of foot fought and defeated a much larger American Army under General Boyd.  It was a text book example of better trained and disciplined troops against poor quality but more numerous troops.

  I have painted the regiment in its early war dress.  Officers are still wearing bicorns with white breeches and the men stove pipe shakos. I really like the NCO's, keeping men on their toes and dressing the line.  The gallant officer appears to be channeling General Brock inspiring his men.  It is a nice break from the usual and gives the unit a dashing appearance.

  Figures are from Knuckleduster miniatures.  They continue to provide great figures and great value.  The flags from Flags of War.  These are a great item also and I wish they got more press and were better known as they are wonderful.