Showing posts with label Battle. Show all posts

Tuesday, June 21, 2022

Big fight at Cook's Mill 1814 Part 1


  The game starts with both brigades marching onto the table.  The 1st US Rifles are already deployed on the Canadian side of the river.  Both sides roll for possible reinforcements.  The British/Canadian reinforcements arrive in turn 6 while American reinforcements arrive turn 12.  Let the game begin!


Turn 1:

  Brigadier General Windfield Scott entered the field with his 1st Brigade.  


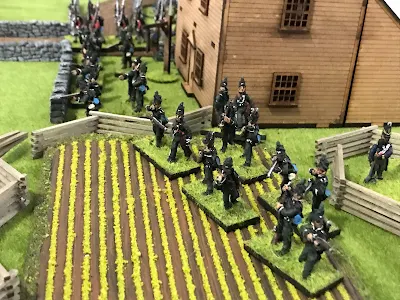
  While most of the Brigade, lead by the 25th US Infantry marches up the road to cross the bridge, the 9th US Infantry is sent to the right to protect his flank and look for a possible ford across the river.  

The 1st US Rifles have already crossed the river and taken position to protect the 1st Brigade as they deploy.


  Lt.Col. Parsons brings the Light Brigade onto the table.  


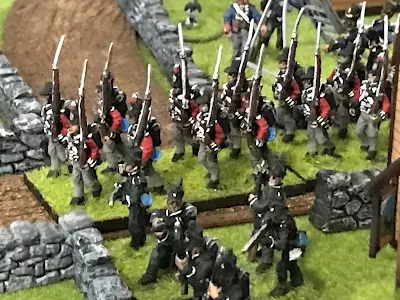
The Glengarry Light Infantry (GLI) deploy in skirmish line while the Battalion of Incorporated Militia of Upper Canada (IMUC) marches down the road.


 The two militia battalions deployed on either side of the road. 

 John Norton and his Mohawk warriors appear on the other side if the river to annoy and  snipe at the advancing US regulars.

A local sheppard is less then impressed with all this foolishness!


Turn 2:


  Parsons sends his 1st Militia battalion towards the ford while the 2nd Militia battalion advances through the woods to out flank the American rifles.  A wing of the GLI is sent to support them.


  The IMUC deploy while the rockets and artillery in limber to fire.


Scott urging his regulars to hurry, but the bridge is a bottleneck.

The Mohawks take casualties from the 9th US but in turn their fire causes four American casualties.  Both sides easily pass their morale checks.


 While some curious geese wonder what these rockets are all about?


Turn 3:

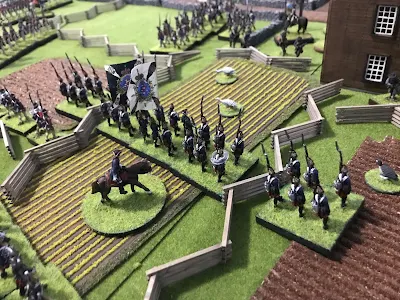
When is the 1st US Rifles stand firm behind their rail fence Scott deployed his brigade.  They are finaly over the river.


But the 1st Militia and a wing of the GLI are turning their left flank, and the other wing of the GLI on their right now long can they hold?

The 9th US Infantry drives the Mohawks back.  But they take heavy fire from the withdrawing warriors and the 2nd Militia who have advanced up to the ford.

  Run away!  The geese do not like the rockets at all!


Turn 4:


The stand of the 1st US Rifles has been magnificent but it has come to an end.  The IMUC and GLI charge forward and overrun the poor unit.  The remainder of the rifles rout back to the protection of the 1st Brigade lines.

Scott brings up the 25th and 11th US Infantry with the 22nd US Infantry in reserve.  

On the far right flank the 9th US Infantry takes cover by a hedge row and keeps an eye on the Indians and militia.


Turn 5:


Charge!  The 25th and 11th US Infantry sweep forward to engage the Canadians.

The 22nd US Infantry is sent to guard the exposed left flank from the advancing GLI and Militia.


  In the close combat the 11th US Infantry defeats the outnumbered wing of the GLI.  They are sent running back to the Canadian lines.  The 2nd Militia barley notices and resume their watch in the river crossing.


 The 25th US Infantry led by General Scott himself defeats the IMUC who retire back shaken.  Lt.Col. Parsons calls to them to rally and stops their retreat.  The Royal Artillery prepares itself to hold against the on rushing grey tide.


General Scott orders his victorious regiments forward!  The enemy center is broken,  there are inky the rocket battery and artillery to our front.  Don't give the Canadian troops time to recover.  Forward!


Meanwhile, unobserved the 1st Militia has  cleared the woods and finds itself behind enemy lines!


And in the background the fifes and drums beating British Grenadier are heard.  Morrison's brigade has arrived in the nick of time!

To Be Continued....


Monday, June 13, 2022

Cook's Mill 19 Octiber 1814


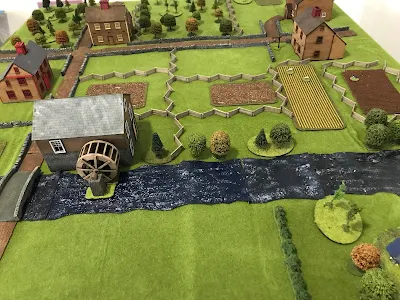
  This game will be based on the historical Battle of Cook's Mill in September 1814.  A reinforced American Brigade was sent to destroy British/Canadian supplies in one of the final actions of the war along the Niagara. In this version the Americans must cross as the river and destroy the enemies supplies located in the town of Cook's Mill.  The Canadian/British force will try and prevent that from happening.   I have altered the historical order of battle slightly to better fit my present collection of figures.  In addition I have added possible reinforcements to create a more interesting game.  

  All figures are 25mm and rules used are my version of the Fife and Drum miniature Rev War rules changed for the War if 1812.  


Order of Battle:

American Order of Battle:

1st Brigade: Brig. Gen. Scott

1st Rifle Regiment (24)

9th US Regiment (24)

11th US Regiment (24)

22nd US Regiment (24)

25th US Regiment (24)

(All regiments are rated as regulars.  The Rifle Regiment starts the game deployed by the cross roads West of the bridge.  The remaining regiments enter the game one regiment each move  on the east road. )


Possible reinforcements:

3rd Brigade: Brig.Gen. Porter

9th Pennsylvania Volunteers (24)

1st New York Volunteers (24)

2nd New York Volunteers (24)

Canadian Volunteers (24)

(at start of game roll 2d6 for turn they enter the game.)


  In order to destroy supplies located in a building move a unit next to that building. You must roll a seven or better on 2d6 to destroy the supplies.  The unit attempting it cannot be in close combat or fired at that turn.  

British/Canadian Order of Battle:

2nd (Light Brigade): Lt. Col. Parsons

Battalion of Incorporated Militia of Upper Canada (24)

Glengarry Light Infantry (24)

1st Militia Brigade  (24)

2nd Militia Brigade (24)

Mohawk Warriors (12)

Royal Artillery (medium gun)

Royal Marine Artillery (rocket)

(This force deploys on the table top at the North West corner.)

Reinforcements:

3rd Brigade Lt.Col. Morrison

1st Regiment

89th Regiment

100th Regiment

Flank Companies (Light Infantry and Grenadier)

(at start of game roll 2d6 for turn they enter the game.)


Wednesday, May 25, 2022

Battle at Dyckman's Mill part 2


The battle rages on!

Continued from first part here: https://bravefusiliers.blogspot.com/2022/05/battle-at-dyckmans-mill-part-1.html

Turns 7 & 8:


  As the British advance across the open ground they are under fire by the Continental line regiments and Hamilton's guns.   The 9th and 11th  Continentals are behind cover and the British line are out in the open. Taking serious casualties the British pass their morale tests and continue their advance.


  The Hessian Brigade advances up to the ford and prepares to cross. The Virginia and Pennsylvania rifles have contested the advance but casualties are mounting and their firepower is becoming less effective.   Both Hessian battalions form column for the crossing. 

  And the first wagon exists the table! 


Turn 9 & 10:


  Colonel Rall  calls  to his regiment to follow him and leads them across the stream.  The rifles cause numerous casualties but the Hessian cross and then form up into line.  A close range volley clears the pesky skirmishers out of the way.  What is left of them fail morale and break.


  The British 7th and 63rd advance against the American line.  Both regiments take casualties but a devastating round from Hamilton's guns breaks the 7th regiment who fall back.  General Beale rides up to rally them and the proud Fusilier get ready to return to the fight.  

Now the second wagon is off the table.


Turn 11 & 12:


Colonel Rall leads his Hessian towards the town.  General Beale has reformed his line and is now continuing his advance.  The Grenadier battalion is advancing slowly but steadily through the woods to flank the American position.


  Conclusion:

Afterwards the last wagon exits the table American General Becker looks to withdraw his Continentals.  They have held the British better then expected but with the Hessian threatening to take away his line of retreat its time to go.  Captain Hamilton fires a few last rounds to keep the British at bay as the Continental fall back off the table and up the road.   General Becker can be satisfied that nit on my the vital supply wagons have escaped but he has also seen his valuable Continental line regiment and artillery saved.  The great sacrifice of the Pennsylvania and Virginia rifle men  helped to make this happen.And they local militia although defeated and their colors lost can be counted in to return to assist later .

  The Crown forces follow and quickly occupied the town (to the great joy if the local tavern keeper who now sees hard currency paid for goods).  The casualties were relatively low which will please Sir William Howe. Colonel Rall is pleased at the courageous dedicated service of his professional soldiers.  Especially his regiment, but also the sacrifice if the jagers who fought twice their number.  The British Grenadiers upheld their reputation and a extra mug of beer per msn will be issued to congratulation to them. All in alk many things both sides could be proud of.


 Who won?  Both sides completed their victory conditions.  As with many battles of this war historically the British held the ground and the Americans retreated to fight another day.  I will leave the long term to future historians but to me it was a fun and glorious game that in plan on returning to again.


Next post, how the game wss set up and solo play assists....