Showing posts with label King Philips War (KPW). Show all posts

Monday, May 2, 2022

Testing the Rules


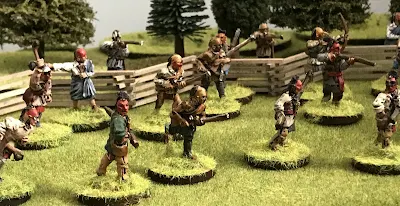
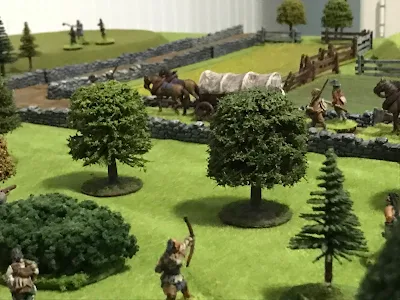
 I set up a small game to test out my rules I posted about.  Two units per side, with Pilgrim units walking into an ambush. I wanted to test out the rules and see how they work.  So the actual set up was less important to me then seeing how the rules worked. I am looking for a simple but fast moving game.   

Wampanoag Indians units:

Chanonchet commands one unit of warriors armed with muskets.  Deployed in fields north of road.

Mudawamp commands one unit of warriors armed with muskets deployed in woods by road.

Settlers units:

Captain Winslow's company is first unit in column of militia and is armed with muskets.

Captain Atwood's company of volunteers are armed with muskets.  They are just crossing bridge when ambush sprung.


  Turn 1:

Indians  roll for 1 operation

Pilgrims roll for 2 operations.  They also rolled high so go first in turn.


  Captain Winslow' company changes firmation and deployed to right and left of road.  They fire at groups opposite of them. (this takes two operations) Chanonchet's warriors take four hits and Chanochet is killed! (group is in massed in open so easy target.  After casualties roll d10 and a 10 equals leader killed)  Mudawump's group in woods take one hit.  Window's command's muskets are now unloaded.  Atwood's company deployed into skirmish line behind ridge to support Winslow.  

  Wampanough's check morale.   Chanochet's warband fails morale and routs.  Philip attempts to rally them.  Mugawump fires at column in road and hits five settlers.  Winslow's command tests morale and routs back.  (To test morale must roll d10 and add subtract modifiers.)

Turn 2.

 Both sides roll a 1 for operations and each has only 1 operation this turn.  The Wampanoag goes first.

 The late Chonchet's warband Rallies from rout, but us still disordered.  Mugawump's warband turn to face enemy to their right.

Atwood's command moves to top of ridge while Winslow's rally in place.


Turn 3

Wampanoag rolls 6 and gets 3 operations each this turn.


Chonchet's warband rallies, and charges Winslow's company on the ridge.  Winslow is unloaded so cannot fire.  Defeated in melees rout back.

Mugawump's warband fires at Atwood's company on the ridge and kills six figures.  Atwood's return fire kills four.  Atwood's company failed their morale test and routs!

Turn 4

Pilgrims race for the bridge.  I could have continued the game and combined the two companies.  But having my gotten a good sense of the rules, I decided to end game.


Conclusion:

Rules did what I wanted them to.  A quick game with a good feeling for period. The rules worked well and play moved along at a quick clip.  I learned not to be in formation  in open when being shot at! I enjoyed them and looking forward to playing soon.  But first, time out for a War of 1812 game up next.


Sunday, May 1, 2022

King Philip's War rules


I have been playing around with the rules I use for my King Philips War games.  I am looking for a simple set of rules which gives a flavor if the period.  Most English settlers were poorly  trained militia.  The better trained Rangers were few and came about late in the war.  I call them volunteers to distinguish from militia.  Indians were not supermen.  If charged they tended to retreat and charged if it was to their advantage.  In addition because they tended to avoid heavy casualties their morale was brittle.  

  I recently found a set of rules by Richard Barbuto on the  The Lone Warrior site which looked good.  After a few modifications on my part I will be giving them a try.

  If interested in them here is a link to the original set called   " From Bunker Hill to New Orleans. "

https://lonewarriorswa.com/complete-rule-sets


 Of course I will be writing up a game using them soon.


Fighting King Philip

Organization:

All units of 8 - 12 figures.  One figure in unit is A leader. All figures are individually mounted.

Each side gets 1 group leader or commander.


Formations:

Line: two ranks base to base.

Column: two figures wide three or more ranks deep. Only first two ranks can fire.

Skirmish Order: single line of figures all touching.

Open Order: single or two ranks.  All figure spaces one figure apart.  All can fire

Mass:  group of figures as wide as deep.  Only two ranks can fire.


Sequence of play:

Turns are UGIO.  Roll dice for which side goes first.

Next roll D6 for each unit for side movin.  This gives # operations for all units that turn.

Indians: 1,2=1 / 3,4=2  /5,6= 3

Militia: 1-3= 1 / 4,5= 2 / 6=3

Volunteers: 1,2=1/ 3-5= 2/ 6=3

Operations:

Move/change formation/change facing

Rally or reform

Load/ Fire


Movement:

Volunteer = 10" column/ 6" line/ 8" open order/ 10" skirmish order

Militia = 10" column/ 6" line/ 8" open order/ 10" skirmish or mass.

Indians= 12" skirmish order/ 10" mass


Terrain:

Roads:  add 50% to move if start on road in column.

Hills: All movement up hill except in skirmish order is halved.

Open Woods: deduct 50% movement unless in skirmish

Thick woods:  deduct 50% all movement.

Spotting in woods:  stationary units spotted at 8"/ moving units or units that fired at 12". Cannot fire at target unless you can see them.


Fire Combat:

All firing is straight ahead. Routed or disordered units cannot fire unless rallied and reformed which takes two operations. 

Target classes:

A: Formed Troops in open

B: Formed in woods/ skirmish in open

C: Formed in Thick woods/skirmish in woods

D: Skirmish in Thick woods/behind fence, breast work, low wall, etc...

E. Garrison house or Fort.


Roll D10 per figure firing.  Match range to target and must roll that number or less to hit.

Firer.     Range.    A.   B.   C.   D.   E.

Militia    8".            5.   4.    3.    2.    1

Volunteer 8".          5.    4.    4.   3.    2

Indian.     8".           5.    4.      3.  2.    1

Bow.          4".          6".    5.     4.    3.  2

 For each hit roll D10.  On a roll of 10 unit leader is killed.  


Charge:

Declare charge.  Must be able to move to within 2" of target.  Charging unit must be in good morale to charge. Note after melee charger is disordered.

Defender may fire if loaded, charged from front and passed morale check.  Attacker checks morale if hit.

If charged home line up figures in formation they were in.  May double up figures.  Never more then 2 vs 1.


Roll D10 per figure fighting.  Add subtract modifiers.  

Modifiers:

Superior Leader with unit   +2

Defending class D.  +2

Defending class E.  +3

Additional figure fighting   +2

Non Indian charging.  +1

Indian in skirmish formation charging  +1

Indian in mass formation charging. +2

Figure disordered  -1

Attacked from rear or side. -2

Note: in 2 vs 1 only one figure fights and gets +2.  Second figure cannot be killed or withdraw but fights second round melee if survived.

Results:

In the case of two figures meleeing with a single figure.  Only one of the two figures rolls and it gets the +2 bonus.  That second figure does not roll, nor can it be killed or forced to withdraw.  It is not a casualty (but would withdraw if the unit lost the morale check described below.)


If a figure’s die roll is twice that of his opponent, then the opponent is killed.

If a figure’s die roll is greater than his opponent’s, but not double, then the opponent withdraws one skirmish move, facing the winner.

If scores are equal, both figures maintain position for the moment.

When all the figures in contact have rolled, count up casualties for both sides (dead and retreats).

The side with the most casualties has lost.

Compare the number of casualties of both sides and apply the morale check results to the losing unit.  e.g. if the winning unit had 3 casualties and the losing unit had 5, the difference is 2.  The losing unit withdraws two skirmish moves (the surviving figures of the unit remain together.)  The unit is disordered but faces its opponent


Morale:

Check morale if takes casualties, charged or charging.

Roll D10 to check must equal if lower to pass.

Volunteers 8

Militia 6

Indians in cover 8

Indians in open 6


Modifiers:

No leader  -1

Each 2 casualties that turn -1

Disordered -1

Less then half strength -1

Charged in flank or rear -2

Indians charged  -2

Higher level leader attached +1

In class D cover +1

In class E cover +2

Indians charging skirmishers. +1

Indians charging flank or rear +2


If fail check;

By 1 or 2:  withdraw # operations that turn by skirmish move rate.  Face enemy.  Disordered.  Takes one operation to reform.

By 3 or 4:  withdraw # operations skirmish move rate.  Back to enemy. Routed.  Takes one operation to rally and one operation to reform.  Two operations total.

By 5 or 6: withdraw # operations at skirmish move rate.  Back to enemy.  Permanent lost one morale level for rest of game.  Routed.  Takes one operation to rally and one operation to reform.  Two operations total.


Friday, October 8, 2021

Sudbury Historical Society Talk


  On Saturday morning I  attended a tour of the  Wandsworth cemetery at Sudbury Massachusetts.  The cemetery is located on the lower slope of  the hill where Captain's  Wadsworth and Brocklebank and their  companies fought on 18 April 1676.  Most of the men killed during that action were buried in a mass grave near here and later moved to the large monument in the center of the cemetery.


The tour was put on by the Sudbury Historical Society.  In addition to talking about the Sudbury fight in 1676 it also talked about a number of the individuals  buried there.  Members of the society dressed in period clothing stood near that Igrave to tell you a little about them. It was most interesting and entertaining. 


I was particularly interested and enjoyed talking to the World War One "veteran" dressed in an authentic uniform of a member of a medical company.  My grandfather Edward McNamara served in the medical company of the 101st regiment 26th "Yankee Division."


Following talk I took a quick drive past some of the sites associated with the 1676 fight.  Looking at the picture of the monument the colonial companies had been fighting up the hill from where the monument is located today.  Driving up Concord road to Lancaster road you go between Goodwin and Green hills.  This is the area the Native warriors ambushed the companies marching from Marlboro to relieve the Haynes Garrison house.  The militia held if the warriors for a number if hours until they were forced to retreat down the hill when the grass and brush are set fire.  As they raced down the hill most were overtaken an killed.  Later their bodies were collected and buried about Fifty yards to the right of the monument.  When the monument was built in 1852 the mass grave was dug up and the bones re buried under it.  


About eleven militia men escaped the fight and took refuge in the Hop Brook Mill at the foot of the hill.  This is located by Concord road and Route 20 (The Boston Post Road) in Sudbury today.  The area has been built over and nothing remains of the battleground.


On the way home I made sure to go pass the Haynes garrison house site.  Its about two miles from the cemetery.  The site today is marked but very overgrown.  


There is also a good view of the area where the Concord river runs in the distance. Its along the modern tree line.   A small group of eleven men from Concord marched along the river to come to assist the town of Sudbury.  This view from the Haynes site showed the view the members of the garrison  might have had of the approach of the Concord men.  Near where the bridge is today (to the left of the tree in the distance) they were ambushed with only a single individual escaping.  Later the bodies were burning by the Bridge.


Thursday, September 2, 2021

The Sword and War Club


  In searching for a set of rules to play my King Philips War games with I have decided to try out a old favorite; "The Sword and the Flame."  Although written for 19th Century Colonial battles it has been adapted for many other conflicts throughout the ages.  It is also a fun game to play and a set of rules most people I game with are familiar with.  In the past I have had a number of very fun and most memorable games.  The French intervention into Mexico game where I killed "El Guapo" (and made Larry Brom fall off his chair laughing)  comes to mind. But that is another story for another day as they say.


  I am not planning in doing a lot of  reversions;  more of a "vanilla" version where Colonists use the Egyptian charts and Native Warriors use the Pathan charts.  Due to lack of figures I will be using commands of 10, 12 and 15 figures per unit for infantry.  Mix them up in the same game to add variety.  Each unit gets only one leader. A special or elite unit might get two but that will be unusual.

  The Colonists will use the Egyptian charts.  The Natives use the Pathan chart.  Ranges are as is. Both sides used flint lock muskets.  Match locks went out very very quickly with the colonists and the natives never liked them.  So both sides have the same  "technology. " 
  Formations are loose Skirmishers lines and massed groups.  Colonists were know to occasionally form line for volley ( but not very often) and some occasions  a back to back or circle rather then square.  But those were desperate affairs.  

  I am not worried about using stragglers for charging,  but am using it if using a charge move to get to a location quickly. Not everyone can keep up!   Carrying away the wounded is requiring a lot of thought.  From my reading it might not be required.  There was a lot of " there but for the grace of God goes I" and days later we recovered and buried the bodies.   At the retreat after The Turner's Fall Fight the main body of Colonists knowing left the rear guard, the commander saying each man for himself.  But we will see.

The colonies secret weapon were the Christian or Praying Indians.  They were excellent at scouting and preventing an ambush.  I have not read of any difference in their fighting abilities;  So I am thinking of using  them as scouts.  They will be attached to a command but operate independently and can only be hit with a special card (king, queen joker).   this way they can find and warn about an ambush before it happens.

Another unusual unit will be Colonists cavalry.  They appeared to be mounted Infantry.  So rude to the battlefield and dismount to fight.  But there were a few (very few) mounted cavalry charges.  

That's its for now.  More after a couple play tests.  I will post A solo game soon to show how it plays.

And, as always feedback is appreciated and looked wanted.

Thursday, August 5, 2021

Metacomet's Warriors and allies


Finished the Brigade miniatures Wampanoag warriors and Metacomet (King Philip) figure for a total of 16 figures.  I mounted them on round MDF bases and they are ready to play.


To assist them I rebased my other Native warriors from my War of 1812 collection by Knuckleduster minuatures.  They are dressed very much like the Brigade figures and will fit in with them as allies.  I know both groups will find service fighting in American Rev War and 1812 as well as KPW so these will become super useful troops.


Monday, August 2, 2021

New England Militia of King Philips War


 I completed the Brigade game miniatures militia figures.  These were fun figures to paint and a break from my usual uniformed troops.  While they can field as any militia type troops I expect to use them as Captain Samuel Mosley's  men due to their ball bag and cartridge pouch.  His orders were to use these rather then powder flasks (i.e. twelve apostles) to aid in faster loading and making less noise.  I think these figures also capture the look of Mosley's men who were made up of ex privateers, pardoned convicts, ex sailors, and other riff raff drafted from undesirables in town.

 Mosley was an ex merchant ship captain who had fought privateers and pirates and disliked native Indians.  He was involved in a number of questionable actions so his marriage to the governor's daughter probably kept him out of trouble.  He did not get along with Captain Benjamin Church, who refused to mention him at all in his history of the war.  Which is possibly why he is not well known today.  Captain Mosely's company took part in numerous fights and always gave a good accounting of themselves.  At Bloody Brook when they tried to rescue Captain Lathrop's men the Indians recognized them and called out, "Come on Mosely, come on! You want Indians?  Here are enough Indians for you!"

.


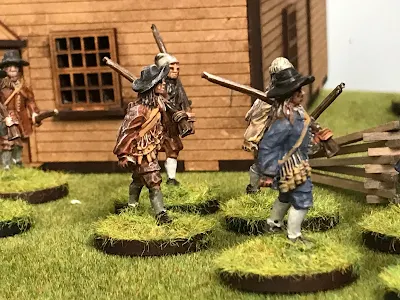
  In addition I have been painting up the warfare Miniatures armed civilians.  These figures have the twelve apostles and are walking (I hesitate to say marching) in a very relaxed manner.  Perfect for local militia walking into an ambush or escorting supply wagons.


And a few more pictures of how things will look on the table top.


Wednesday, June 16, 2021

What I worked on this week


  I think I got my painting mojo back!


Finished up my wagons and a bunch of Indians and militia for King Philips War this week.  Its been fun and I have enjoyed it very much.  I still need to base the wagons but the Indians and Pilgrims look fine.


Now its time to put painting aside as Friday is game night for the club.  I am putting on a Crimean War Russian vs British and French battle around capturing a cross road.  More on this and the other game later.