Showing posts with label Whites Of Their Eyes Rules. Show all posts

Saturday, November 7, 2020

Setting up Cowpens


  Cowpens is one of the more interesting actions fought during  the  American Revolution.  General Daniel Morgan with a mismatched command won one of the most decisive battles of the war.  He understood how his opponent Banastre Tarleton fought and designed his battle plan for him.  He understood the various strengths and weakness of each of his troop types (rifles, Continental line regulars and militia) and set them to maximize their strengths not their weaknesses.
It is also one of the best preserved battlefields I have visited.  

In fighting this out on the table top I will be using  the historical order of battle at a 1:10 scale.  The rules used are "Whites of Their Eyes" by Steve Haller.  I am limiting the game to 12 turns.  This is to force the British to rush into the fight as historically they did.  The battlefield was very slight rolling ground.  There were scattered trees, mostly pines but they did not effect the fighting.  Here are a couple pictures from the actual battlefield to show how it looks.


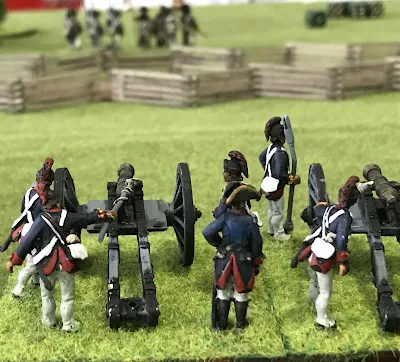
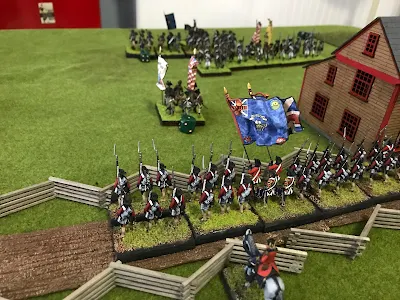
The Americans are set up with the cavalry hidden in a swale along one edge of the field.  The American main line of Continental line troops is 15 inches from them.  A line of two militia regiments are 10 inches in front of them with another line of rifles 10 inches in front if them.  The plan was for each line to cause casualties before falling back.  The British will enter the board in two lines.  The first is made up of the 7th Regiment, Royal Artillery (3 pounder), British Legion Infantry and Light Infantry battalion.  A troop of the Legion Cavalry and 17th Light Dragoons protect each flank.  On turn 3 the remainder of the British Legion Cavalry and 1/71st Highlanders enter.  The British must attack and destroy the enemy as quickly as possible.


A hidden advantage of the game is the American command structure.  Morgan is the commander, assisted by Howard who commands the Continentals and Pickens who commands the Militia.  The British have only Tarleton.  This will effect starting troops and assisting with close combat and rallying routed troops.  So it will be a difficult battle for the British to win.


Cowpens Order of Battle

Morgan's Light Division

Cavalry Brigade: Lt. Col.Wm Washington
Continental Light Dragons (8) (regulars)
McCall's Militia Horse (6) (militia)

Continental Brigade: Col. Howard
Maryland-Delaware Light bn. (24) (elite)
VA. State Troops (12) (regulars)
Tripplett's VA. Rifles (12). (regulars)


Militia Brigade: Pickens
1st Spartan SC militia. (24 (militia)
2nd Spartan SC militia (24)  (militia)
(Hays Little River Militia Divided between the two militia regiments)
McDowell's Rifles. (12)  (militia)
Cunningham's Rifles (12) (militia)

(134 figures)


Tarleton's Flying Column
Lt. Col. Tarleton commanding

17th LD troop (4)
British Legion Troop (4) (regulars)
Royal Artillery 3pounder (regulars)
British Legion Infantry (20) (regulars)
British Light Infantry (16) (regulars)
7th Fusiliers (18) (regulars)
1/71st Highlanders (24) (regulars)
British Legion  Dragoons (20)  (militia)
(106 figures)

(Light bn made up of light companies 71st regiment, and companies from the 16th Regiment and Prince of Wales American Regiment. A most unusual unit indeed!)

Tuesday, May 12, 2020

Test game of "Whites Of Their Eyes"


The best way to learn a set of rules is to play those rules.  So my son Nathaniel agreed to try a game.  We set up a small scenario and started playing.  The table was 6' x 5' with a cross road in the center.  The two houses blocked fire but you could not put troops inside them.  


The order of battle for both side were:
American Order of Battle:
General John Glover
3rd  Continental Regiment (30 figures)
13th Continental Regiment (30 figures)
26th Continental Regiment (30 figures)
Militia battalion (30 figures)
Rifle battalion (12 figures)
Hamilton's Artillery battery (2 x 6pdrs)
3rd Continental Light Dragoons (6 figures)

British Order of Battle:
General Lord Rawdon
23rd Regiment (30 figures)
33rd Regiment (30 figures)
49th Regiment (30 figures)
Legion Light Infantry
17th Light Dragoons
Royal Artillery (2 x 6pdrs)


The British set up in the center and marched forward.  The 23rd, Royal Artillery and 49th with the 33rd in reserve.  The Lights and cavalry advanced up the right side of the table  to try and turn the American flank.

The Americans sent the 3rd Continental and Rifles down their right flank to out flank the British.  The Artillery took position in a hill by the British right flank opposed the lights and cavalry. In the center the 13th, 26th and militia hoped to hold on while the rest of the army enveloped the British .

We rolled to see who moved first and Nathan won.  Turn sequence is  check morale, move, fire and after fire movement for first player then second player .  Nathan moved his artillery into two great positions.  One on top of a hill and the other looking down the road.  Both have great views of the British and clear fields of fire.   At this point In the game we both made a error.  Artillery can move and fire in a turn.  Light guns can move 6" or move and fire 3" and can fire out to 36" .  Heavy guns move 3" or 1" and fire and range out to 4 8"  .  Unfortunately we decided they were heavy guns but moved them as Light guns and fired as heavy.  Part way through the game we discovered this.  Artillery was very devastating, possibly because of this.  We will do better next time.

The battle started with American artillery targeting the British lights at close range.  When you fire artillery  you first roll to see if you hit the target.  Roll one dice and point out where you are aiming.  Close range is either a misfire if you roll a one otherwise hit.  You then place a block 4" x 2" centered on where you hit and you roll for the figures within it up to six figures.    Each figure hit gets a saving roll.  Regular infantry save on a 5 or 6 but at close range you lose one pip so save on a 6 only.  Poor rolling saw the light take four hits and then failed the morale check .  


The British guns stayed together and concentrated their fire on the 26th Continental.  We found it important at medium or long range to aim at a point where is you hit it causes the most damage as the  aiming roll could send the shot slightly the right or left of aiming point.  This possibly missing the target or only hitting a small amount of figures.


After a couple turns most  regiments got within small arms range.  The American rifles had superior range but we're slower to reload so fired every other turn.  Light troops could also split move (move - fire - move) but Nathan did not try that.  by this time my Lights had routed off the board due to casualties from artillery fire.  To fire small arms you count up the figures,  check the range and in the small arms chart see how many possible hits.  The target gets to roll a saving roll for each possible hit.  Note that if you are behind cover (walls etc) you add one to the saving roll.  So if you save on a 5 or 6 if under cover you save on a 4, 5, or 6.  Regiments can move and fire.  

In the center the two British line regiments and two guns decimated the 26th Continental which routed.  The American guns continued to cause long range hits in the British 49th regiment.

The American cavalry moved around the British flank and charged the British cavalry.  In a melee both sides throw a dice, add or subtract modifiers and multiple by number of figures.  High side wins.  Loser take a 20% casualties and retired.  Winer take a 10% casualties from front rank.  The Americans easily drove off the British dragoons and then turned against the British center.  


By this time the British were in trouble.  Their lights and cavalry were gone.  American cavalry were moving against their right.  On the left the American 3rd Continental and Rifles were turning that flank. The 49th were taking heavy casualties due to Artillery fire.  But marching steadily onward the British 23rd and artillery took on the 26th (which had rallied and returned) and broke them.  They then routed the Militia battalion. Soon only the 13th Continental stood in their way.  The 49th and 33rd turned to protect their left flank.  In the small arms exchange the 49th was down to less then 50% and failed their morale check.  As they retreated the 33rd charged the 3rd in a attempt to turn the battle.  But it was not to be.  They rolled very poorly ( a 1) and the Americans rolled  very well (6) so they lost lost the melee.  Athough the British 23rd were advancing victorious the rest of their forces were in retreat.  With over 50% losses the game was called and declared a American victory. Well done Nathaniel!


It was a fun game and were learned a lot. For next time I think a cheat sheet for both players will be very useful.   We will be trying another game soon.