Thursday, May 14, 2020

13th Continental Regiment 1776


Please note this is my second edition of this regiment.  The first was using RSM LTD. Miniatures.  These are from Brigade Games.  Why the change?  First these new figures are more correct for the  1776 period.  Why?  They are a mixture of The 1775 Bounty coats (Massachusetts gave to soldiers enlisting), Regimental coats (just being issued but in small numbers in 1776) and civilian clothing.  This creates just the right impression I was looking for  in the original.  The old 13th will be repainted to continue its service.  


The 13th Continental Regiment ( Read's Regiment) was raised April 23, 1775, as a Massachusetts militia regiment at Cambridge, Massachusetts, under Joseph Read. The regiment would join the Continental Army in June 1775. The regiment saw action during the Siege of Boston, the New York Campaign and the Battle of Trenton. As part of General Glover's brigade it fought  the rear guard action at Pell's Point in October 18, 1776.  The regiment was disbanded on January 1, 1777, at Morristown, New Jersey.


Little is known of the uniform warn by this Regiment in 1776.  One report suggests brown coats.  The regimental flag was yellow or straw colored  so I went with that as the facing color.   


  Now, as to the regimental colors.  General Charles Lee's  advice for how colors should be for 1776 regiments suggested a regimental color in the facing color of the regiment paired with a Grand Union flag.   So I will follow Washington's suggestion.  The flag is by The Flag Dude and a very nice copy of the original flag it is. The 13th was I usual in that the actual regimental color is documented.

Wednesday, May 13, 2020

3rd Continental Regiment 1776


Please note this is my second edition of this regiment.  The first was using RSM LTD. Miniatures.  These are from Brigade Games.  Why the change?  First these new figures are more correct for the  1776 period.  Why?  They are a mixture of The 1775 Bounty coats (Massachusetts gave to soldiers enlisting), Regimental coats (being issued but in small numbers in 1776) and civilian clothing.  This creates just The right impression I was looking for  originally.  The old 3rd will repainted to continue its service.  


The 3rd Continental Regiment was raised  in January 1776 by consolidating Colonel Learned's, Danielson's and Wood's  1775 regiments .  It was enlisted until January 1777 and  served during the seige of Boston and later in the campaigns around New York city.  It was Commanded by Colonel Ebenezer Learned until his retirement in May 1776 due to illness.  Learned later returned to military service and commanded a brigade during the Saratoga campaign.


During the siege of Boston Colonel Learned and the 3rd Continental regiment manned the important Dorchester heights position which forced the British evacuation of Boston.  When the Americans marched into Boston the 3rd led the march into the city and was assigned the duty of removing obstacles like abatis and caltrops.  Afterwards they marched south to New York city.  Although they did not participate in the fight on Long Island they did see service later in the campaign.  They were assigned to the Brigade commanded by General John Glover with the 13th, 14th and 26th Continental regiments.  At Kip's Bay September 5 they formed the defensive line at Kingsbridge  that Washington's forces retreated past.  At Pell's Point  on October 14 they fought a delaying action against advancing British light forces.  Remnants of the Regiment fought at Trenton before being disbanded with the expiration of enlistments.  Many of the men later enlisted into the 4th Massachusetts regiment of 1777.


  Little is known of the uniform of the 3rd Continental Regiment.  One return I found suggested drab color coats.  These could be a shade of brown or undyed wool.  Massachusetts had large supplies of brown wool on hand.  These included captured and re dyed British coats.  Usually coats were supplied with a facing color and waistcoat or vest to  match.  There were a variety of wool for facing colors avalible.  Since none are listed for the 3rd I have assigned them blue as there were supplies of this material avalible.


Tuesday, May 12, 2020

Test game of "Whites Of Their Eyes"


The best way to learn a set of rules is to play those rules.  So my son Nathaniel agreed to try a game.  We set up a small scenario and started playing.  The table was 6' x 5' with a cross road in the center.  The two houses blocked fire but you could not put troops inside them.  


The order of battle for both side were:
American Order of Battle:
General John Glover
3rd  Continental Regiment (30 figures)
13th Continental Regiment (30 figures)
26th Continental Regiment (30 figures)
Militia battalion (30 figures)
Rifle battalion (12 figures)
Hamilton's Artillery battery (2 x 6pdrs)
3rd Continental Light Dragoons (6 figures)

British Order of Battle:
General Lord Rawdon
23rd Regiment (30 figures)
33rd Regiment (30 figures)
49th Regiment (30 figures)
Legion Light Infantry
17th Light Dragoons
Royal Artillery (2 x 6pdrs)


The British set up in the center and marched forward.  The 23rd, Royal Artillery and 49th with the 33rd in reserve.  The Lights and cavalry advanced up the right side of the table  to try and turn the American flank.

The Americans sent the 3rd Continental and Rifles down their right flank to out flank the British.  The Artillery took position in a hill by the British right flank opposed the lights and cavalry. In the center the 13th, 26th and militia hoped to hold on while the rest of the army enveloped the British .

We rolled to see who moved first and Nathan won.  Turn sequence is  check morale, move, fire and after fire movement for first player then second player .  Nathan moved his artillery into two great positions.  One on top of a hill and the other looking down the road.  Both have great views of the British and clear fields of fire.   At this point In the game we both made a error.  Artillery can move and fire in a turn.  Light guns can move 6" or move and fire 3" and can fire out to 36" .  Heavy guns move 3" or 1" and fire and range out to 4 8"  .  Unfortunately we decided they were heavy guns but moved them as Light guns and fired as heavy.  Part way through the game we discovered this.  Artillery was very devastating, possibly because of this.  We will do better next time.

The battle started with American artillery targeting the British lights at close range.  When you fire artillery  you first roll to see if you hit the target.  Roll one dice and point out where you are aiming.  Close range is either a misfire if you roll a one otherwise hit.  You then place a block 4" x 2" centered on where you hit and you roll for the figures within it up to six figures.    Each figure hit gets a saving roll.  Regular infantry save on a 5 or 6 but at close range you lose one pip so save on a 6 only.  Poor rolling saw the light take four hits and then failed the morale check .  


The British guns stayed together and concentrated their fire on the 26th Continental.  We found it important at medium or long range to aim at a point where is you hit it causes the most damage as the  aiming roll could send the shot slightly the right or left of aiming point.  This possibly missing the target or only hitting a small amount of figures.


After a couple turns most  regiments got within small arms range.  The American rifles had superior range but we're slower to reload so fired every other turn.  Light troops could also split move (move - fire - move) but Nathan did not try that.  by this time my Lights had routed off the board due to casualties from artillery fire.  To fire small arms you count up the figures,  check the range and in the small arms chart see how many possible hits.  The target gets to roll a saving roll for each possible hit.  Note that if you are behind cover (walls etc) you add one to the saving roll.  So if you save on a 5 or 6 if under cover you save on a 4, 5, or 6.  Regiments can move and fire.  

In the center the two British line regiments and two guns decimated the 26th Continental which routed.  The American guns continued to cause long range hits in the British 49th regiment.

The American cavalry moved around the British flank and charged the British cavalry.  In a melee both sides throw a dice, add or subtract modifiers and multiple by number of figures.  High side wins.  Loser take a 20% casualties and retired.  Winer take a 10% casualties from front rank.  The Americans easily drove off the British dragoons and then turned against the British center.  


By this time the British were in trouble.  Their lights and cavalry were gone.  American cavalry were moving against their right.  On the left the American 3rd Continental and Rifles were turning that flank. The 49th were taking heavy casualties due to Artillery fire.  But marching steadily onward the British 23rd and artillery took on the 26th (which had rallied and returned) and broke them.  They then routed the Militia battalion. Soon only the 13th Continental stood in their way.  The 49th and 33rd turned to protect their left flank.  In the small arms exchange the 49th was down to less then 50% and failed their morale check.  As they retreated the 33rd charged the 3rd in a attempt to turn the battle.  But it was not to be.  They rolled very poorly ( a 1) and the Americans rolled  very well (6) so they lost lost the melee.  Athough the British 23rd were advancing victorious the rest of their forces were in retreat.  With over 50% losses the game was called and declared a American victory. Well done Nathaniel!


It was a fun game and were learned a lot. For next time I think a cheat sheet for both players will be very useful.   We will be trying another game soon.


Saturday, May 9, 2020

A comparison of 25mm American Revolution Miniatures


     Anyone who visits this blog knows I am obsessed with the American Revolution.   Gaming the period, with both board games and miniatures has been a part of my life for too many years.  And during that time I have had three large miniature armies.  My present army has seen me used a number of miniatures.  Not all the figures ranges that are out there but a number of them.  So I thought it might be of interest to show a picture comparison of those figures I use.  Perhaps to help other gamers out there decided which miniatures they will use for their collections.  Please keep in mind that these are my opinions and I would never tell anyone what they have to buy.  Only what I have bought and what I like or do not care for.  I will also show each figure next to each other so gamers may decide what works best for their army.  


Left to right by base  RSM, Eureka, Brigade,
Fife & Drum, Old Glory And Perry Miniatures.


Fife and Drum Miniatures.


My favorite line of miniatures out there.  I have lots of these and the company continues to grow and add new figures.  Again, this is a true labor of love.  Jim is into the period.  If you are familiar with Minden miniatures these are by the same sculpture.  He has also done the figures for Crann Tara miniatures.  These are slim figures with realistic proportions.  Again, the equipment and weapons are in scale.  Jim also is very open to customer suggestions and you just might get that one of a kind figure you wanted. He does British in campaign kit, and has one of the only correct Brigade of Guard's figures out there.  Outstanding Native American Indians.  And the line is still growing!  Super customer service and highly recommended.

Kings Mountain Miniatures.


     King's Mountain Miniatures is a sadly underappreciated and and should be better known.  It is a brilliant line of figures, and extremely flexible.  Most figures have separate heads;  and the owner provides a wide variety of heads and head gear to match.  You want Philadelphia Associators?  You can do it with this range.  Cocked hats, round hats, cousins caps and helmets all available.  The figures are slim and fit in very well with Fife and Drum miniatures.  Best of all these are a true labor of love for the owner.  Bill is a true Rev War enthusiast who commissioned the range to make sure he could the figures he needed.  He is great to do business with and a wonderful individual.  When he found out I was looking for a certain flag he sent me reams of files of flags he had collected over the years to help.  Please take a look at these figures, you will be glad you did!  When I restarted my American Revolution armies these were some of the very first figures I brought. 

http://www.kingsmtminis.com/catalog/


RSM Ltd.


     Most 18th century gamers know this company for their Seven Years War range.  Not as well know is their American Revolution line.  Not as extensive as the SYW line the Rev War line has the basics of any army; infantry, cavalry and artillery.  These are slim figures with realistic proportions.  They look like soldiers should look.  Muskets look like the musket I carried in reenactments for years and not oversized clubs.  PLus, they are extremely cost effective.  A bag of 36 infantry cost $29 dollars.  You get a lot of figures for a small amount of money.  For those collecting while on a budget consider this line.  My only negative is that she is starting to show with the molds and sometimes figures are not as detailed as they should be.  Otherwise I highly recommend this line of figures.

http://www.dpcltdcom.org/rsm95_012.htm


Old Glory (second editions).


These are the second edition figures from Old Glory.  Far superior to the original line of figures done years ago.  These are also sold in very economical battalion packs.  Add a sold glory discount card and it's hard not but these figures.  A little taller and more robust then Fife and Drum they are a little smaller then Perry miniatures size wise.  Standards are cast into the figure which is a drawback to me.

Eureka Miniatures.


    Another not familiar range of miniatures which deserves better publicity.  Eureka make some great fugures, and figures you cannot find anywhere else.  I bought the figure range they did for the 14th Continental Regiment (Glover's Marblehead regiment).  A brilliant range with plenty of personality.  There is also a line of "Ragged  Continental " who look, well ragged.  Great and useful fugures.  These created a different regiment then we usually see on the table too.  Certainly not neat parade ground soldiers but hardened men.  

Order within the United States:
https://eurekaminusa.com

Home of Eureka miniatures:
http://eurekamin.com.au

Brigade Games.


     A very new line of figures.  I picked them up because they are the only figure line out there with figures wearing the correct 1775 Bounty Coat.  I felt a couple regiments with mixed bounty coats and regimental coats would look great. These are a very nice group of figures which adds to any army. The variety of clothing and uniforms adds to any regiments appearance.  

 I have not bought any of the British (they wear the regulation uniform ) and the Hessians have not been released yet.  Some of the figures in civilian clothing look a little pirate like, to me as earlier period clothing rather then 1770's. And unlike many of the other figure lines you need to spend some time cleaning up each figure before painting.


Perry Miniatures and Wargames Foundry.


Possibly the most widely used figure for this time period.  They are available in both plastic and metal castings.  They have almost every type of uniform or clothing and also make unusual uniforms like the Volunteers of Ireland.  All are done by the talented Perry Brothers who also did the line for Wargames Foundry.  Because of this and because the two lines compliment each other I have included them together.   Again a little taller and better fed them many of the other ranges.  But on the table top they all work together and your eye makes adjustments.  I would not mix these with other figures in the same regiment. 


Wednesday, May 6, 2020

Rules Review "The Whites of Their Eyes"


  It should be of no surprise to readers of this blog that I am a big fan of self published War game rules.  Nothing against the professional published glossy rules.  I buy them and read them and often play them at club game nights.  But for my own games I really like something different.  So I am always on the hunt for new rules.  Once I find a set I tend to stay with them.  This way I actually learn the rules.  "The Charge of the Light Brigade" rules I use for my Crimean games I have been using for over twenty years.  I just discovered Jim Purkey 's rules and very happily use them for War of 1812.  But my American Revolution gaming has of late been lacking something.  While I enjoy "Loose Files And American Scramble" no one I game with shares my interpretation of the rules.  This means games tend to get into long discussions of what the rule really meant with too many interpretations causing a disruptive gaming night.  So I am on a quest for a better set of rules and I believe now I have found them.


   "The Whites of Their Eyes" by Stephen E. Haller are a set of wargame rules for fighting battles of the American Revolution.  These were originally published by The Courier in 1977 and revised and updated in 1985, 2000 and 2018.  At present the rules are available from the author who still plays them.  They could be considered a throw back or "old school" rule set.  They include saving throws, alternate turns , and use six sided dice.  To me that can be a good thing.  After play testing them I found they give me a fun game which stays within the spirit of the time period.  There are also a number of unusual twists within the rules to make things very intetesting. 

A couple aspects of the rules I really like. 

 Light troops in open order or as skirmishers  (rifle men, jagers, Indians, legion infantry and light infantry) can actually act like light troops skirmishing.  They have a split move.  You can move a portion of your movement, fire then move the rest of your movement.  In play this gives them a obnoxious quality.  You can move up to get a better shot then move away.  But be careful you do not get caught by line troops in a melee as they will eat you up.  Shooting by these troops while in a open order is also different.  Line troops volley by counting up the total number figures and checking the chart for number of possible hits.  Defender then throws a saving roll to see how many casualties they get.  Skirmishers fire one dice per figure. Regular Light Infantry, because they were better disciplined can close ranks and fight as elite infantry.    Once a unit has taken casualties skirmishers can aim at the command stand to possibly hit the unit commander.  If they do it effects the unit when they take a morale test.  Another nice rule is troops behind a wall or fence get a little additional range (3 inches)  to their fire because they are resting the weapons.  Saving rolls for hits are interesting.  Instead of multiple additions and subtraction for results it's a simple modifier for hits.  Personally I like it.  

Artillery is also a little different then most games.  When they fire you point to target and where you are aiming.  Roll a dive and this gives you a deviation.  You might hit right where you aimed, or slightly to the right of left depending on range.  Close range is always where you aimed and there are no saving throws for figures but at close range.  

Morale is interesting.  You have a basic morale factor, and can add and subtract  modifiers to it.  Roll two dice and you have to get a seven or better to pass.  Militia in the open or near British regulars get a deduction.  But in woods or under cover they get a addition.  Lots of little things like this give flavor and cause troops to act as their historical counterparts.  

I like these rules a lot.  It gives you a simple fun game which stays to the spirit of the period.  To give a better idea of how they work my next post with give a small game.  Stay turned for more.

Update 7 May 2020:  Steve Haller, the author of these rules has given me permission to send out a PDF version of the rules.  The total page has the authors email if you wish to contact him.  Please use the contact form at the bottom of the blog page here to send me a email and I will forward the rule to you. 

Evidently some emails to me have not gone through. I can be reached at dinosaurfifty5@yahoo.com

Saturday, May 2, 2020

Stuart Asquith and the War of 1812: A review of two books


    I was asked recently by a friend about these two books.  How different are they and are they worth getting?  Another fruend asked me if they are just the same thing with different covers or if they duplicate the same materials.  To answer those questions here is a shirt review of my opinion about these books.  Both of which I own.


The War of 1812: A Campaign Guide to the War with America 1812-1815

  Opening this book at the On Military Matters stand at Cold Wars a few years ago I was delighted right away.  It is a book a wargamer would write.  One who loved the period.  Well written, lots of illustrations and bunches of helpful details. Just the stuff you need if starting the period or are an old hand who needs inspiration.   I bought it right away.

  As far as the content of the book it can be described as being in three parts.  The first  third of the book is devoted to a general history of the war per year (from 1812 to 1815). There is also a chapter devoted to the naval aspects of the war.  The text is short, clear, and very understandable.  most of the illustrations in this section are old prints and maps;  many out of Benjamin Lossing's Field Book of The War of 1812.

The next section is devoted to the  armies; British, Canadian United States and Indians.  This section describes the composition of armies and the uniforms worn.  Many are of obscure small units.  Great details here and very handy.  A small part is devoted to the “Indians” (Native Americans), about their involvement in the war and the main actions involving them. 

   The illustrations here are worth The price of the book.  There are a number of outstanding uniform plates by Bob Marrion.  There are also numerous photographs of reenactors here.  It is interesting to see the uniforms and how they look on real people rather then miniatures 

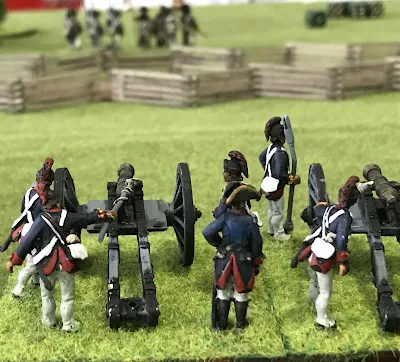
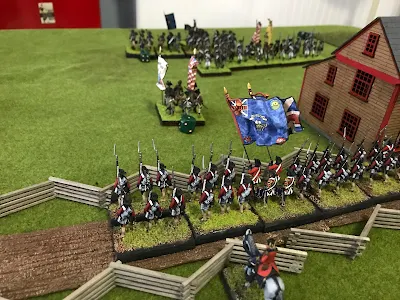
   The third and last part is  wargaming the War of 1812.  How to integrate the tactical particularities of  this unusual war into a set of  rules. The quality and types  of troops, what figures are available and where to get them.  All scales are mentioned.  numerous pictures of wargamer figures illustrate this section. The figures are usually 25mm Wargame Foundry or 54mm figures.  Please keep in mind the wonderful line of figures from Knuckleduster are not listed as they were not yet created when this book was written.

It is also an expensive book.  Because it is hardback and filled with colorful illustrations.  But you get a book that will last and you will return to time and again. 


Scenarios for the War of 1812-1815

  This scenario booklet has been written  with the wargamer in mind.  If you are looking for a quick guide to some of the important actions and how to Guggenheim on your table top here is your guide. 

After a capsule summary off the war the author lays out twelve battles forgoing fight.  The battle listed are:
Queenston Heights, 13th October 1812
Raisin River, 18th/22nd January 1813
The Assault on York, 27th April 1813
Sacket's Harbor, 29th May 1813
Beaver Dams, 24th June 1813
Thames River, 5th October 1813
Chateaugay, 25th October 1813
Crysler's Farm, 11th November 1813
Chippawa, 15th July 1814
Lundy's Lane, 25th July 1814
Bladensburg, 24th August 1814
North Point, 12th September 1814

  Here we have a good variety of actions. Some are obscure battles (Thames River), some skirmishes (Beaver Dam) and others stand up actions (Chippawa).  There is something for every size collection here.

  Each battle is played out in a similar manner.  A potted history of the actual fight, a simple map of the battlefield, troops involved and suggestions on how to game the battle. Some people may say the maps are too simple, but to me they give a good  representation of the ground.  In summation everything you need to war game this unique conflict in your table too.

Friday, May 1, 2020

New Blog Header


I put up a new heading picture to my blog.  I think it is much more appropriate to the blogs title.  This is just one plate of a multi plate watercolor  panorama of Boston done by Lieutenant Richard Williams of the 23rd Regiment Royal Welch Fusiliers.  He mentioned in his journal sitting stop a hill in Boston to paint this.  In one plate there is a fusilier on guard duty.  He is identified by his cap, the blue facings on his coat, no shoulder wings and the three feathers of the Prince of Wales on his cartridge box and rear of his cap.  All of which are very clear in the original works.


A full size copy of the entire panorama is on display at the Battle Road Visitor Center, Minute Man National Historical Park, Lincoln, Massachusetts.  For additional information please see my article concerning the Fusilier and his uniform.

Nichipor, Mark A. "Richard Williams and the Cartridge box badge of the Royal Welch Fusiliers."
 Military Color for and Historian, 37 (summer 1985), pp. 93-94.