Saturday, November 7, 2020
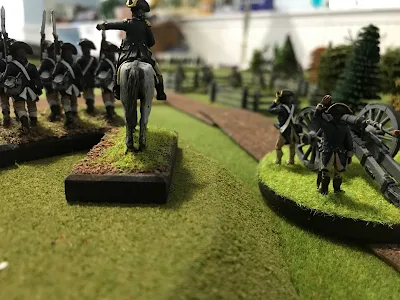
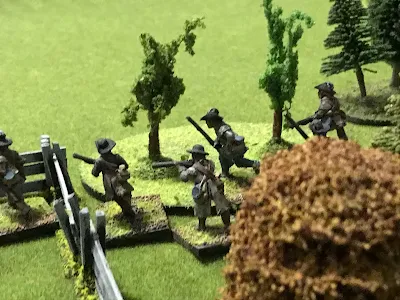
Setting up Cowpens
Thursday, November 5, 2020
Uniforms of the Hessian Grenadier battalions
 |
| Hessian Grenadier Reenactors |
One of the more interesting looking units for the American Revolution war gamer would be the combined Hessian Grenadier battalions. Made up from the detached Grenadier companies of the Hessian force sent to American they are most colorful and imposing on the table top. I am looking to add some next year so have been doing some research on them.
The treaty between Hesse Cassel and Great British determined the army sent to America would be made up of 4 Grenadier battalions, 15 Infantry battalions, 2 companies of Mayer and 2 artillery pieces and crews per regiment or battalion. Each Grenadier battalion was to have 16 Commissioned Officers, 44 Non Commissioned officers, 1 non combat officer, 20 musicians, and 429 rank and file. Actual field strength would be much lower. After the attack on Red bank the two Grenadier battalions who fought there fielded 192 men total.
Here is a field report from 1777 following the campaign to give actual field strength rather then paper strength.
Strength Report 25 November 1777
Battalion Off. NCO. Mate. D&F. R&F. Total
Linsing. 7 28 3 20 216 274
Minnigerode 6 28 3 20 217 274
Lengerke. 17 33 3 17 316 386
Kohler. 12 36 2 16 250 317
The four Grenadier battalions were made up of four companies each, and were named after their commanding officer. With slight modifications this stayed the same throughout the war.
Grenadier Battalion von Linsing
In 1776 the battalion was composed of the Grenadier company from the Leib, Mirbach, 2nd bn. Guard and 3rd bn. Guard regiments. These stated together until February 1783 when a company from the Landgraf replaced the company from the Mirbach. In May 1783 the organization changed to a company from the 1st, 2nd and 3rd bn. Guards and a company from the Erbprinz regiment.
Grenadier Battalion von Block
In 1776 it was commanded by Ltc. Justus Heinrick Block. He was replaced after that year by Ltc. George Emanuel von Lengerke. The battalion was composed if the Grenadier company from the Wutginau, Prinz Carl, Donop and Trumbach regiments. In 1783 the company from Jung von Lossberg replaced the Trumbach company.
Grenadier Battalion von Minnigerode
In 1776 the battalion was commander by Col. Frederick Ludwig von Minnigerode. He was replaced in 1780 by Col. Wilhelm von Lowenstein. The battalion was made up of the Grenadier company from the Erbprinz, Ditfurth, Lossberg and Knyphausen regiments.
Grenadier Battalion von Kohler
In 1776 commanded by Ltc. Johann Christopher Kohler. He was replaced in 1778 by Maj. Wilhelm Graf, who was replaced in 1782 by Maj. Fredrick Platte. The battalion was made up if the company from the Rall , Wissenbach, Stein and Bunau regiments.
 |
| Hessian Reenactors |
For more information please see:
The Hessian Grenadier Battalions in North America, 1776-1783"
Weinmeister, Oscar K., Jr.
MCH, 27 (Winter 1975), pp. 148-152.
Sunday, November 1, 2020
Hessian Infantry Regiments 1783
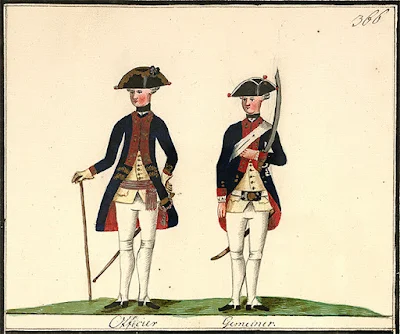
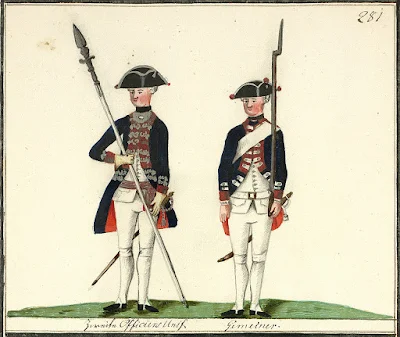
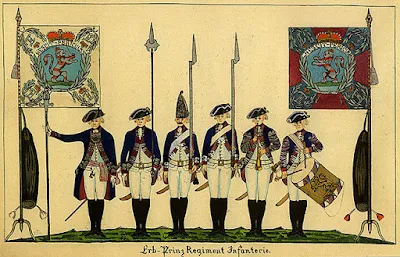
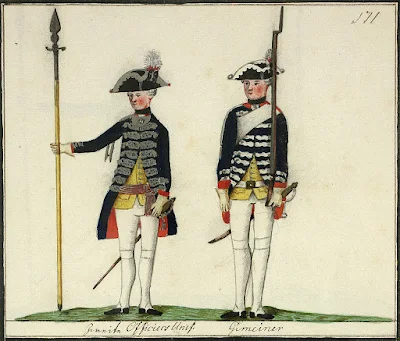
While searching the internet I found this site from Hesse Germany. There were a number of illustrations of Hessian regiments who had served in America 1776 to 1783. These appear to have been done post 1783. But the uniform and flag details should be if great interest to miniature wargamers.The site is at:
https://www.lagis-hessen.de/en/subjects/discover/sn/hetrina
Regiment von Trumbach, after 1778 von Bose:
Friday, October 23, 2020
USS Maine's Ventilation Cowl
Readers of this blog know I have an usual hobby of looking for artifacts from the USS Maine. That battleship mysteriously blew up in the harbor of Havana, Cuba, in 1898, giving Americathe excuse it needed to launch the Spanish-American War. Which America won in a month. I have found parts of the Maine in Key West Florida, Bangor Maine and of course Havana Cuba. But today I found another item that was nearer to home.
 |
| USS Maine. Note the ventilation cowl to the right of the forward funnel. |
 |
| The crushed cowel as it looks today. |
The Maine sank in less than 40 feet of water, which made salvage possible. America's small towns, flush with patriotic fervor, demanded relics of the ship. Some did better than others. The captain's bathtub can be seen in Findlay, Ohio! Other items are scattered nationwide. The bow scroll is in Bangor Maine, the main mast is at Arlington Cemetary and the fore mast is at Annapolis Maryland. Three ventilator cowls -- those items which stick out of ship decks that people are always falling into or peeping out of in movies -- were dredged up. One was given to the town of Woburn, Massachusetts. It is displayed today in a covered memorial in the center of the town. More accurately it is within a traffics circle. So to see it you have to drive around and round, or just find a parking space somewhere (easier said then done!).
Thursday, October 15, 2020
Fire and Movement Rates 1809
The following experiments were held in the early 19th century America and were concerning rates of fire and movement under combat conditions. The experiments are summarized here from data in the book "The American Military Library" (Philadelphia, 1809) by William Duane. The book was written in response to the "Chesapeake Affair" of 1807 and the possibly of war with Great Britain. Duane wrote up his "library" to familiarize United States Militia Officers with current European developments.
Experiment 1
"To try in how short a time a man could fire thirty six rounds of ball cartridge."
Conditions: 36 rounds in pouch; 18 in block, 18 below. A veteran infantryman loading and firing at will at a target 125 yards away.
Results: 3 rounds in 1 minute; 18 rounds in 6 1/2 minutes; 36 rounds in 13 minutes (deducting time to transfer cartridges, which a man needed help in doing). Out if 36 balls, 15 hit the target. (Note: the target is not described, but man sized targets elsewhere are discussed.)
Experiment 2
"Charge of Light Calvary on Artillery"
Conditions: A Light Horseman placed 600 yards (maximum effective give range) from a light 6 pounder.
Result: The first 200 yards at a walk in 95 seconds. The next 150 yards at a trot in 28 seconds. The next 170 yards at a gallop in 13 seconds. The final 80 yards to the gun at the charge in 8 seconds. In this 2 minutes and 24 seconds, the gun was fired once every 11 seconds, for a total of 13 times.
Experiment 3
"Infantry attacking Artillery"
Conditions: A soldier placed 250 yards from the gun (Normal charge distance).
Result: The first 170 yards at the march, the last 80 at the charge. He reached the gun in 102 seconds, during which the gun fired once every 8 seconds for a total of 13 times.
Experiment 4
"Light Cavalry attacking Infantry"
Conditions: Light Horseman placed 400 yards from Infantryman.
Result: Horseman trotted 200 yards, galloped 170 and charged 80 yards. He reached the Infantryman in 49 seconds, during which the Infantryman fired 3 times.
Experiment 5
"Infantry attacking Infantry"
Conditions: Infantryman placed 250 yards from defending Infantryman.
Result: Infantry marched 170 yards in 70 seconds, and charged 80 yards in 20 seconds. During this 90 seconds the defending Infantryman fired 5 times.
Experiment 6
"Infantry line attacking Infantry over uneven ground"
Conditions: The attacking party was required to keep their dress while advancing over rough ground covered with bushes for 250 yards.
Results: The attacker marched 170 yards in 100 seconds, and charged 80 yards in 45 seconds. During this 145 seconds, the defending Infantry fired 7 times.
Experiment 7
"Infantry line attacking Artillery"
Conditions: An Infantry company, formed 3 deep, at 250 yards from the gun.
Result: Infantry marched 170 yards in 100 seconds, and charged 80 yards in 17 seconds. During this 117 seconds the gun fired once every 8 seconds, for a total of 14 times.
Final Results:
The infantry fired a total of 15 times in a total of 284 seconds, for an average of once every 18.9 seconds.
The Artillery fired a total of 40 tines in 334 seconds, for a average of once every 8 seconds.
Tuesday, October 13, 2020
Battle of Gum Swamp
Table top set up at the start of the game. For order of battle and background to the game please see previous post here:
https://bravefusiliers.blogspot.com/2020/10/nostalgia-on-table-top.html
The Americans must hold the bridge as long as possible and inflict heavy casualties on the British. They have placed Porterfield's light infantry (mixed muskets and rifles) on the right flank hidden in the woods. They are supported by the 2nd Maryland battalion and a light artillery battery. The left flank is held by two militia battalions from Virginia and North Carolina. They need to cause casualties to the advancing British and try and delay their attack. They are supported by two Continental line battalions (1st Maryland and 4th Virginia) as well as Lee's legion infantry and dragons.
As the British advance all across the front, there is a cavalry fight by the woods.
The 17th Light Dragons charge the Militia horse who are screening the woods. They defeat the Militia, who retire, fail their morale check and rout.
The Royal Artillery concentrate their fire in the Virginia Militia. In spite of heavy casualties the morale of the militia holds and they stand fast (for now). The British Infantry advances.
The America artillery scored hits on the 33rd which continued it's advance. But the second gun misfired! Tarleton brings his legion dragoons across to threaten the American guns. But Porterfield's Lights, hidden in the woods opened fire on the British cavalry. The British Legion dragons took two hits and had to test their morale. They failed the test, and routed back! (Really bad dice roll on my part!).
The Royal Artillery scored hits on both the Virginia militia and the Continental on the hill. Both groups passed their morale checks and returned fire at the British. Gates ride over and rallied the Militia horse who returned to the woods. Behind the lines the Continental took up a secondary position.
In the woods, the American lights used the split move to advance into range, fire at the British and retire back into the woods. (Light troops may move part of their movement, fire and then move the rest if their movement) This is one part of these rules which captures the flavor of skirmish ing very well.
The American artillery continued to cause casualties to the advancing Red coats. But their morale held and they continued their advance. The Virginia and North Carolina militia continued to hold steady.
On their right the British 33rd and Light Infantry charged the militia. They easily won the fight, and the militia routed when testing their morale. Racing back they passed by the Legion infantry who also failed their morale! Carried back the wave of troops headed for the bridge over Granny Creek! The British lights, having suffered heavy casualties fell back and the 1/71st moved up to replace them.
Gates quickly moved his Continental up to cover the gap caused by the retreating militia and light. He ordered the militia horse and the lights in the woods to hold up the British as long as possible.
In the center the 23rd Royal Welch Fusiliers charged the Continental and gun on the hill. In the fighter that followed the artillery crew routed and the Continental line retired. Captain Edward Bell of the Fusiliers quickly claimed the captured guns. With his center and left in confusion Gates threw in the towel and ordered his Continentals to save themselves. The British Legion Dragoons, having been rallied by Lord Rawdon returned to the fight ready to chase the retreating troops.
Epilogue:
It was a fast and fun game. I liked the terrain and possibly will revisit it for another battle but with different troops. Although I used the set up from the original game should I play again I will allow the Americans to set up as they like. The militia in the open stood little chance against the British.
I enjoyed the rules very much, but I am still learning then. The Artillery firing is great fun as you point to where you are aiming then roll to see where you hit (or misfire!). The split move for the lights really captures the feel of light troops. I highly recommended them.
This was a fun fast game that gave me a lot of fun on a rainy day. I am sure I will be revisiting it again.


