Saturday, August 20, 2022

Fight at the North Bridge


  The situation at the North Bridge in Concord on the morning of the 19 April 1775.   Captain Laurie's detectment of Light infantry companies are guarding the bridge in the center if the picture.  They are listed on the west side of the river.  To their right the local Minute and Militia companies have taken position in the hillside over looking the bridge.  The road to the top left leads to Colonel James Barrett's farm and us where Captain Parson will arrive later in the game.  The road on the lower left leads to the town and is where Lt.Col. Smith will arrive from with his Grenadiers.  Now, onto the game!

   The game starts on turn one with Captain Laurie's detachment guarding the bridge.  Colonel Barrett's Militia and Minute Man battalions are just arriving in the hillside overlooking the bridge.  Captain  Laurie quickly sends a message to town to send reinforcements (they will arrive on the board on turn six).    For the next two turns the Colonists hold a town meeting to debate what to do (i.e.more then half the units must pass a morale test to march towards the bridge).

  On turn three the radical firebrand Colonel John Carroll arrives.  

  His stirring speech to oppose the red coated tyrants is met with cheers and cries from one Minute Captain of "I haven't a man who's afraid to go."  Forming columns the companies march down towards the bridge.


 Captain Laurie retires to the east side of the bridge and extends his men along the bank.  Where is Smith with the reinforcements!   Colonel Carroll leds from the front and the colonists steadily draw nearer.


  Looking to Colonel Carroll for leadership he advised three battalions march to the bridge while one battalion set up to watch the Red coats who went to Barrett's farm.  On turn five the militia and minute men arrive at the bridge.  Both sides are deployed along the banks and ready for a fight.  Laurie wonders aloud where is Smith?  Looking over there shoulders they can just make out the reinforcements marching up the road.

    The British fire a few warning shots (actually it was long range and they missed but this sounds better).


Both sides are in range and deployed and open fire.  Heavy casualties all around but both sides pass their morale checks.  Next move Smith hurried the Grenadiers into place and both sides continued the small arms fire again with casualties mounting.  One militia battalion is shaken but Colonel Carroll rallies them.


On turn 10 Captain Person's detachment arrives on the board!  The waiting Minute battalion is ready and opens fire giving  the British a warm welcome.  


At the bridge casualties mount on both sides with Smith and Carroll trying to rally their men.   First one militia battalion breaks and runs.  Then the light infantry detachment breaks and runs.  Smith and the Grenadiers stand fast and continues to hold the bridge open.

Although shadowed by two battalions Parsons continues to retire and fire.  


  Finally the casualties are too much and the second minute  battalion breaks. 

  The bridge is open and Parson races to cross to safety. Smith, satisfied with the result fires a last volley and covers the march back to Concord.   The two remaining militia battalions move cautiously forward but there is no hope to cut off the lights.  Better to think about how to continue the fight later when the British have to march back to Boston.

Conclusion:

  A most enjoyable game.  The difference in quality if troops was the final decision in who one.  In fact I am surprised that the Minute battalions held on as well and as long as they did.  Perhaps that was due to the outstanding leadership of Colonel John Carroll!  


Thursday, August 18, 2022

North Bridge game suggestion


Doolittle print done in May 1775 of the Bridge fight.

   I worked for thirty years for the National Park Service.  The majority of that time was at Minute Man National Historical Park in Concord and Lexington.  Although I had not thought about a miniature wargame  involving the fight at the North Bridge two things recently changed my mind.  This was inspired  by the article in  Wargames Illustrated "Battle at the North Bridge"  (#291 January 2012) and the post on how he fought this out on the blog "Steve's Painting Shed."  Steve's blog is always a fun visit and full of great ideas if you are interested in the America Rev War.  Highly recommend and one of my first stops in the blogging world.


What really happened:

  The game concerns the action around the North Bridge in  Concord on 19 April 1775.  Historically,  after arriving Concord that morning  Lt.Col. Francis Smith sent seven companies of light infantry (about 32-36 men per company) to the North bridge.  Four light companies under Captain Lawrence Parsons      ( from the 5th, 38th, 23rd and 52nd) crossed the bridge and marched two miles further to Colonel James Barrett's farm to search for cannon. Three light infantry companies (4th, 10th 43rd) under Captain Walter Laurie stayed to guard the bridge.  The remainder of the British force stayed in Concord and searched for supplies. 

View from hillside over looking bridge held by Militia and Minute companies

  During this time various Minute and Militia companies from the surrounding towns gathered on the hillside by Major John Buttrick's house overlooking the bridge.  The town of Concord was just visible in the distance.  They numbered about 400 men and were divided into a Militia battalion under Colonel Barrett and a Minute Man battalion under Major John Buttrick.   


The bridge from the British side.

  When the Militia and Minute Men saw smoke rising over the town they assumed the British were burning their homes.  They marched down to cross the bridge and exchanged fire with the Light Infantry at the bridge and drove them away. The British broke and retreated back towards town leaving two dead at the bridge. Part of the militia returned up the hill they had just come down from carrying there two dead and wounded.   The minute men crossed the bridge.  Buttrick placed them behind a stone wall by the Jones house and they and the Grenadiers with Smith cautiously eye balled each other for a few minutes until Smith counter marched back to town. The Minute companies soon discovered the town was not being burned!  A fire set to burn some cannon carriges were the source of the smoke.  When some worried towns folks complained the fire could spread to the town buildings the British put out the fire.  


Diorama of the North Bridge fight.

  Undecided what to do now the various Minute companies moved to the ridge overlooking the town to keep an eye on the British.  Some companies marched to take position further up the road for when the British started their return march to Boston. There they were joined by other companies from further away towns.

   When Captain Parson's light companies return later they found the bridge deserted and two dead British soldiers nearby!  


The game:


  The table is set up to represent the area by the bridge very loosely.  I am looking for an interesting game not a historical recreation. Unlike the actual events both sides are eager to a fight!   The British must hold the bridge long enough to allow the detachment to return to town.  The Americans want to capture the bridge and prevent this. There will be blood!  The British have better trained and disciplines troops but the Americans have more men.

  Captain Laurie's detachment (4th, 10th and 43rd)  is by the bridge while  Captain Parson's  detachment (5th, 23rd, 38th and 52nd)is off-table and is expected to return soon. Reinforcements from Concord are in the form of a battalion of  Grenadiers and Lt.Col.Smith.

 The British at the bridge can call for reinforcements.  Roll a d6 and the battalion of Grenadiers arrive on the road from town on that turn.  

  Parson's force  attempt to enter the table beginning on turn 10. On this turn roll a d10 and they require 1-6 to enter. If they fail then they roll again on turn 11 needing 1-9. If they fail then they automatically enter on turn 12.

  Colonel Barrett and Major Buttrick are on the hillside overlooking g the bridge.  Their object is to capture the bridge and prevent the British forces returning to town.  To represent the hesitation on the part of company commanders to march down and confront the British each militia/minute group must pass a morale check.  If more then half the group fails they will stay in the hill to talk it over some more.  If more then half pass then enough talking its time for action.


Order of Battle:

Lt.Col. Francis Smith commanding: 

in town with Grenadiers.

Captain Laurie's  light infantry detachment at the bridge:

(30 figures/ regular)

Captain Parson's  light infantry at Colonel Barrett's farm:

(30 figures/ regular)

British Grenadier battalion: in Concord

(30 figures/ Elite)

  I have rated the Light infantry as regulars and not elite.  This is because of their erratic performance throughout the day.  At Lexington green they fired against orders and lost all control and at the North Bridge they again fell apart (although I personally think it was more Laurie fault). Light companies were still relatively new (added to the establishment in 1770), and this was the very first time in Boston they had been brigaded worked together.  I think poor command and control plus no standard light infantry drill manual were the problems that day and later at Bunker Hill.  These would be corrected later under General William Howe.  On the other hand the Grenadiers lived up to their reputation that day so they stay elite.


Colonel James Barrett commanding: on hillside overlooking bridge.

Concord-Acton Militia battalion

(30 figures/militia)

Bedford- Lincoln Militia battalion

(30 figures/militia)

Acton-Concord  Minute battalion

(30 figures/militia)

Bedford-Lincoln Minute battalion

(30 figures/militia)

  I have rated all the Americans as militia.  Minute Man companies trained more often so in theory they we're better discipline.  But in looking over the performance of both groups I see historically little difference that day.  I am giving them more units as they did seriously outnumber the British throughout the day.


Tuesday, August 16, 2022

Fire and fall back boys!


  In the game  an American Brigade must hold up an advancing British column for seven turns.   I based it on the action of Pell's Point in October 1776.  I added plenty of fences and walls and hedges  to break up the landscape and give the defenders cover.  The American commander deployed two regiments on either side of the road behind fences.  The 14th and 26th Continental regiments on the right and the 3rd and 13th Continentals on the left.  The artillery was held back as crossing fences would be an issue (you have to knock them down).  The British entered with a Brigade of three regiments, the 10th, 33rd and 23rd  and a medium artillery gun on the left of the road. On the right were two loyalist regiments, the New York Volunteers (NYV) and the Prince of Wales America Regiment (PoWAR) with a light gun.  The Guards Brigade was held in reserve.


  As the Crown Forces advanced onto the field the Americans waited until they were within musket range.  Once there they fired and immediately fell back towards the next fence line.  In the rules, if you don't move during the movement phase you can use a fire and retire.   Once you fire you turn the unit to face the rear and move back half your movement rate.   So they get to cause some casualties but get out of the way before the enemy can close.  Hopeful, because if the enemy can close you are in a heap of trouble.


  This time it worked.  The Americans fell back to the next line of cover.  The Crown forces kept advancing but did take some  casualties.  Eventually one British Regiment (33rd) did go shaken but quickly recovered.  Once the Americans ran out of positions to retire to it was time for them to leave the field.


  Rather then a exciting game it turned into more of a learning experience in testing out a new wrinkle in the rules. A tactical exercise.   I have long played the Fife and Drum miniature rules (with some modifications) for my War of 1812 games.  They provide a fun and and fast game.  Because they are one page long they are easy to learn and you play the game rather then spend your time looking up rules and interpretation.  For an explanation of his the rules see https://bravefusiliers.blogspot.com/2019/11/rules-i-use-for-wargaming-war-of-1812.html

 They provided an interesting game which reflected many a action during the war.  The Americans were not going to stop the British, but could wear then down and slow them up.  In this way it was a fun learning experience.  The fire and retire rule worked very well.  But of course you need a series of good positions to falk back to each turn.  And that is not always going to happen.  I also got to get my newest regiments onto the field for the first time.  Both the Prince of Wales and the 10th fought well I am glad to say.  


 If you are interested in the period I would highly recommend these rules.


Wednesday, August 10, 2022

A Charming Field for an Encounter


  I had a little free time today so I started to set up the gaming table for a Rev War battle.   Nothing cheers you up like your toy soldiers so I got some of my favorite regiments out.


   I am looking towards a early war (1776) action with a smaller American force delaying a larger a British one.  I have been playing a lot of Jim Purky's Fife and Drum miniature rules.  I use them for War of 1812 and have recently started using them for Rev War also.  Jim made a suggestion for a "fire and retire" Rules which I want to try out.  They are available  for free on his Fife and Drum miniature page.


 This action is a chance for my two newest  Crown Forces regiments to take the field.  I hope the  Prince of Wales regiment does better their historical counterparts did.  And I know I will be able to depend on the 10th Regiment.

  For the Americans I brought out Glover's Brigade of the 3rd, 13th, 14th and 26th Continental Regiments.  These regiments were from Massachusetts and fought valiantly at Pells Point.   Just the type of action I was planning.

   The 14th was from Marblehead and made up of men with a maritime background who twice moved Washington's army by boat.  Hence the regiment is dressed in a mixture if civilian and naval clothing.  Figures from Eureka miniatures.


 The other regiments are from Brigade games.  They are dressed in a mixture of early was Bounty Coats, civilian clothing and a few uniform coats. For more information about these uniforms please see;  https://bravefusiliers.blogspot.com/2020/03/continental-line-uniforms-1776.html 

  This was probably a more accurate view of how the American Army looked at least in 1776 then the parade ground uniformity we all like in our toy soldiers.


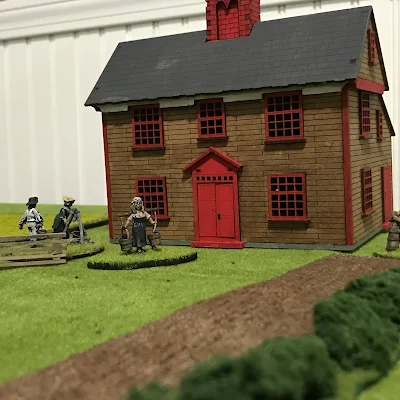
  Buildings are from "Things From The Basement.". Most are typical New England houses of the 17th/18th century.  Two of the buildings are from my time in the NPS at my station;  the Hartwell Tavern and Captain Smith House.  These buildings are great fun to build and reasonably priced.


Tuesday, August 9, 2022

David McCullough


Another sad day when one of the great ones has passed on.  


   David McCullough was one of my all-time favorite history books writters .  His books sparked my imagination and left me wanting to know even more.  I greatly a number of his books.  "1776"rekindled an interest in the campaign around New York.   His biography if Truman and John Adams were both enlightening and illuminating about the men.  The Johnstown Flood gave me goosebumps as I read it.  All wonderful and all enjoyable.

   David McCullough was right when he said "history is for all of us." And I learned from his books that "History could be exciting."


Sunday, August 7, 2022

10th Regiment of Foot


  I have added the 10th Regiment of Foot to my Crown Forces army.  A favorite Regiment of mine for sentimental reasons back during my reenactment days.  Historically the regiments light infantry and Grenadier companies took park in the fighting in 19 April 1775 at Lexington and Concord and later at Bunker Hill.  The Regiment took part in the New York campaign in 1776 and the Pennsylvania campaign 1777.   Later, in 1778 as an under staffed regiment they were returned to England to recruit while the rank and file were drafted into other regiments in American.  The surplus uniforms were sold to a loyalist Regiment The Kings Orange Rangers.


 Figures used are Fife and Drum miniatures.  I used the British line marching with blanket rolls for something a little different.  Flags are from GMB.  I like the yellow facing and colors as they give a bright spot in a otherwise somber background.

Friday, August 5, 2022

Prince of Wales American Volunteers


 This long serving but hard luck loyalist Regiment was raised in 1776 by Governor Montfort Browne.  It was to a multi battalion regiment, similar to DeLancey's and his ticket to a Major General Commission.  Alas!  Browne's ambitions were greater then his talents and it never came to pass.


 The Regiment first saw service  in 1777 on the Danbury Connecticut raid.  Later they were  sent to the garrison of Newport Rhode Island and took part in the siege there.  Sent south they took part in the siege of Charleston South Carolina 1780.  

 At the battle of Hanging Rock 6 August 1780 the regiment held its ground but was decimated.  Out of 180 men present they suffered over 94 casualties.   Because of this the regiment was detached in small garrison which are picked off by local  militia and partisans during the next year.

   Captain Maxwell's  defense of Fort Granby was particularly poor when he raised the white flag on condition of being able to keep his loot and march away.  This was done pretty much at the first sign of trouble and ignored the fact a relief column under Lord Rawdon was on the way  

 The Light Infantry company was combined with two companies from the 16th Regiment of Foot and the light company of the 71st Highlanders  to form a light infantry battalion that served with Cornwallis at Camden and Tarleton at Cowpen where it was captured.  The survivors were later incorporated into the cavalry of the British Legion 

  On Rawdon’s relief column to the siege of Fort Ninety Six  the regiment could muster a meager 36 rank and file to march.

  Following the war the regiment was disbanded in New Brunswick Canada.

  For figures I have used Old Glory 2nd edition.  There appears to be evidence the regiment wore green uniforms faced blue at least until 1780. But as with all things about loyalists confusion reign and there are also reports of red coats being issued.  I needed a green coated loyalist  regiment in my army so that is what I went with.  We wargame are a fickle group. 

  The sharp eyed viewer will note the presence of numerous Black men in the ranks of this regiment.  It was very common for escaped slaves during the war to be recruited into loyalist Regiment and win their freedom.  So I have added a number of if these brave men in all my loyalist regiments

  I did not give the regiment colors as I can not find any evidence they had any.  Also no evidence they did not have any.  But this may change as they look too sad without them.  So I will ask my readers what they think. Should I give the regiment a set of colors?  Or not?   Please vote and let me know!