Monday, May 23, 2022

Battle at Dyckman's Mill part 1


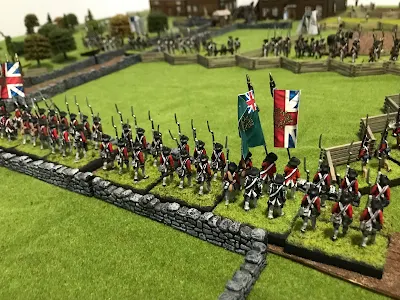
  The game starts with the British entering the table in the southeast corner.  American rifle armed troops are in the fields to their flank.   The main American army is in position on the other side of the stream.  The all important wagon train is slowly moving up the road to make their escape.  It moves at a speed of four inches per turn;  so its slow!  The Americans must buy time for the wagons to escape, and then withdraw off the table.  The British must capture the bridge and the town and the wagons if possible .

Turns 1 & 2:


   The British enter the table from around the road.  The light infantry are pushed toward the stream while the Jagers move to their  right towards the American Rifle men. The Grenadiers boldly push forward to cross the bridge. 

The American rifles fire and fall back.  At long range neither side is scoring any hits.


  The Hessian Brigade moves up to support the Jagers and to look for a crossing upstream. Grenadier Regiment Rall in front followed by Fusilier regiment Knyphausen.  In addition the Royal Artillery moves up to support the British advance.  The 7th and 63rd Regiments of foot are just entering the table.


The Americans take positions behind fences and walls. Still at very long range a few militia men fire at the close pack column of British.  The Continental line holds their fire waiting for the enemy to close into close range.


Meanwhile the wagons slowly move up the road.


Turn 3 & 4:

  The Grenadiers charge across the bridge and quickly form into line.  Although the Militia battalion gets a shot at them they pass morale and next turn close into close combat.  The light infantry moves to cover the Grenadier flank and exchanges musket fire with the 9th Continentals.  


  The next turn the Grenadiers charge the militia.  Its an uneven fight and the militia are defeated  and lose their colors.  They rout back and the Grenadier battalion takes the stone wall.  The lights continue to screen their flank and the 7th and 63rd move up to cross the stream. 


 The 9th Continental falls back and the 11th Continental and New York (Hamilton's) Artillery move up in support.


 The American rifles continue to exchange fire with the jagers as they fall back from cover to cover.  They two units leapfrog each other to give a continuous fire.  Remember that rifles have superior range but take longer to reload (they fire every other turn.


  The American rifles are running out of terrain to fall back on.  All the rifle armed units are suffering heavy casualties by this time.  One American unit crossed the stream and took up position to cover their brothers.  The Hessian battalions move forward.  The jagers fall back after suffering over 50% casualties.  

And still the wagons make their way up the road trying to escape!


Turns 5 & 6:


   With the jager company shot up and in retreat, the Grenadier Regiment Rall took up the pursuit of the retreating rifle units.  As the Pennsylvania rifle unit arrived at the ford the regiment Rall fired a tremendous volley which decimated the retreating rifles.


 Both the British, now across the stream and the Americans firmed up to prepare for the next attacks.


End of part 1


Thursday, May 19, 2022

Dyckman's Mill: An American Revolution battle problem.


  Setting up a small American Revolution battle problem.  Each side has very different victory conditions from each other.  I have set the battle in 1776 around the New York city area to give me the opportunity to play with my early war Continental line regiments for a change.  

The battlefield of Dyckman's Mill.  The top of the photo is north, the bottom south, left side is west and right side is east.  


   The Americans have a number of supply wagons (3) which need to get off the table.  They have a small force of two Continental line regiments, a local militia battalion and two large companies of Rifle armed light troops.  They must hold the British off long enough for the supply wagons to escape, and then get his forces off the table on the road to the Northern edge if the table.  The militia may exit on the road to the west if they wish.  


  The Americans Continental line and Militia may set up anywhere west of the river.  The rifle units may set up east of the river in ambush positions if they wish.  There is a ford way the river in the woods that only the Americans know about.  It is after all their country! 


American Command:

9th(Rhode Island) Continental Regiment (30 figures)

11th (Rhode Island) Continental Regiment. (30 figures)

New York Militia battalion (30 figures)

Pennsylvania Rifle battalion (12 figures)

Virginia Rifle battalion (12 figures)

Hamilton's NY Artillery (1 gun and crew)


  The British must capture the small village in the northwest corner of the table as well as the bridge over the river.   They enter on the road on the southeast side of the table.   Local guides have been less then helpful about the local topography and are unaware if the river can be crossed.  


British Command:

1st Grenadier battalion (30)

Light Infantry wing (16)

Jager  company (12)

7th Regiment (30)

63rd Regiment (30)

Grenadier Regiment Rall. (30)

Fusilier Regiment Knyphausen (30)

Royal Artillery (2 guns and crew)


Saturday, May 14, 2022

A little more painting


  I should be working on my Luzaun Hussars but in took a little break from them.  Going through my box of unpainted figures I discovered a Edward Suren Willie figure of a young lady in riding habit.  Since I am not driving yet and could not get out to get a present for Janine in mother's day u painted the figure up for her.  She got a big kick out if it and it now has a place on her curio cabinet.


Monday, May 9, 2022

Wake up! FIghting Stoney Creek


Set up:   The American encampment was behind a long ridge line.   In addition a shallow creek was in front of the ridge. A rail fence was along the ridge that gave cover to troops behind it.   One regiment was placed in front of the ridge as an advanced guard.  Unfortunately they were asleep.  The rest if the American army was asleep in their encampment areas (marked by rough ground) behind the ridge or in the case of the artillery off to the side of their guns.  Woods covered both flanks.  Once alarmed the Americans will roll to wake the regiments and respond to the attack.  There are six American regiments and two guns.

  The attacking British and Natives enter the board and advance towards the American lines.  There are two line regiments, a combined flank battalion and a small warband of native warriors.

Turns 1 & 2:  The Americans roll a "5" so they continue to sleep soundly.  The British advance forward.  On turn 2 they roll a "4" so they continue their rest.
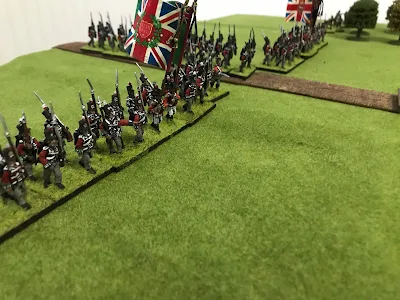

Turns 3 & 4:  the Alarm is sounded!  Americans roll to activate.  Indivual stands more forward towards the danger.  One of the American guns is manned, the other not.  Stands in range fire!  No hits (really poor die rolling here!).  Infantry rolls one dice per stand (or one dice per 2 indians)  with a six a hit.  Artillery roll one dice and half the number rolled rounded down are hits.

The British 8th regiment charges the advanced American Regiment.  The Native warband also attacks.  Since all American stands are not activeated they first test morale with a negative 2 per die roll. The American regiment is soundly defeated and retreats.  (note:  In close combat you roll one dice.  A 1,2 the British withdraw, 5,6 American withdraw otherwise continue.  I then fight another round until one side is beaten).


The combined flank battalion races up the road to engage the American guns.  They take three hits on two stands which withdraw due to poor morale ( if a stand takes a hit through fire it tests morale).


Turns 5 & 6:

More American stands activate and head towards the battle.    They attempt to form a line to drive off the attackers.  There is lots of fire back and firth but very few hits.  (Stands when they are withdrawing check morale.  If they pass they return to the fight.  If not they continue withdrawing but subtract from roll.  This is bad and causes them to rout off board).

Flank battalion captures the two guns!

Turn 7:

The 8th regiment is locked in close combat with an equal number of Americans.  It's a back and forth action with stands withdrawing  and finally the American line breaks. In the center the Flank battalion also drives back the stands in front if it.  

And in the woods the Native warriors chase the enemy from the woods.


Turn 8:   American numbers are starting to tell.  Fresh stands are forming into lines.  The 8th regiment is driven back.  More re American stands move up to engage the 49th and Frank battalion.    At this point the British side decided to start a withdrawal taking the captured cannon with them.  They have blooded the invader and captured their artillery and with few casualties.  The American army has seen the attackers off but now must decide if they should continue the advance through the country.

Conclusion:

I have played this now about four times.  It is always a fast game.  If the Americans can get an early warning it speeds up their activation and gives them more time to bring up stands.  Eventually, as in the historical battle numbers tell and the British withdraw.  But until then its a series of individual actions and you see how much damage they can do. There are a lot of Americans and only half as many British.  But the game dies give a goid feeling for the actual battle and the results are also similar.


   All in all it's a fast fun game and can be changed to almost any time period depending on what figures you have.  Give it a go, you may enjoy it!


Saturday, May 7, 2022

How to fight Stoney Creek: or Thank you Hal and Richard!


  One of the more unusual battles of the North America War of 1812 was Stoney Creek, 6 June 1813. In a daring night attack a British force of about 7-800 men attacked a much larger American forces of 3500.   The fight itself was a confusing affair of not regiments and battle lines  but companies attacking, withdrawing and running away.  Confusion reigned and Captains and NCO's influenced and directed the fight.  But the question I have been asking myself is how to recreate this on the table top?  Clearly the usual set up your miniatures and battle it out will not work.  What I am looking for is less a historical recreation of the battle, but more a fight that gives the feel of it.  I would like confusion and unpredictably.  And, since I am stuck inside to fight it solo.

  I have pondered and thought about it until one day I picked up a old issue of The Midwest Wargamers Association Newsletter or MWAN.  This publication by the great and good Hal Thinglum was a godsend during my early years of wargaming.  It was always chocked full of inspiration and good ideas and what other people were doing.  And in issue #105 was an article, "Going It alone: The Solo Wargamers Corner" by Richard Barbuto.  In it he mapped out how he fought the Battle of San Jacinto in 1835.  Outstanding!  Here was a battle similar to what I was looking for.  Richard lay out his game to include variable times for warning the camp and activating troop.  He also included simple beer and pretzel rules.  What was not to like here.  I was off and running!


  Now this is not a historical recreation.  Its a game to capture the feeling of the battle.  Nor is it a regiment vs regiment battle.  It's companies (stands) vs companies.  Confusion is everywhere.  Some stands fight, some run away.  Armies are mixed up.  The rules used are super simple.  I want a fast and furious game and do not want to bother looking up charts.  Remember what Tuco says in The Good, The Bad and The Ugly, "When you have to shoot, shoot.  Don't talk!"


The set up:

  My game would be played on my 6" x 5". The American encampment would be in the left side and the British would enter on the right side.  Woods covered both flanks and a small creek was in front it the American lines.  The stream was fordable (move up to the stream and stop.  Next move cross and continue on your way)  but a bridge gives quicker access.  Along the American line were a rail fence which.  One American infantry regiment was placed in front of the stream, and Captain Towsend's battery faced the bridge.  The rest of the American forces (5 infantry regiments) were in their tents behind the lines sleeping peacefully.  Troops stayed in their camp until a alarm was sounded to wake them up.  The British forces (2 infantry regiments, A combined flank company battalion and a small group of warriors under John Norton). Entered the table 12" from the American lines.  


Wake Up!  How I play the game:


Turn sequence is

Americans roll for alarm

American stands activated can move or fire

British can roll to charge

British move or fire 


The British enter 12" from the American lines.  The first turn of the game the American roll a d6.  If its a 1 or 2 the sentries spot the British and sound the alarm.  If not, the British continue their advance. The second turn they roll a d6 and a 1, 2 or 3 sounds the alarm.  The third turn the alarm is sounded automatically.

  Once the alarm is sounded each American Regiment  rolls to see how many companies (stands) are activated.  A 1 or 2 is one stand , A 3-6 is two stands.  Once a stand is activated it can move or it can fire.  All unactivated stands remain in the encampment area.  The artillery rolls a d6 and is activated on a 1,2 or 3.  Again, once activated that stand can move or it can fire.  Stands in the encampment area act like sleepy teenagers and do nothing.  If contacted they roll for morale with a -2 per roll for each stand.


 What if the British want to charge and possibly contact some if the sleepy American stands before they are aware?  During the first two moves each stand in a regiment rolls a d6.  On a 1,2 move 6";  on a 3,4 move 7" and on a 5,6 move 8".  You are breaking order but I think this captures the wild charge.


 All stands can either move or fire.  If they contact a enemy stand they are locked into close combat.  To shoot roll d6 and hit on a 6.  Musket range is 12".  A stand can fire as long a it has figures alive.  Once all figures are dead remove the stand.   Stand in close combat roll a d6.  On a 1,2 the British stand withdraws one move.  On a 5,6 the American stand withdraws.  Anything else continue the fight next turn.  If two or more stands attack a single stand the defender withdraws on a 1,2 and anything else continues the fight.


Once a turn a stand that takes a casualty or withdrawals from a fight has to check morale.  In addition any American stand shot at by a native warrior has to check morale.  Each stand on my checks once per turn after the first cause.  To check roll a d6.  Americans on a 1 rout off table, on a 2 withdraw one move and on a 3-6  no effect.  British withdraw on a 1 and no effect otherwise.  Note!  If a stand gets a withdrawal two turns in a roll that stand routs off the board.  Any American stand not activated and still in its encampment area that us contacted by a British stand checks morale with a -2 to the roll.  If it survived it activates.


Next Time playing the game!


Wednesday, May 4, 2022

Painting again


  I have been trying, off and on  to paint.  With very little luck.  My hand eye coordination is off nd and my brush huts my hand more then it does the miniature.  Still, I have carried on and tried a little bit every other day

  Still, at the end of a month's work I have finished painting these French chassaurs for Luazun's Legion.  I still have to do the command figures and a couple more infantry but I am very excited I got these done.    

On to the hussars next?

Monday, May 2, 2022

Testing the Rules


 I set up a small game to test out my rules I posted about.  Two units per side, with Pilgrim units walking into an ambush. I wanted to test out the rules and see how they work.  So the actual set up was less important to me then seeing how the rules worked. I am looking for a simple but fast moving game.   

Wampanoag Indians units:

Chanonchet commands one unit of warriors armed with muskets.  Deployed in fields north of road.

Mudawamp commands one unit of warriors armed with muskets deployed in woods by road.

Settlers units:

Captain Winslow's company is first unit in column of militia and is armed with muskets.

Captain Atwood's company of volunteers are armed with muskets.  They are just crossing bridge when ambush sprung.


  Turn 1:

Indians  roll for 1 operation

Pilgrims roll for 2 operations.  They also rolled high so go first in turn.


  Captain Winslow' company changes firmation and deployed to right and left of road.  They fire at groups opposite of them. (this takes two operations) Chanonchet's warriors take four hits and Chanochet is killed! (group is in massed in open so easy target.  After casualties roll d10 and a 10 equals leader killed)  Mudawump's group in woods take one hit.  Window's command's muskets are now unloaded.  Atwood's company deployed into skirmish line behind ridge to support Winslow.  

  Wampanough's check morale.   Chanochet's warband fails morale and routs.  Philip attempts to rally them.  Mugawump fires at column in road and hits five settlers.  Winslow's command tests morale and routs back.  (To test morale must roll d10 and add subtract modifiers.)

Turn 2.

 Both sides roll a 1 for operations and each has only 1 operation this turn.  The Wampanoag goes first.

 The late Chonchet's warband Rallies from rout, but us still disordered.  Mugawump's warband turn to face enemy to their right.

Atwood's command moves to top of ridge while Winslow's rally in place.


Turn 3

Wampanoag rolls 6 and gets 3 operations each this turn.


Chonchet's warband rallies, and charges Winslow's company on the ridge.  Winslow is unloaded so cannot fire.  Defeated in melees rout back.

Mugawump's warband fires at Atwood's company on the ridge and kills six figures.  Atwood's return fire kills four.  Atwood's company failed their morale test and routs!

Turn 4

Pilgrims race for the bridge.  I could have continued the game and combined the two companies.  But having my gotten a good sense of the rules, I decided to end game.


Conclusion:

Rules did what I wanted them to.  A quick game with a good feeling for period. The rules worked well and play moved along at a quick clip.  I learned not to be in formation  in open when being shot at! I enjoyed them and looking forward to playing soon.  But first, time out for a War of 1812 game up next.


Sunday, May 1, 2022

King Philip's War rules


I have been playing around with the rules I use for my King Philips War games.  I am looking for a simple set of rules which gives a flavor if the period.  Most English settlers were poorly  trained militia.  The better trained Rangers were few and came about late in the war.  I call them volunteers to distinguish from militia.  Indians were not supermen.  If charged they tended to retreat and charged if it was to their advantage.  In addition because they tended to avoid heavy casualties their morale was brittle.  

  I recently found a set of rules by Richard Barbuto on the  The Lone Warrior site which looked good.  After a few modifications on my part I will be giving them a try.

  If interested in them here is a link to the original set called   " From Bunker Hill to New Orleans. "

https://lonewarriorswa.com/complete-rule-sets


 Of course I will be writing up a game using them soon.


Fighting King Philip

Organization:

All units of 8 - 12 figures.  One figure in unit is A leader. All figures are individually mounted.

Each side gets 1 group leader or commander.


Formations:

Line: two ranks base to base.

Column: two figures wide three or more ranks deep. Only first two ranks can fire.

Skirmish Order: single line of figures all touching.

Open Order: single or two ranks.  All figure spaces one figure apart.  All can fire

Mass:  group of figures as wide as deep.  Only two ranks can fire.


Sequence of play:

Turns are UGIO.  Roll dice for which side goes first.

Next roll D6 for each unit for side movin.  This gives # operations for all units that turn.

Indians: 1,2=1 / 3,4=2  /5,6= 3

Militia: 1-3= 1 / 4,5= 2 / 6=3

Volunteers: 1,2=1/ 3-5= 2/ 6=3

Operations:

Move/change formation/change facing

Rally or reform

Load/ Fire


Movement:

Volunteer = 10" column/ 6" line/ 8" open order/ 10" skirmish order

Militia = 10" column/ 6" line/ 8" open order/ 10" skirmish or mass.

Indians= 12" skirmish order/ 10" mass


Terrain:

Roads:  add 50% to move if start on road in column.

Hills: All movement up hill except in skirmish order is halved.

Open Woods: deduct 50% movement unless in skirmish

Thick woods:  deduct 50% all movement.

Spotting in woods:  stationary units spotted at 8"/ moving units or units that fired at 12". Cannot fire at target unless you can see them.


Fire Combat:

All firing is straight ahead. Routed or disordered units cannot fire unless rallied and reformed which takes two operations. 

Target classes:

A: Formed Troops in open

B: Formed in woods/ skirmish in open

C: Formed in Thick woods/skirmish in woods

D: Skirmish in Thick woods/behind fence, breast work, low wall, etc...

E. Garrison house or Fort.


Roll D10 per figure firing.  Match range to target and must roll that number or less to hit.

Firer.     Range.    A.   B.   C.   D.   E.

Militia    8".            5.   4.    3.    2.    1

Volunteer 8".          5.    4.    4.   3.    2

Indian.     8".           5.    4.      3.  2.    1

Bow.          4".          6".    5.     4.    3.  2

 For each hit roll D10.  On a roll of 10 unit leader is killed.  


Charge:

Declare charge.  Must be able to move to within 2" of target.  Charging unit must be in good morale to charge. Note after melee charger is disordered.

Defender may fire if loaded, charged from front and passed morale check.  Attacker checks morale if hit.

If charged home line up figures in formation they were in.  May double up figures.  Never more then 2 vs 1.


Roll D10 per figure fighting.  Add subtract modifiers.  

Modifiers:

Superior Leader with unit   +2

Defending class D.  +2

Defending class E.  +3

Additional figure fighting   +2

Non Indian charging.  +1

Indian in skirmish formation charging  +1

Indian in mass formation charging. +2

Figure disordered  -1

Attacked from rear or side. -2

Note: in 2 vs 1 only one figure fights and gets +2.  Second figure cannot be killed or withdraw but fights second round melee if survived.

Results:

In the case of two figures meleeing with a single figure.  Only one of the two figures rolls and it gets the +2 bonus.  That second figure does not roll, nor can it be killed or forced to withdraw.  It is not a casualty (but would withdraw if the unit lost the morale check described below.)


If a figure’s die roll is twice that of his opponent, then the opponent is killed.

If a figure’s die roll is greater than his opponent’s, but not double, then the opponent withdraws one skirmish move, facing the winner.

If scores are equal, both figures maintain position for the moment.

When all the figures in contact have rolled, count up casualties for both sides (dead and retreats).

The side with the most casualties has lost.

Compare the number of casualties of both sides and apply the morale check results to the losing unit.  e.g. if the winning unit had 3 casualties and the losing unit had 5, the difference is 2.  The losing unit withdraws two skirmish moves (the surviving figures of the unit remain together.)  The unit is disordered but faces its opponent


Morale:

Check morale if takes casualties, charged or charging.

Roll D10 to check must equal if lower to pass.

Volunteers 8

Militia 6

Indians in cover 8

Indians in open 6


Modifiers:

No leader  -1

Each 2 casualties that turn -1

Disordered -1

Less then half strength -1

Charged in flank or rear -2

Indians charged  -2

Higher level leader attached +1

In class D cover +1

In class E cover +2

Indians charging skirmishers. +1

Indians charging flank or rear +2


If fail check;

By 1 or 2:  withdraw # operations that turn by skirmish move rate.  Face enemy.  Disordered.  Takes one operation to reform.

By 3 or 4:  withdraw # operations skirmish move rate.  Back to enemy. Routed.  Takes one operation to rally and one operation to reform.  Two operations total.

By 5 or 6: withdraw # operations at skirmish move rate.  Back to enemy.  Permanent lost one morale level for rest of game.  Routed.  Takes one operation to rally and one operation to reform.  Two operations total.


Monday, April 18, 2022

I am doing Ok


  Good morning everyone!  Checking in with my latest progress report.  Met with the neurosurgeon the other other day.  They say my skull fracture is healing and no sign of blood or bleeding which is great.  Now they want me to met with a brain specialist.  In the mean time I am scheduled to go into speach therapy and then physical therapy.  

  I am still getting head achs and dizzy spells and at times am light headed.  Walking is unevan as I start to lose my balance or get unsteady and need help.  Sleeping is difficult as I wake after a few hours and cannot get back to sleep.  But I guess this is progress and its slow.  

  What am I doing to get through the day?  Lots of Audible books of course.  These are great as you can sit back and just enjoy.  I am still limited in the time I can spend on a screen.  Reading with print is ok, but screen time (computers, Kindle and tv ) has to be limited as after an period of time I get really bad head aches.  This is letting me know I have to rest my brain.  I have tried to paint some miniatures but I am having a difficult time doing that as my hand and eye coordination if off.  So its more frustrating then helping.  

   I have been playing my map games from Command post Games/Pub Battles.  These take about an hour from set up to conclusions and really divert my attention.  I get to play a game and have fun while doing so. 

 Lastly, I have been thinking of some miniatures wargames ideas and rereading rule sets.  I hope to set up and play a small table top game with my figures soon.  That would be fun!  One scenario I have been thinking of is how to do the War of 1812 battle of Stones Creek.  This was a lopsided battle where a much smaller British force defeated a much larger American force.  I think I may have come up with a way.  We shall see.  


  Again thank you all for the kind words and comments sent here.  I appreciate them and they do cheer me up greatly during those black dog days.  Thank you!


Sunday, April 3, 2022

My medical update


  First off, thank you all very much for taking the time to write and and leaving messages. These have cheered me up greatly and I appreciate all of you taking the time to write. 


  I am continuing my journey getting back on my feet.  Although still resting and sleeping a lot I am starting to get up and walking about the house. A bit unsteady, and having to support myself but walking.  Little tasks tire me out.  And there is a round of doctors to see.  My appointment with the neurosurgeon is in mid April, and I will be seeing a concussion therapist soon.  Looks like physical therapy is in store too.   


  I discovered audio books!  Because I have to limit my screen and reading time I have turned to audio books.  I can down load them from the local library system and return when done.  Presently listening to "Valiant Ambition" by Nathaniel Philbrick.  I've finished "A Night To Remember" by Walter Lord; "Washington and Hamilton" by Stephen Knott and "The Man Who Captured Washington: Major General Robert Ross and the War of 1812" by John Mckavitt.  Enjoyed them all and would be interested if any of you have any recommendations.


Again thank you for the notes and one wishes. They really do mean a lot.

Thursday, March 24, 2022

Where is Mark?


Fritz wondering Where is Mark?


 On Sunday I had a serious accident at work.  While working on our last flight of the shift I was getting down from a belt loader when my feet slipped on the sand and I went straight down backwards.  I must have blacked out since there were a lot of people around me who are usually not on the ramp.  I was dizzy and light headed and my back and neck were very sore and very disoriented.   I was driven to a major Boston hospital's emergency room and checked out.  After looking me over they said I was good to go.  I was surprised they did no X-Ray.  I went home still feeling dizzy and light headed and tired and sore.  Next mornings Janine called my primary doctor to be checked out as I still did not feel well.  I went there in the afternoon thinking there might be something wrong with my back.  The doctor took one look at my eyes, which had dark rings around them like a raccoon and sent me to get a Cat Scan as well as some X-Ray.

  The results are my back will be fine and no damage.   But I have a concussion and a skull fracture.  I must have hit my head on the ramp.  There is no bleeding which is really good. I am scheduled for follow up exams and to see a neurosurgeon.  Its not good, but it could be a lot worse.

I am not sure what the next four to eight weeks (recovery time) will be like.  I am tired and am resting and sleeping a lot.  While I can read I am told not to do so for long periods.  Like thirty minutes at a time.  Definitely no major physical activity.   I have more of a pressure at times in my head, sometimes a dullness.  And its a major effort to do anything.  This post took a couple days to write.  The picture above is our Yorkie Fritz.  While I was in the emergency room (it was many hours)  he kept going to the stairs looking for me to come home.  This is where he great me when I come home.

   I may not be posting regularly, or answering any replies in a timely manner.  In fact my blogging over the next month will be irregular.   I will post when I can.  I am still here but a bit preoccupied.


Saturday, March 19, 2022

Visitors in my yard


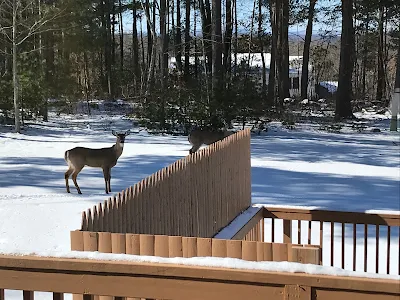
  Its winter in the north east and not much happening g outside.  Most people and creatures are snuggled inside where its warm.  But imagine my surprise when I looked outside and saw these creatures.


There are four of these dear that are in the woods around our neighborhood.  I usually see them in the early morning (3:00 A.M.) on the way to work.  But as of late we are seeing them in the day light. In the summer and fall we have a flock of turkeys.  And there is a fox but I have get to get A picture.  Some of the neighbors have mentioned a bear  but I have yet to see it outside pictures.


UPDATE:

For those interested in the Bear I mentioned here is a news clip I found on Youtube.  No, it not in my back yard but at least you get to see the fellow!

https://m.youtube.com/watch?v=vxBbrRO3piA